FREE SHIPPING ON ORDERS OVER $150

Cart
0
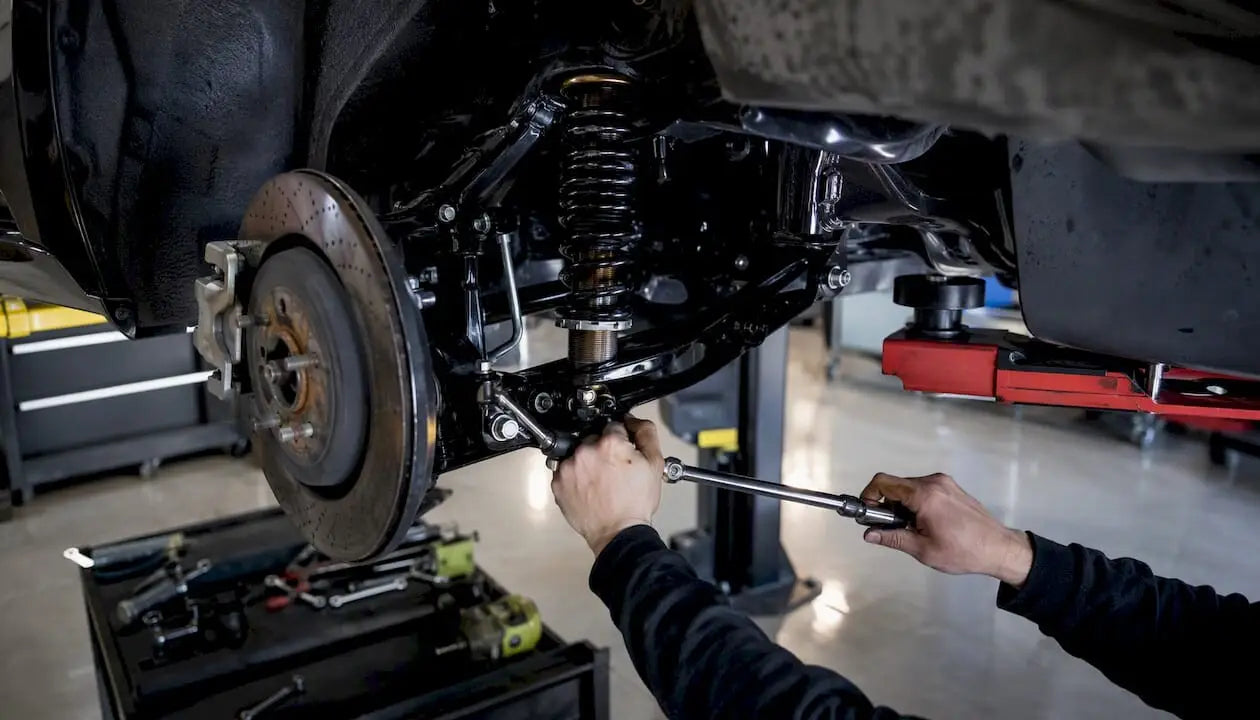
A competent DIYer can install coilovers on a Toyota A90 Supra in roughly 4–6 hours solo or closer to 3 hours with a second set of hands. The job is straightforward by enthusiast standards, but the A90 has two details that catch people off guard: the Electronic Damper Control (EDC) system will throw chassis warning codes if you disconnect it without a canceler module, and the lower-mount bolts must be torqued with the suspension at ride height, not at full droop. Get those two things right and the rest of the install follows a clean, logical sequence. You need a torque wrench that covers a wide range of typical automotive fastener torques, quality jack stands, and either an EDC canceler or a plan to address the sensor before you start.
Key Takeaways
A clean A90 coilover install comes down to torque accuracy, correct body length, and addressing the EDC system before the first drive.
| Point | Details |
|---|---|
| EDC canceler is required | Skipping it triggers chassis warning codes and may block traction-control functions on the A90. |
| Torque at ride height | Final-torque lower-mount bolts with the suspension at ride height, not at full droop, to avoid bushing pre-load. |
| Dry-fit without spring first | Cycling the suspension without the spring catches rubbing and binding before they become real problems. |
| Re-torque at 30–50 miles | Springs seat and collars can back off; re-check every fastener after the first 30–50 miles and again at 300. |
| Book alignment immediately | Get a professional four-wheel alignment with ride height set before putting serious miles on the car. |
| Undergrounddynamics A90 fitment | Undergrounddynamics offers A90-specific coilover kits with fitment data and EDC-compatible hardware options. |
Table of Contents
- What tools and parts do you need for an MK5 Supra coilover install?
- How to prep your Supra and set up safe lift points
- How to install the rear coilovers on an A90 Supra
- How to install the front coilovers on an A90 Supra
- How do you set ride height, preload, and damping on an MK5 Supra?
- Quick-reference torque specs for the A90 coilover install
- What should you check after installing coilovers on an A90 Supra?
- Troubleshooting common issues after an A90 coilover install
- Notes from the Undergrounddynamics installer: what we’ve learned on the A90
- Undergrounddynamics has the A90 suspension parts you need
- Sources
- FAQ
What tools and parts do you need for an MK5 Supra coilover install?
Come prepared. Stopping mid-job to hunt down a 17mm socket is the kind of thing that turns a Saturday afternoon into a Sunday problem.
Hand tools and power tools
- Torque wrench, 1/2" drive, covering 15–130 lb-ft (click-type preferred for accuracy)
- Breaker bar, 1/2" drive
- Ratchet set with metric sockets: 10mm, 12mm, 14mm, 17mm, 19mm, 21mm
- Deep-well sockets for top-hat nuts
- C-spanner or pin-spanner wrench (usually included with the coilover kit)
- Impact wrench or impact driver (optional but speeds up wheel removal)
- Trim removal tool or flathead screwdriver for interior access panels
Lifting and support gear
- Floor jack (trolley jack), minimum 2-ton capacity
- Four quality jack stands rated for the A90’s weight
- Wheel chocks (at least two)
- Rubber mallet for persuading stubborn components
Consumables and hardware
- Anti-seize compound for threads on lower-mount collars
- Blue threadlocker (Loctite 243) for locking collars and set screws
- New top-mount nuts if supplied with the kit (do not reuse stretch-type nuts)
- Penetrating oil (PB Blaster or equivalent) for any seized OEM hardware
Parts checklist
- Coilover kit confirmed for A90 fitment (front and rear, four corners)
- EDC canceler or plug-and-play bypass module
- Helper springs or spring keepers if your kit uses separate springs
- Replacement lower-mount bolts if the kit instructions specify new hardware
Pro Tip: Before the install day, soak any visible suspension bolts with penetrating oil the night before. A90 hardware can seize, especially on cars that have seen winter roads or salt.
HSD’s fitting instructions also recommend measuring your wheel-to-arch height before jacking the car, so you have a baseline to return to if something looks off after the install.
How to prep your Supra and set up safe lift points
Park on a hard, level surface. Concrete is ideal. Asphalt can compress under jack stand feet, especially in summer heat, so use wide-base stands or a piece of hardwood under each foot.
The A90 factory jack points are reinforced pinch-weld locations along the rocker panels. Use the rubber-padded saddle on your floor jack at the front subframe or rear differential housing for initial lifting, then transfer the car’s weight to jack stands at the pinch-weld points. Never rely on a scissor jack as your only support. The car needs to be stable enough that you can put real torque on fasteners without it rocking.
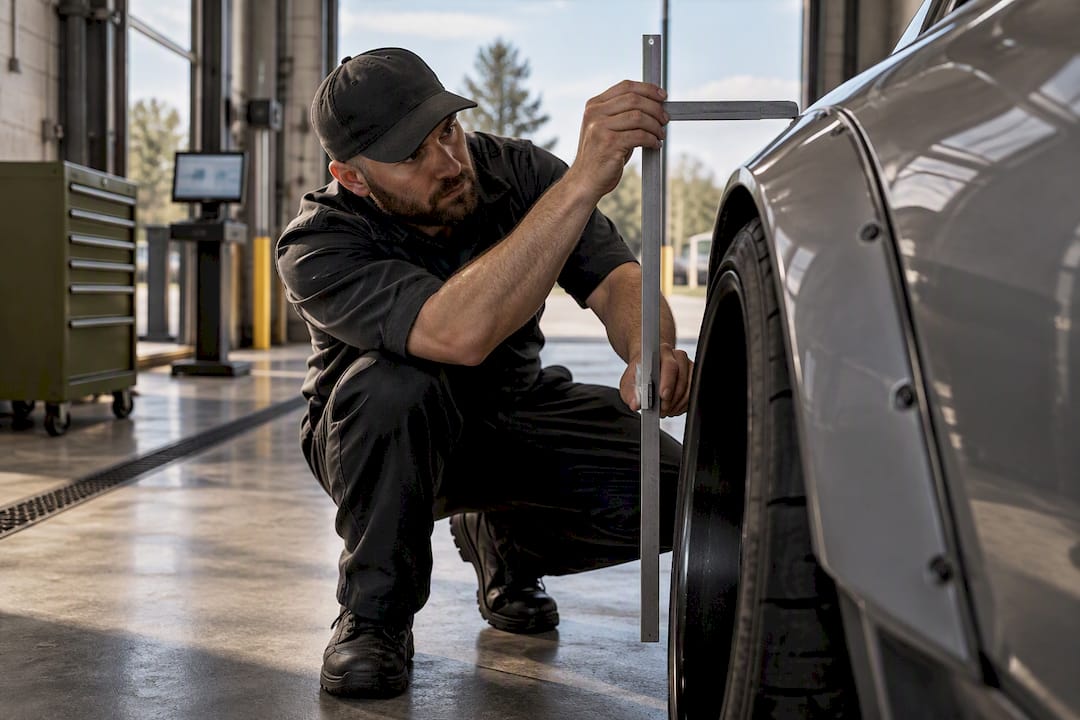
Before you remove anything, document your stock ride height: measure from the center of each wheel to the lip of the arch. Write it down. You will want this number when you dial in the new ride height.

The EDC connectors sit at the top of each strut. Disconnect them carefully and cap or tape the connectors to keep moisture out. A90 community experience confirms that skipping an EDC canceler module will trigger chassis warning codes and may block traction-control functions. If you are running a non-EDC coilover kit, install the canceler before your first drive.
Pro Tip: Photograph every bracket, sensor wire, and clip position before you remove anything. The A90’s ride-height sensor brackets have a specific orientation, and getting them wrong costs you a re-do.
Safety checklist before you start:
- Safety glasses and gloves on
- Wheel chocks behind the wheels staying on the ground
- Torque wrench calibrated and zeroed
- Phone charged for referencing torque specs mid-job
How to install the rear coilovers on an A90 Supra
Start at the rear. It is the simpler end of the car and builds your confidence before tackling the front strut towers.
- Remove the rear wheel. Break the lug nuts loose before jacking. Once the wheel is off, support the trailing arm with a jack stand or a floor jack set low.
- Photograph the OEM setup. Capture the swaybar end-link position, brake-line bracket routing, and the ride-height sensor bracket orientation before touching a bolt.
- Disconnect the EDC connector at the top of the shock. Cap it.
- Unbolt the swaybar end link from the shock body or lower bracket. Factory spec for the swaybar end-link nut is a moderate torque value; refer to the factory or kit instructions for the exact figure. Set the bolt aside.
- Remove the brake-line bracket from the shock body (typically two 10mm bolts). Do not stress the brake line.
- Support the hub assembly with your floor jack so it does not drop when the shock is freed.
- Remove the lower mount bolt. This is usually a 17mm or 19mm bolt through the lower bracket. Factory torque spec is a moderate torque value; refer to the factory or kit instructions for the exact figure. Keep this bolt if the kit instructs you to reuse it.
- Remove the top-mount nuts from inside the trunk or rear strut tower area (typically three 12mm nuts). Lower the hub slowly and pull the OEM shock assembly out.
- Dry-fit the new coilover without the spring first. Run the suspension through full travel to confirm no rubbing or binding before committing to the spring. High Performance Academy recommends this method to catch clearance issues before they become problems.
- Check OEM upper mount reuse. Many A90 kits reuse the factory rear upper mount. SupraForums installers note that forcing components together risks damage; if the mount feels tight, light sanding or a professional press is the right call, not brute force.
- Install the coilover with the spring and bump stop in place. Hand-tighten the top-mount nuts first, then snug the lower mount bolt.
- Torque the top-mount nuts to approximately 25 lb-ft. Torque the lower-mount bolt to approximately 59 lb-ft with the suspension at ride height (car on the ground or jack supporting the hub at ride-height position).
- Reinstall the brake-line bracket and swaybar end link. Torque the end-link nut to approximately 32 lb-ft.
- Reinstall the wheel. Torque lug nuts to the torque specified by manufacturer guidelines in a star pattern.
Pro Tip: Do not final-torque the lower-mount bolt at full droop. Tighten it snug during install, lower the car to ride height, then torque to spec. Torquing at droop pre-loads the bushing and accelerates wear.
How to install the front coilovers on an A90 Supra
The front is more involved because of the strut tower access and the steering clearance check. Take your time here.
- Remove the front wheel. Break lug nuts loose before jacking.
- Disconnect the EDC connector at the strut top. Tape it clear of the work area.
- Disconnect the swaybar end link from the strut body if it prevents removal. Factory spec is approximately 32 lb-ft for reinstall.
- Loosen the tie-rod end nut at the knuckle. You do not need to fully remove it in most cases, just enough to allow knuckle movement.
- Support the hub with your floor jack.
- Remove the two strut-to-knuckle nuts. These are typically 19mm and torqued to approximately 59 lb-ft from the factory.
- Access the strut top mount from the engine bay. Clean the area around the top-mount bolts before removing them. Three nuts, typically 12mm, torqued to approximately 25 lb-ft from the factory.
- Lower the hub and pull the strut assembly out through the wheel well.
- Dry-fit the new front coilover without the spring. Turn the wheel lock-to-lock and cycle the suspension through full compression. High Performance Academy’s install method specifically calls out this step to verify steering clearance and catch rubbing before the spring goes in.
- Check wiring harness and ABS sensor routing. The ABS sensor wire on the A90 has limited slack. Route it clear of any moving parts before final torque. A SpeedIndustry install video is useful here for a visual reference on tight clearance areas around the strut tower.
- Install the coilover with spring and bump stop. Hand-tighten the top-mount nuts.
- Torque the top-mount nuts to approximately 25 lb-ft.
- Seat the strut into the knuckle and torque the knuckle-to-strut nuts to approximately 59 lb-ft.
- Torque the tie-rod end nut to approximately 35 lb-ft. Reinstall the swaybar end link at approximately 32 lb-ft.
- Reinstall the wheel. Torque lug nuts to the torque specified by manufacturer guidelines in a star pattern.
Pro Tip: If your kit uses camber plates instead of rubber-insulated top hats, expect more road noise on the street. Camber plates give you adjustability; rubber tops give you a quieter daily. Know which tradeoff you are making before you bolt it in.
How do you set ride height, preload, and damping on an MK5 Supra?
Getting the setup right matters as much as the install itself. A coilover set too low with no droop travel is worse than stock.
- Set initial body length before installing springs. With the coilover dry-fitted (no spring), measure the lower mount to strut-top distance at your target ride height. This is your body-length baseline.
- Aim for a 45/55 bump-to-droop split. Experts recommend targeting roughly 45% bump travel and 55% droop as a starting baseline for street-driven cars without aero. High Performance Academy confirms this split preserves wheel contact and predictable handling.
- Adjust ride height using the lower base collar. Screw the damper body in to raise the car, out to lower it. Use the C-spanner and lock the collar with the locking ring once you hit your target.
- Set damping near mid-range. If your kit has adjustable damping, start at the midpoint of the available clicks. Document that number. Softer settings suit street driving; firmer settings suit track days. Adjust in two-click increments and note the change.
- Roll the car forward and back before re-measuring. Suspension needs to settle before your measurements are accurate.
- Re-check ride height after 30 miles. Springs seat and components settle. A small correction at this point is normal.
If a spring becomes uncaptive at full droop, add a helper spring or spring keeper between the main spring and the lower perch.
Quick-reference torque specs for the A90 coilover install
Always cross-reference these figures against your specific coilover kit’s instructions and the Toyota factory torque chart. Some fasteners are torque-to-yield and must be replaced, not reused.
| Fastener | Approx. Factory Torque | Notes |
|---|---|---|
| Strut top-mount nuts (front and rear) | 25 lb-ft | Verify against kit instructions |
| Strut-to-knuckle nuts (front) | 59 lb-ft | Replace if torque-to-yield |
| Lower-mount bolt (rear) | 59 lb-ft | Torque at ride height, not full droop |
| Swaybar end-link nut | 32 lb-ft | Front and rear |
| Tie-rod end nut | 35 lb-ft | Use new cotter pin if applicable |
| Brake-line bracket bolts | 10–14 lb-ft | Do not overtighten; aluminum bracket |
| Wheel lug nuts | 59 lb-ft | Star pattern, two passes |
Verify callout: Torque figures above are commonly cited factory references for the A90. Your coilover kit may supply its own hardware with different specifications. When in doubt, use the kit manufacturer’s spec for kit-supplied hardware and the Toyota factory spec for OEM fasteners.
What should you check after installing coilovers on an A90 Supra?
The install is not done when the last bolt is torqued. These checks protect the car and your work.
Immediate post-install checks:
- Confirm all EDC connectors are seated or the canceler is active
- Verify ABS sensor wires and brake lines are routed clear of moving parts
- Check that all locking collars are tight and set screws are secured with threadlocker
- Confirm ride height is even side-to-side (within 3mm)
Break-in and re-torque schedule: Drive conservatively for the first 30–50 miles. Avoid hard cornering and aggressive inputs while components seat. After that mileage, re-torque every fastener on the suspension. Check again at 300 miles. Springs compress, bushings settle, and collars can back off slightly in the first few hundred miles.
Pro Tip: Book your alignment before the install day, not after. Most shops need a few days’ notice, and driving on misaligned suspension wears tires fast. Set your ride height, then go straight to the alignment rack.
Alignment targets for the A90 with coilovers: Factory alignment specs are a reasonable starting point. With coilovers, a slight increase in negative camber (front: 1.0–1.5 degrees negative) improves cornering feel on the street without excessive tire wear. Rear camber typically stays near factory spec unless you are running a dedicated track setup.
Corner-weighting becomes relevant when you are chasing lap times or running a precision handling setup. It requires slightly different ride heights per corner to equalize weight distribution, and it is best done on a corner-weight scale at a shop equipped for it. For street use, a standard four-wheel alignment is all you need.
Troubleshooting common issues after an A90 coilover install
Rubbing at full compression: The coilover body length is too long for your ride-height target. Shorten the body length by screwing the damper further into the lower base. Confirm clearance with the wheel fitted and the suspension cycled through full compression before driving.

Knocking or creaking from the strut top: Check whether your kit uses a pillow-ball (camber plate) or rubber-insulated top hat. Pillow-ball tops are noisier on the street by design. If the noise is new, check that the top-mount nut is torqued to spec and that the bearing surface is clean and lubricated.
Chassis warning codes or EDC errors: This is the most common A90-specific issue. Community installers confirm that chassis codes appear when the EDC system detects missing or incorrect damper signals. The fix is a plug-and-play EDC canceler module. Short-term, you can sometimes clear codes with an OBD-II scanner, but they will return without the canceler.
Uneven ride height or uncaptive spring: Check that the spring-seat locking collar is fully tightened and that the spring preload is set correctly. If the spring rattles at full droop, add a helper spring. Recheck that both sides are set to the same body length.
Swaybar end-link noise: If the end link is binding at the new ride height, you may need adjustable end links. Fixed-length OEM end links can bind when ride height changes significantly.
Notes from the Undergrounddynamics installer: what we’ve learned on the A90
Ismael has put together model-specific guides for the A90 and a range of other enthusiast platforms, and a few things come up consistently on the Supra.
The dry-fit-without-spring step is not optional. It feels like extra work, but it catches rubbing and binding issues before the spring is in the way. On the A90, the tight clearance around the front strut tower means a coilover that looks like it fits can still contact the chassis at full compression. Check it.
Mark your baseline measurements before you touch anything. Wheel-center-to-arch on all four corners, written on a piece of tape stuck to the fender. You will thank yourself when you are trying to match ride height after the install.
For A90 coilover fitment and setup guidance, Undergrounddynamics publishes model-specific buying and setup content that covers what to look for in a kit and how to verify fitment before purchase. If you are unsure whether a specific kit works with your car’s EDC setup, that is the right place to start.
When to call a shop: if the OEM upper mount is seized or damaged, or if you are seeing interference that you cannot resolve by adjusting body length, a shop with a press and alignment rack will save you time and prevent damage. Forcing components together on the A90 risks cracking the mount housing. SupraForums installers have documented cases where light sanding or a press was the only clean solution.
Pro Tip: If you are doing this install for the first time, watch a model-specific video walkthrough before you start. Visual confirmation of the strut tower access and wiring harness routing on the A90 is worth 20 minutes of your time.
What the first A90 coilover install actually feels like
The first time you pull an A90 apart for coilovers, the job feels bigger than it is. The strut towers are tight, the EDC connectors are easy to forget, and the lower-mount torque sequence catches people out. Most installers finish the rear in about 90 minutes and spend the remaining time on the front and setup. The single thing most people wish they had done earlier: set the body length before installing the springs. Cycling the suspension dry takes five minutes and saves an hour of backtracking. Verify your torque specs against the kit instructions, not just memory, and you will drive away with a setup that actually works.
Undergrounddynamics has the A90 suspension parts you need
Undergrounddynamics carries coilovers and suspension hardware with fitment data specific to the A90 Supra, so you are not guessing whether a kit works with your car’s EDC system or upper-mount configuration. The catalog includes supporting hardware and EDC-compatible options, and the fitment pages tell you exactly what the kit includes and what you will need to source separately.
Before you buy, check the A90 coilover setup guide on the Undergrounddynamics blog for kit-specific notes and fitment verification steps. If you have a pre-sales question about EDC cancelers, replacement mounting hardware, or spring rate selection, the support team can confirm compatibility before the order ships.
Ready to get the right kit for your build? Browse the Undergrounddynamics suspension catalog and confirm your A90 fitment before checkout.
Sources
- How To Install Coilovers & Adjust Ride Height | High Performance Academy
- Any Coilover Install Tips? | SupraMKV - 2020+ Toyota Supra Forum (A90 MKV Generation)
- KW V3 install question | SupraForums
FAQ
Do you need an EDC canceler to install coilovers on an MK5 Supra?
Yes. Without an EDC canceler or plug-and-play bypass module, the A90 will throw chassis warning codes and may restrict traction-control functionality after the OEM dampers are removed.
What torque spec do you use for the A90 rear lower-mount bolt?
The factory rear lower-mount bolt torques to approximately 59 lb-ft. Always torque it with the suspension at ride height, not at full droop, and confirm the figure against your specific coilover kit’s instructions.
How long does an MK5 Supra coilover install take?
A solo install typically takes 4–6 hours. With a second person, most builds finish closer to 3 hours, not counting setup time and the post-install ride-height check.
Can you reuse the OEM upper mounts on an A90 coilover install?
Many kits do reuse the factory upper mounts. If the fit feels tight, light sanding or a professional press is the correct approach. Forcing components together risks cracking the mount housing.
When should you get an alignment after installing coilovers?
Book the alignment immediately after setting your final ride height. Driving on misaligned suspension accelerates tire wear, and the alignment shop needs your ride height locked in before they can set accurate camber and toe.