FREE SHIPPING ON ORDERS OVER $150

Cart
0
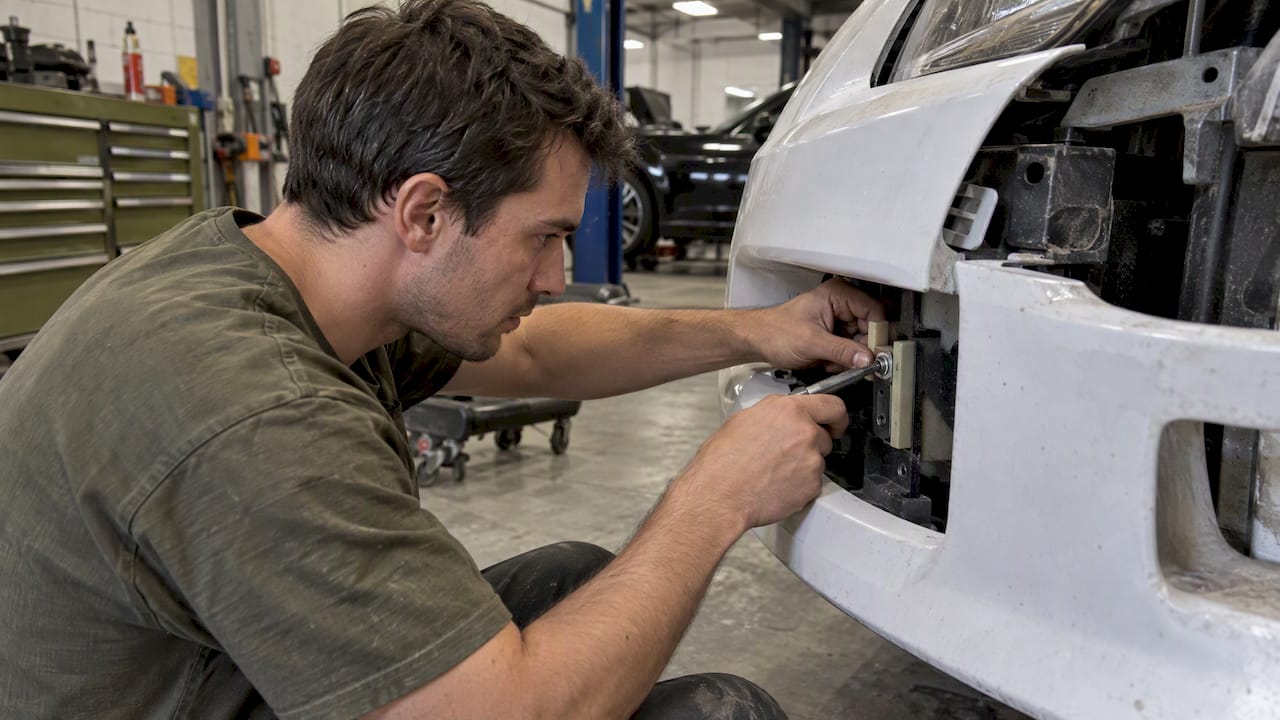
Bumper fitment shims are thin spacers, usually steel or plastic, that go behind a mounting tab, bracket or bolt to move a bumper cover a fraction of an inch. They work well for closing a hood-to-bumper gap or lifting one corner on a freshly installed aftermarket cover. They do not work on a bumper that sags because clips and tabs have broken. Shimming a broken mount just hides the problem until it comes back.
This guide covers how to tell which problem you have, how to shim a bumper properly, and where shimming stops being a good idea, including cars with blind-spot or radar sensors in the bumper.
TL;DR
- Shims fix small, consistent offsets, typically on a new or newly refitted aftermarket cover. They don’t fix torn tabs, cracked retainers or missing push-pins.
- Inspect the mounts first. A bent bracket should be realigned to its factory position, not spaced out.
- Test-fit before paint. Shimming a painted part risks chips, and paint thickness near sensors matters on newer cars.
- Change one thing at a time, in thin increments, and snug bolts evenly so you don’t warp the cover.
- If your bumper houses radar or blind-spot sensors, a shifted cover can degrade them without a dash warning. Get the system checked after any change.
Table of Contents
- What a fitment shim actually does
- Diagnose before you shim
- Shims for aftermarket bumpers and body kits
- How to shim a bumper step by step
- What shims can’t fix
- Sensors, radar and why this matters on newer cars
- Our take on shims
- Shopping for the right parts
- After the fit is right
- FAQ
- Sources
What a fitment shim actually does
A bumper cover is not structural. On most cars the real support is the reinforcement bar behind it, and the plastic cover hangs off that with brackets, tabs, clips and a few bolts. A shim changes the distance or angle at one of those contact points. Add 1/16 inch behind a lower bracket and the bottom edge moves out. Add the same behind an upper bolt and the top edge moves forward and tilts.
That is useful when the geometry is almost right. It is useless when something is broken, because a shim can only push against a surface that holds still.
The common shim types:
- Flat steel or stainless shims in roughly 1/16 inch and 1/8 inch thicknesses, often sold in assorted kits with a slot that slides behind a bolt without removing it. Kits like the 30-piece body alignment sets that rank for this keyword are built for fenders, bumpers and trunk lids alike.
- Nylon or plastic spacers, which won’t rust against painted metal and are easier to stack in small increments.
- Large fender washers, a cheap way to spread clamping load on a tab that has worn or stretched its hole. Owners fixing a gap between a swapped fascia and the fender report this working when the threaded adapter behind the fender had worn down, as described in this owner thread on fascia gap and sag.
- Vehicle-specific shim kits from aftermarket makers for platforms with a known sag. Check that the thickness and hole spacing match your car before you buy.
Diagnose before you shim
Most bumper sag is not a shim problem. Automotive Part Picker’s guide to loose or sagging bumper covers says most sag comes from broken, worn or brittle plastic clips and brackets. The same guide says the real fix is restoring the intended mounting, not adding spacers.
So spend ten minutes on inspection first. With the car parked level and the bumper cold:
- Look at the gaps. Compare left to right at the hood line, the fender seams and the headlight edges. A gap that’s wider on one side only points to a mount on that side.
- Press up gently on the sagging area. If the cover snaps back to position and drops again, a retainer is failing. If it stays put and the gap is simply wrong, the geometry is off.
- Check the clips and tabs. Look for torn bumper tabs, cracked retainer tracks and missing push-pins. These are frequently lost during routine work like headlight or radiator service and never replaced, according to the same guide.
- Check the brackets. If a bracket is bent or has shifted, loosen it, realign it to its factory position and retighten. Don’t use shims to cover up a structural misalignment.
- Look underneath. Curb scrapes and parking-block hits crack lower tabs first, and you’ll see fresh white stress lines in the plastic.
If you find broken parts, replace them before doing anything else. Only after the mounts are sound and the bumper is still off by a small amount should you reach for shims.
Shims for aftermarket bumpers and body kits
This is where shims earn their place. Aftermarket covers are generally made by measuring an OEM part and replicating it. One collision-repair shop notes that this reverse-engineering frequently requires shimming, bending or other modifications to get acceptable alignment. A painted-parts supplier says the same, pointing to manufacturing tolerances and design differences as the reason mounting points can land slightly off.
That matches what most builders see in practice. A fiberglass or polyurethane front bumper, lip or full kit is rarely a bolt-on that lines up on the first try. It needs a test fit, and a test fit usually reveals a few millimeters to trim, shim or elongate.
A realistic pre-paint routine:
- Test-fit unpainted. Hang the cover on the car with every bolt loosely started. Don’t tighten anything yet.
- Set the reference lines first. Align the cover to the headlights, the fender seams and the hood edge before judging any gap.
- Mark where it’s off. Use painter’s tape and a marker. Note the gap in fractions of an inch at three or four points.
- Solve with the right tool. A gap at a bolt location may want a shim. A hole that doesn’t line up may need slotting. A tab that’s too long may need trimming.
- Tighten in a pattern. Work from the center outward, then recheck the gaps. Overtightening one corner pulls the cover out of shape.
- Only then paint. Paint adds film thickness at every edge and mounting point. Fit the cover bare so you aren’t chasing paint chips later.
If you’re planning a kit for a specific chassis, check fitment notes before ordering. Our body kits collection lists parts by vehicle, and a part like the 2014-2020 BMW 4 Series F32 Duraflex M4 Look front bumper cover shows the kind of year-and-model detail you should expect on any listing.
How to shim a bumper step by step
Once the mounts are sound and you know where the offset is:
- Gather the kit. You need assorted shims in 1/16 inch and 1/8 inch, a socket set, painter’s tape, a feeler gauge or a ruler with fine marks, and a helper.
- Loosen, don’t remove. Back off the bolt at the problem point so the shim can slide in behind the tab. A slotted shim saves you from pulling the bolt completely.
- Add one shim. Start with the thinnest. A common mistake is going to 1/8 inch because it feels more decisive. Quarter-inch jumps move a bumper further than you think.
- Snug and check. Tighten lightly, step back and check the gap again against the opposite side.
- Repeat in small steps. If the gap still isn’t right, add another thin shim rather than swapping to a thick one. Stacks of thin shims let you tune.
- Mirror it. If you lifted the driver’s side at one point, check whether the passenger side needs the same, so you don’t create a new mismatch.
- Final torque. Tighten all fasteners evenly. Then check the gaps again, because tightening often changes them.
- Road test. Drive around the block, hit a few bumps and recheck. A bumper that settles after a test drive was telling you something.
Using washers and spacers for worn holes
If the hole in a plastic tab has stretched, a shim alone won’t help because the bolt head pulls through. A large fender washer spreads the load. This is a stopgap on a tab that’s cracked, but on a tab that’s just oval, it often works fine.

Stacking limits
If you’re stacking more than two or three shims in one spot, stop. Either the part doesn’t fit the car, the bracket is bent, or you’re correcting something that should be fixed elsewhere. Stacked metal shims also loosen over time as the plastic compresses.
What shims can’t fix
Some problems look like a gap problem and aren’t.
| Symptom | Likely cause | Right fix |
|---|---|---|
| Whole lower edge sags, clips pop out | Broken clips or retainer tracks | Replace clips, retainers, tabs |
| One corner low after a curb strike | Cracked tab or bent bracket | Repair the tab, realign the bracket |
| Large, uneven gap on a new aftermarket cover | Part dimensions or wrong fitment | Re-check fitment, trim or slot, then shim |
| Bumper wavy or bowed between mounts | Overtightened bolts or heat-warped plastic | Loosen and re-seat, support the cover |
| Gap between bumper and fender only | Worn threaded adapter in fender | Replace adapter, use a fender washer |
| Cover binds and won’t seat | Paint or coating build-up on edges | Remove build-up from mating surfaces |
A sagging bumper is really the second row of that table far more often than it is the third. The advice from the sag guide is blunt: relying on shims to hold a cover with torn tabs or broken clips only delays the failure, because the underlying support is still compromised.
Sensors, radar and why this matters on newer cars
On older cars, a bumper that’s off by an eighth of an inch is cosmetic. On newer ones, it can be a safety issue.
Modern driver-assist sensors sit in or behind bumper covers. ADAS Line notes that front radar sits behind the grille or emblem and blind-spot sensors embed in the rear bumper. It also warns that minor shifts in position, or changes to paint thickness near radar areas, can degrade performance without any dashboard warning light. Its guidance is to recalibrate ADAS systems after bumper work even when everything looks flush.
Manufacturer position statements go further. A Chrysler position statement on bumper and fascia repair with ADAS, hosted by I-CAR, says repairs or misalignment near the blind-spot monitor can cause false activation and improper operation of assisted-driving systems. Our research on OEM guidance also points to a limit of 12 mils (300 microns) of paint thickness near blind-spot sensors, and cautions against fillers or modified brackets that change a sensor’s intended position.
What that means for you:
- If your car has bumper-mounted sensors, don’t shim, bend or re-drill mounting points around them without checking the manufacturer’s repair information.
- Aftermarket covers may not replicate OEM sensor locations exactly. The collision-repair shop mentioned earlier warns they often lack the precise sensor mount positions of OEM parts, which can attenuate sensor signals.
- Have the system calibrated by a qualified shop after any bumper change that affects the sensor zone. Your dealer or a collision shop that performs ADAS calibration can tell you what your model requires.
- Don’t trust the dash. No warning light doesn’t mean the system is working correctly.
Most enthusiast builds, like a Miata, an older Civic or a 350Z, don’t have these systems, so this applies mainly to newer daily drivers and modern platforms.
Our take on shims
We sell aero parts, so we hear about gaps constantly. Our view is simple: shims are a finishing tool, not a repair tool.
When a customer tells us a lip or bumper “doesn’t fit,” the cause is usually one of three things: the car already had worn or broken mounts before the new part went on, the part was bolted down tight before anyone checked alignment, or the expectation was OEM-level seams from a part that needs a proper test fit. The first two are fixable in an afternoon. The third is a reason to treat any fiberglass or polyurethane cover as a fit-and-finish project, not a plug-and-play one.

Our approach is to give you fitment detail up front, so you know the year, chassis and configuration a part is built for. We source from established suppliers rather than make parts ourselves, and we offer carbon fiber and fiberglass options, which behave differently when you tighten them. Fiberglass can be trimmed and tuned. Carbon fiber needs a lighter hand with fasteners and no forcing. Either way, do the test fit before paint. It takes an hour, and it saves you from crying into your bank app after a painter has already sprayed a cover that needs reworking.
If you’re stacking shims to make something line up, stop and re-check the basics. A repeatable setup beats a pile of washers.
— Ismael
Shopping for the right parts
If you’re replacing a cover, lip or full kit, buy for your exact chassis and year, and ask what the mounting hardware situation is. Browse our body kits and our hoods, spoilers and body panels, or start from the Underground Dynamics home page to filter by platform. Each listing is presented with fitment detail and specs so you can check before you order.
If your bumper-to-hood gap changed after a suspension swap, remember ride height moves body lines too. Our guide to bump steer correction is a good read before you change geometry, and our lowering springs and coilovers pages cover the other side of the equation.
After the fit is right
Once the gaps are even and the bolts are torqued, protect the finish. Bare fiberglass should be primed and painted before it sees weather, and fresh paint needs time to cure before you load it with any coating. When you’re ready to keep painted panels clean without scrubbing at them, a spray-and-rinse coating applied panel by panel is one gentle option for the maintenance routine. Remember that any coating or filler near sensor zones counts toward film thickness, so check your vehicle’s guidance first if it has radar.
After a week of driving, recheck the bolts. Plastic settles, and a quick re-torque catches the loosening early.
FAQ
Can shims fix a sagging bumper?
Only if the sag comes from a small geometric offset and the mounts are sound. Most sag is caused by broken clips, cracked retainers or torn tabs, and shims won’t hold those. Replace the damaged parts first, then shim if a small gap remains.
What thickness of shim should I start with?
Start with the thinnest you have, usually 1/16 inch, and add one at a time. Stack thin shims rather than jumping to 1/8 inch, and recheck the gap after each tightening. If you need more than two or three in one spot, something else is wrong.
Should I shim before or after painting a new aftermarket bumper?
Before. Test-fit the bare cover, make all adjustments, then paint. Shimming a painted cover can chip edges, and paint adds thickness that changes how the cover seats.
Is it safe to shim a bumper with parking or blind-spot sensors?
Only with care. Manufacturer guidance warns that misalignment or repairs near blind-spot sensors can affect how the systems work, sometimes with no warning light. Check your manufacturer’s repair information and have the system calibrated by a qualified shop if you change anything in the sensor zone.
Why doesn’t my new aftermarket bumper line up?
Aftermarket covers are often copied from OEM parts and can differ in tolerance, so some need shimming, trimming or slotting. Check that the part is made for your exact year and chassis, test-fit before paint, and make sure your car’s own brackets aren’t bent.
Sources
- Bumper cover loose, sagging, or hanging down, Automotive Part Picker
- OEM vs Aftermarket Parts, Pristine Collision Center
- Why Won’t My Bumper Fit? Painted OEM Parts
- Front Fascia / Bumper Gap, Sag, 300C Forums
- ADAS Calibration After Collision Repair, ADAS Line
- Bumper/Fascia Repair with ADAS, I-CAR position statement