FREE SHIPPING ON ORDERS OVER $150

Cart
0
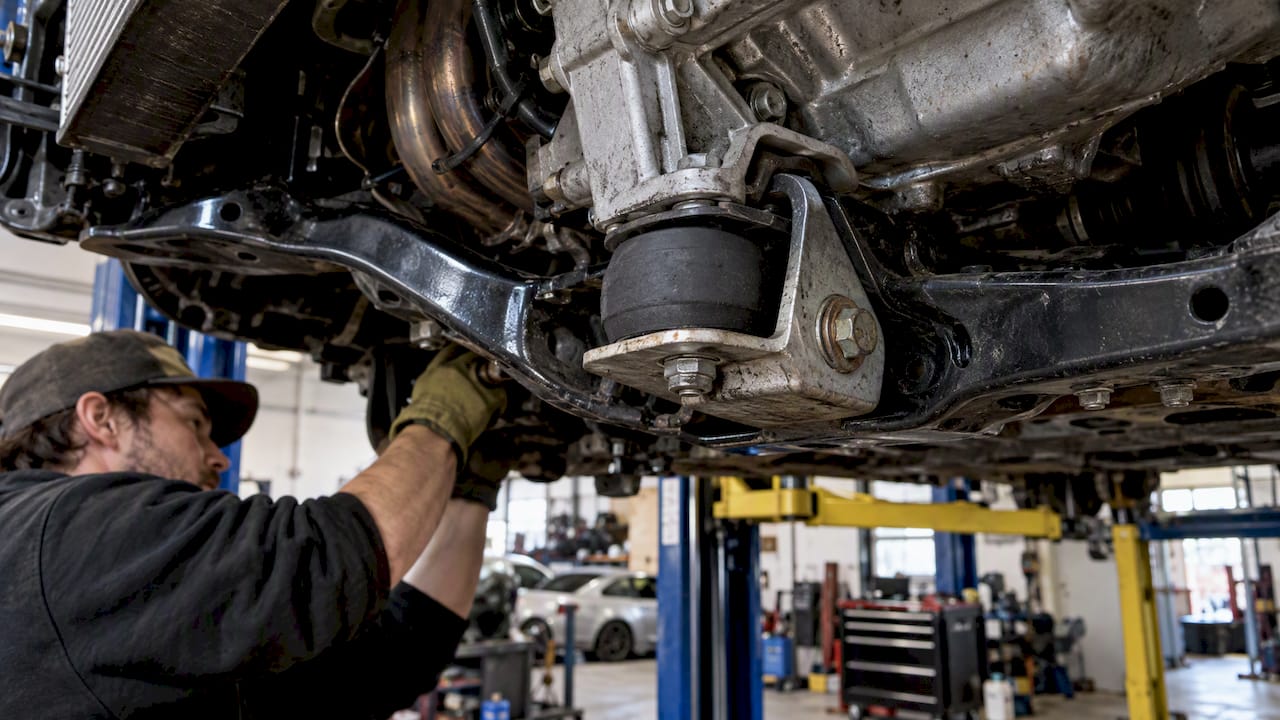
Engine vibration mounts carry the powertrain’s weight and keep its vibration out of the chassis, so the right mount is the one rated for your engine and transmission weight and tuned for low-frequency noise and vibration. Mount type depends on the vehicle and application. Check the manufacturer’s specifications to choose a compatible mount. Start by checking your current mounts for cracks or too much engine movement.
TL;DR:
- Confirm the mount’s load rating, deflection, bolt pattern, bracket, and vehicle part number before buying; physical fit alone does not guarantee correct geometry.
- Engineers target roughly 5–17 Hz for passenger and commercial vehicles, but mount response changes with load and frequency, so check published stiffness.
- Cracked or oil soaked rubber, separated metal bonds, idle shaking, clunks, or visible engine rocking warrant inspection by a qualified technician; avoid improvised movement tests.
- Mount replacement requires drivetrain support, service manual torque procedures, and tightening at the engine’s resting height; tight access or uncertain alignment calls for a shop.
- Stiffer mounts reduce engine movement but transmit more vibration into the chassis; after mount changes, inspect exhaust components if a new drone appears.
Table of Contents
- What types of engine vibration mounts are there?
- How do engine mounts actually isolate vibration?
- How do you choose the right engine vibration mount?
- What does installing engine mounts involve?
- How do you know an engine mount is failing?
- Do engine mounts work with coilovers and exhaust systems?
- Fitment first: our take on mounts for performance builds
- FAQ
- Sources
What types of engine vibration mounts are there?
Most mounts you will meet fall into a handful of designs. Knowing which one you have tells you what to buy and what to expect from it.
- Bonded rubber mounts: Rubber vulcanized to metal plates or a bracket. Check the vehicle or equipment specifications to see whether this type is suitable.
- Hydraulic mounts: These contain fluid. Check the vehicle specifications and inspect them for signs of damage or leakage.
- Two-piece or telescoping mounts: These are mount designs used in some applications. Confirm suitability against the equipment specifications.
- Conical mounts: The rubber sits in a cone shape. Check the equipment specifications to determine whether this design is suitable.
- Shear mounts: These are loaded sideways, so the rubber flexes in shear. Check the equipment specifications to determine whether this design is suitable.
Application matters as much as shape. A generator on a trailer needs different travel and load capacity than a Civic or a Miata with a stock block. Heavy machinery pushes toward two-piece or conical designs.
Environmental exposure can affect mount condition. Inspect mounts for visible damage and follow the vehicle or equipment maker’s maintenance guidance.
How do engine mounts actually isolate vibration?
Think of a mount as a spring and a damper sitting between the engine and the chassis. The goal is to reduce how much force gets transmitted into the body, which is what you feel as shake, buzz and boom.
The core trade-off is stiffness versus compliance. No universal vibration isolator exists: a stiffer mount holds the engine steady and lasts longer, while a softer one isolates better but lets the engine move more. Effective systems separate the powertrain’s natural frequency from structure-borne resonances, and the same SAE source points to a target of roughly 5–17 Hz for commercial and passenger vehicles. The idea is to keep the mounted engine’s own resonance below the major excitation bands, so idle and cruising vibration doesn’t line up with it.

Position matters too. Engineers choose mount stiffness, angle and location to balance engine displacement against natural frequency at each mode, a compromise described in an SAE pre-print on mounting layout. That is why a mount that fits physically can still behave badly if its stiffness or angle is wrong for your layout.
Real rubber is messier than the textbook spring. Filled elastomers change stiffness and damping with load and frequency, which is why simple spring-damper models are often inaccurate. A mount’s response can vary with amplitude and frequency, rather than behaving like a single fixed spring value. One SAE paper on amplitude and frequency dependence covers this in detail.
The payoff of getting the system right is real. A design process built on vibration decoupling, simulation and bench testing can significantly reduce transmissibility and improve NVH.
How do you choose the right engine vibration mount?
Work through the list in order. The first items rule out wrong parts quickly, and the later ones separate a good fit from a great one.
- Match load and static deflection. The mount must carry your engine and transmission weight without bottoming out or sagging. Check the rated load and the mounting geometry before anything else.
- Check natural frequency and stiffness. You want the mount’s natural frequency below the major engine excitation bands. Look for published stiffness or durometer hardness where the maker lists it.
- Consider directional stiffness. Mounts behave differently in compression and shear. Make sure the loading direction on your engine matches how the mount is designed to work.
- Verify fitment. Confirm stud or bolt pattern, bracket shape and the OEM or vehicle-specific part number. A mount that almost fits changes engine angle and can ruin alignment with the driveline.
- Account for environment and life. Oil, heat and UV exposure decide how long rubber survives. Hot engine bays and leaky valve covers shorten service life.
- Decide if you need heavy-duty. If the engine is heavy, the duty cycle is harsh or the equipment is industrial, step up to two-piece or heavy-duty designs instead of standard bonded rubber.
Pro Tip: Have the other mounts inspected when one has failed. Replace mounts as needed based on their condition and the vehicle maker’s guidance.
Adjustable designs are worth knowing about. Testing on adjustable-stiffness rubber mounts reported isolation rates above 80% after adjustment in the cases studied, which shows how much tuning stiffness can matter for a given application. If you want to compare options for your chassis, our motor mounts collection lists fitment details by application.
What does installing engine mounts involve?
For an experienced DIYer, replacing mounts is a moderate-difficulty job. The hard part is not the bolts. It is supporting the drivetrain safely while the old mount is out.
- Support the engine first. This work can be hazardous if the drivetrain is not supported correctly. Consult the vehicle’s service manual and have a qualified technician perform the work if you are unsure.
- Relieve the weight. Follow the vehicle’s service manual for the correct procedure, or have a qualified technician do the work.
- Remove hardware and swap the mount. Keep track of bolt lengths and any spacers or heat shields, since they often differ by position.
- Tighten the fasteners. Follow the vehicle’s service manual for the specified torque and tightening procedure.
- Don’t over-compress the mount. Tighten with the engine at its natural resting height, not jacked up or hanging, or the rubber ends up preloaded and wears fast.
You need a torque wrench, jack stands, an engine support and the right sockets. Plan for a few hours on a simple front mount, longer if access is tight or the subframe has to move. If alignment looks difficult or the engine won’t settle where it should, hand it to a shop. A wrongly seated mount costs more than the labor you saved.
How do you know an engine mount is failing?
Mounts rarely fail all at once. They get worse slowly, so the signs are easy to explain away until something else breaks.
Look at the rubber first. Torn or cracked rubber, oil-soaked material, broken studs and rubber separating from the metal plate all mean the mount is done.

Then pay attention to how the car behaves. Shaking at idle, a clunk or bang when you accelerate or shift, and visible rocking of the engine are the usual symptoms. A bad mount lets the engine move more than the driveline, hoses and wiring were designed for, so it can damage other parts.
If you suspect a mount is failing, have it inspected by a qualified technician. Do not try to assess engine movement using an improvised test.
Do engine mounts work with coilovers and exhaust systems?
They do, but changes in one place show up in another. Performance mounts are stiffer, and a stiffer mount sends more vibration into the chassis, which is where your other upgrades live.
Coilovers change ride height and how the body moves, but they don’t change how the engine sits in the bay. The real overlap is in the noise and vibration you feel. A stiffer suspension and stiffer mounts may make a car feel harsher and increase perceived noise and vibration. If you go stiffer on both, expect a rawer car and decide what you want to trade.
Exhaust systems interact more directly. Exhaust components can affect noise and vibration. If a drone appears after changing mounts, inspect the exhaust system as well. If you hear a drone after changing mounts, look at the exhaust before blaming them. Our write-up on fixing exhaust drone with hangers and a resonator walks through that without welding.
Clearance is the other catch. A new intake, header or turbo kit can leave less room for a taller or stiffer mount, and an engine that rocks more under power can touch a downpipe or hose. Test-fit and check movement before you finish the build.
Fitment first: our take on mounts for performance builds
In performance builds, we think fitment beats looks every time. A mount is a hidden part, so what matters is stud pattern, clearance and rated load, not how it looks on a shelf. Before you buy anything, check those details on the product page and make sure they match your chassis and engine. If the page doesn’t list them, that is a reason to look elsewhere. Correct geometry helps the engine align with the driveline.
— Ismael
FAQ
What are vibration isolation mounts?
Vibration isolation mounts sit between an engine and its frame, supporting the engine and reducing vibration transmitted to the body or equipment structure. Mount designs vary by application.
Do bad motor mounts cause shaking?
Worn mounts can contribute to increased vibration or noise. Have the vehicle inspected to determine the cause.
Is replacing motor mounts a big job?
It is a moderate job for an experienced DIYer, mainly because the engine has to be supported while the mount is out. Drivetrain support and staged torque steps are the key parts. Tight access may call for a shop.
What is the difference between a vibration dampener and a vibration isolator?
An isolator reduces vibration transmitted from a source to a structure. A dampener reduces vibration energy. Some engine mounts provide both functions.
Sources
- Thedrive
- Saemobilus
- Mdpi
- Optimization Design and Performance Analysis of Vehicle Powertrain Mounting System | Chinese Journal of Mechanical Engineering | Springer Nature Link