FREE SHIPPING ON ORDERS OVER $150

Cart
0
If your ride is hissing, sitting low on one corner, or the compressor keeps kicking on long after the engine’s off, you’re likely dealing with an air suspension leak or a related supply problem. The move now isn’t to start swapping parts. Note which corner, what the symptom pattern looks like, and leave any warning codes in place so you can start isolation testing before anything gets replaced.
TL;DR:
- Deflate and reinflate each corner separately, then compare physical height with scan readings; system wide compressor overwork points toward supply side faults.
- For pressure decay testing, isolate each spring at 20 psi or less; a loss of 4 psi or more in 24 hours confirms a leak.
- Keep diagnostic codes intact through testing, and record affected corners, timing, and results to give the technician useful fault history.
- Inspect air springs every 6 months or 10,000 miles, replace air dryer desiccant around 60,000 miles, and check line routing after suspension work.
Table of Contents
- 1. How to tell you actually have an air suspension leak
- 2. Is it a supply-side leak or a suspension-side leak? A step-by-step isolation checklist
- 3. How to find very slow or hard-to-see leaks
- 4. Common leak locations and what to check at each one
- 5. Repair options and how to keep costs reasonable
- 6. Preventive maintenance to reduce future leaks
- 7. Practical notes from an aftermarket parts seller
- FAQ
- Sources
1. How to tell you actually have an air suspension leak
Before you chase a repair, confirm what you’re actually dealing with. Air suspension systems throw a handful of pretty consistent warning signs when something’s letting air out, and catching the pattern early saves you from guessing later.
- Audible hissing, especially near wheel wells or under the vehicle when parked and the engine’s off.
- A corner that sags overnight or drops noticeably faster than the others after sitting for a few hours.
- Compressor short-cycling, where it runs more often or for longer stretches than it used to, trying to keep up with lost air.
- Dashboard warnings like “service air suspension” or a ride-height fault message.
- Inconsistent height readings between corners when you check them side by side.
Once you spot one or more of these, start documenting. Write down which corner (or corners) are affected, whether the drop happens immediately or only after hours of sitting, and whether you hear anything or just notice the height change. Also note whether the symptom shows up after loading or unloading cargo, since weight changes can expose a marginal leak that otherwise stays hidden.
This pattern matters more than it might seem. According to iCarsoft’s diagnostic breakdown, a suspension warning or a system that won’t raise or lower properly can originate from several different branches, not just a leaking air spring. Separating pneumatic leaks from height-sensor faults, air-supply hardware problems, or electrical issues starts with exactly this kind of symptom pattern. Technicians use it to narrow down which branch is failing before they touch a wrench, and you can do the same groundwork before you ever call a shop.
2. Is it a supply-side leak or a suspension-side leak? A step-by-step isolation checklist
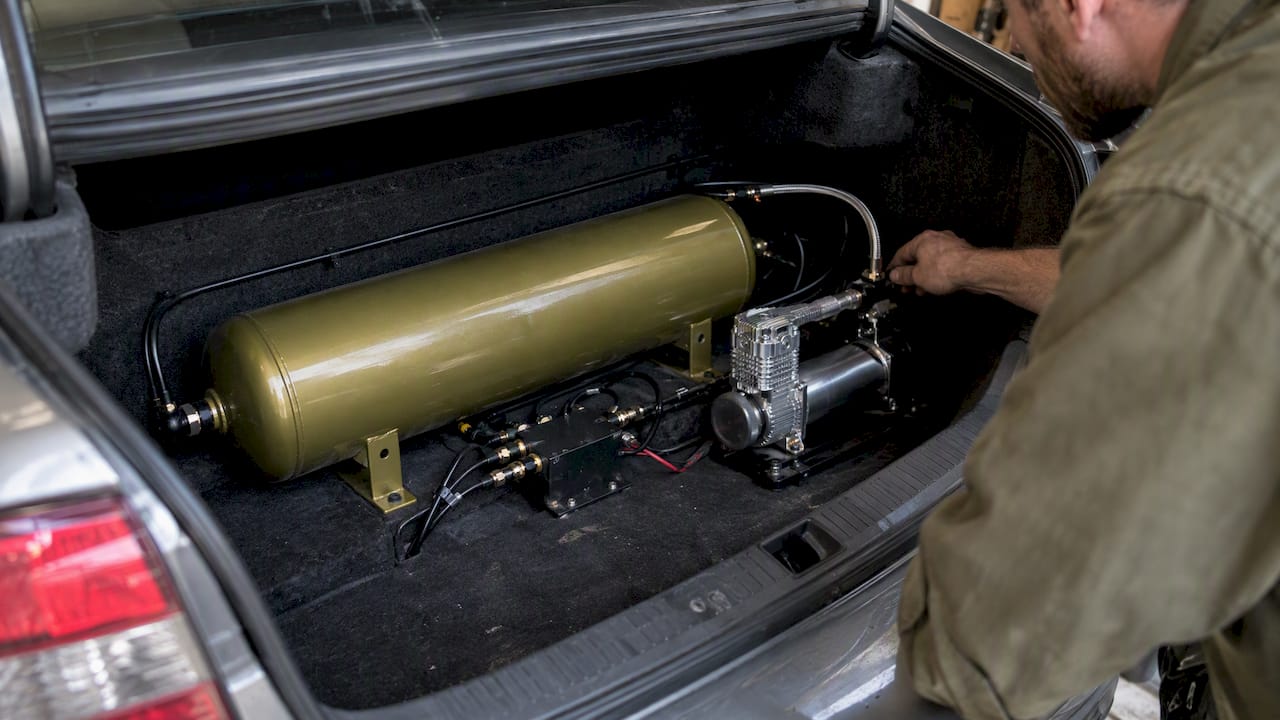
Air suspension systems split into two broad branches: the management side (compressor, valve block, reservoir, and the lines feeding them) and the suspension side (the air springs themselves, their lines, and fittings). A leak in either branch can look identical from the driver’s seat, a sagging corner and a compressor that won’t quit, so isolating which one is failing is the single most useful thing you can do before repairs start.
- Deflate one corner at a time using the system’s manual controls or diagnostic tool, then watch both the reported height reading and the actual physical movement of that corner.
- Reinflate the same corner and track how quickly it returns to target height. A slow climb or a corner that won’t hold once it gets there points toward that specific air spring, line, or fitting.
- Monitor compressor current or run time where you have access to a scan tool, since a compressor working overtime on every corner (not just one) suggests a supply-side leak rather than a bad air spring.
- Check electrical basics before you touch anything pneumatic: battery voltage, ground connections, and fuses. A weak ground or blown fuse can mimic air loss symptoms by causing erratic height readings.
- Inspect connectors at the valve block and height sensors for corrosion or looseness, since a bad connection can trigger the same warning lights as an actual leak.
- Hold off on clearing any codes until you’ve finished testing. Stored fault data often points to exactly when and under what conditions the system first detected a problem.
Pro Tip: Write down every test result, corner by corner, before you call a shop. A technician who gets a clear isolation history can usually skip repeating half the diagnostic steps.
Supply-side leaks are sneakier than they sound. GM’s own technical guidance on sagging Tahoe, Yukon, and Escalade models points to loose or improperly seated air line connections as a frequent cause of corners dropping, a fault that looks exactly like a bad air spring until someone checks the fittings themselves (Gm-trucks). That’s why preserving your module’s stored data and resisting the urge to clear codes early matters. It gives whoever diagnoses the system a timeline instead of a blank slate.
3. How to find very slow or hard-to-see leaks
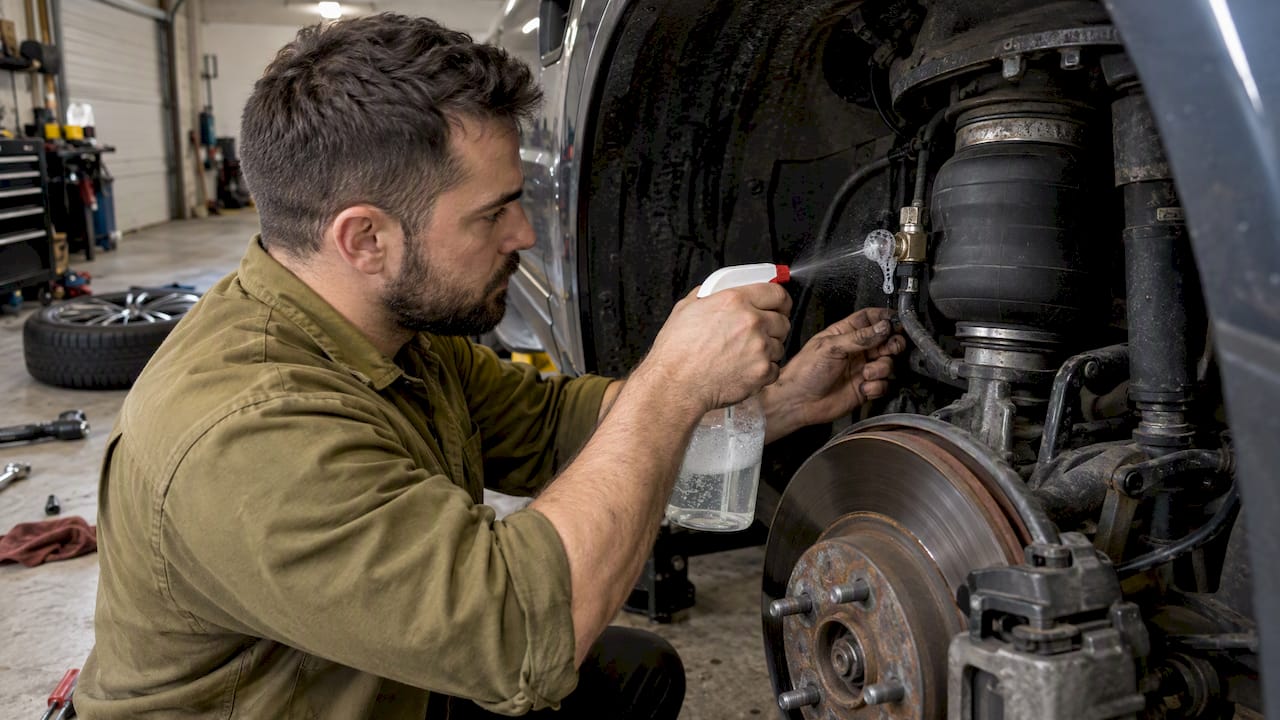
Soapy water catches a lot of leaks, but it has limits. It works well on visible fittings and seams where bubbles can form and stay put, but it struggles with internal leaks, leaks hidden behind brackets, or leaks so slow they cause only a small pressure loss over time. If you’ve sprayed every joint you can reach and the corner still sags overnight, you’re likely dealing with a slow leak that needs a different approach.
The pressure-decay test is the standard way to separate a genuine leak from normal “wicking,” which is the tiny amount of air that naturally seeps through an air spring’s rubber bellows over time. According to Hendrickson’s Tech Tips Air Suspension 101, the protocol is straightforward: inflate the air spring to 20 psi or less, isolate that line from the rest of the system, and monitor the pressure over 24 hours.

A drop of less than 4 psi over that 24-hour window counts as acceptable wicking, while 4 psi or more indicates an actual leak that needs attention (Hendrickson). That single number is the difference between a spring that’s fine and one that needs replacing, so it’s worth doing properly rather than eyeballing it.
For leaks too small for soap bubbles to show, a few tools help:
- Ultrasonic leak detectors pick up the high-frequency sound of escaping air even when you can’t hear or see anything.
- Handheld leak testers with a sensing probe let you scan along lines and fittings without disassembling anything.
- Inline pressure gauges let you track decay in real time instead of waiting a full day to find out what happened.
Test on a dry vehicle, since surface moisture or recent rain can mimic a leak and send you chasing a fault that isn’t there. Mark any suspect joints with a paint pen or tape before you retest, and repeat the test overnight when possible so temperature swings don’t skew your readings.
4. Common leak locations and what to check at each one
Once you know which branch is losing air, narrow it down to a specific part. Most leaks cluster around a handful of predictable spots, and working through them in order saves time.
- Air springs and bellows: look for ozone cracking (fine surface lines from age and UV exposure), bulges, or spots where the bellows rubs against a bracket or shock due to insufficient clearance.
- Push-fit fittings and quick-disconnects: confirm the line is fully seated by checking for the white insertion mark, which should disappear into the fitting when properly connected. A visible mark usually means the line isn’t seated and needs reinserting or the connector needs replacing.
- Air lines and routing: check for kinks, abrasion where a line rubs against a chassis edge, and pinch points that develop after full suspension travel compresses or stretches the routing path.
- Valve block, reservoir, and expansion chamber: leaks here often present as a system-wide pressure drop rather than a single sagging corner, which is exactly why they get mistaken for a bad air spring. A slow leak in the reservoir keeps the compressor working to compensate everywhere, not just on one side.
- Compressor intake and exhaust components: inspect the exhaust elbow and valve for cracks or a valve that’s sticking open, since either one bleeds pressure the compressor just built.
Manufacturer troubleshooting documentation backs up a lot of this list directly. Guidance from Sabo’s air spring troubleshooting bulletin points out that most premature air spring failures trace back to lack of maintenance, incorrect installation, or an unrelated suspension problem, not a bad spring on its own. Before you replace one, check line clearance, confirm the shocks are the correct match, and verify mounting hardware is torqued properly. Skipping that step is how perfectly good springs get thrown away.
5. Repair options and how to keep costs reasonable
Confirm the leak with isolation testing first, repair the specific part that proved faulty, then retest and rescan the module before calling it done. Replacing parts before you’ve nailed down the actual source is the single most common way repair bills balloon.
Monroe’s technical guidance calls this pattern “shotgunning,” replacing components without proper isolation testing first, and flags it as the leading cause of inflated repair costs (Monroe). A shop that skips individual corner deflation and inflation testing is guessing just as much as you would be.
Once the leak’s confirmed, common repairs include:
- Reseating or replacing a fitting when the insertion mark shows it was never fully connected.
- Replacing a cracked or bulging air spring once isolation testing confirms that corner, not the supply side, is losing pressure.
- Servicing the valve block or reservoir when a system-wide pressure drop points there instead of a single corner.
- Repairing or replacing the compressor, but only after testing proves it’s actually faulty rather than just overworked by a leak elsewhere.
Some of this is doable in a driveway: fitting inspection, a soapy-water check, or a basic pressure-decay test just needs patience and a gauge. Replacing an air spring, recalibrating height sensors, or rescanning modules after a repair usually calls for lift access, specialized tools, or software most owners don’t have on hand, which is where a shop earns its keep.
Pro Tip: When you call a shop, ask for a written diagnostic report that documents corner-by-corner deflation and inflation tests along with module scans from before and after the repair. That paper trail protects you if the same symptom shows up again in a few months.
If a repair turns into a bigger suspension overhaul (worn bushings, mismatched shocks, or a spring that’s failed more than once), our air suspension collection covers compatible replacement kits and components for a range of enthusiast platforms, and it’s worth comparing against a full coilover rebuild cost if you’re weighing air setup against a coilover swap.
6. Preventive maintenance to reduce future leaks
Most air suspension failures aren’t sudden. They build up from moisture, debris, or a small leak nobody caught early enough to overwork the compressor.
- Visually inspect air springs for cracks, fine ozone lines, or bulging every 6 months or 10,000 miles.
- Replace the air dryer desiccant roughly every 60,000 miles to keep moisture out of the system, since contaminated air is one of the biggest drivers of early component failure (Truckinginfo).
- Check lines for chafe against chassis edges or brackets, especially after any suspension work that changes routing.
- Verify mounting hardware torque and confirm shocks are a correct match, since a mismatched shock can stress the bellows unevenly.
- Avoid constant overextension of the air springs and keep ride height within its normal range rather than running it at the extreme end for long stretches.
Address worn bushings promptly, since a suspension problem that seems unrelated often puts extra strain on the air spring next to it. If a corner keeps drifting out of spec despite a clean bill from isolation testing, that’s the point to schedule a professional inspection and request a documented pressure-decay test rather than waiting for a full failure.
7. Practical notes from an aftermarket parts seller
We spend a lot of time matching fitment specs to specific chassis, and the same discipline applies here: before you order a replacement air spring or line, confirm the exact application, because a near-match part rarely seats or seals the way the OEM-spec version does. If you’re headed to a shop, bring your isolation test notes and ask them to preserve module data rather than clearing it. That record is what keeps a diagnosis honest and keeps you from paying for parts that were never the problem.
— Ismael
FAQ
Is it normal for air suspension to leak?
A small amount of air loss, often called wicking, is normal and expected as the bellows ages. A drop of 4 psi or more over 24 hours under a controlled pressure-decay test points to an actual leak rather than normal wear (Hendrickson).
How much does it cost to fix an air suspension leak?
Cost depends entirely on which part is actually failing, a simple fitting reseat costs far less than a full air spring or compressor replacement. The best way to avoid overpaying is to request isolation testing before authorizing any repair, since replacing parts without it is the leading cause of inflated bills according to Monroe’s diagnostic guidance.
Can I drive with bad air suspension?
Driving with a confirmed leak is possible short-term, but a sagging corner changes ride height, alignment geometry, and how the vehicle handles under load, especially in turns or emergency maneuvers. It’s best treated as a developing problem rather than something to put off, since the compressor works harder the longer the leak goes unaddressed.
What is the life expectancy of air suspension?
Air suspension components are durable but not permanent, and most premature failures trace back to moisture contamination, debris, or small leaks left unaddressed long enough to overwork the compressor (truckinginfo.com). Regular inspection and desiccant service extend that lifespan considerably compared to a system left unchecked.
Sources
- Truckinginfo
- Monroe
- 12463-045 Rev B, Tech Tips Air Suspension 101
- Range Rover Air Suspension Warning: Leak, Sensor, Compressor or Power? — iCarsoft Knowledge Hub