FREE SHIPPING ON ORDERS OVER $150

Cart
0
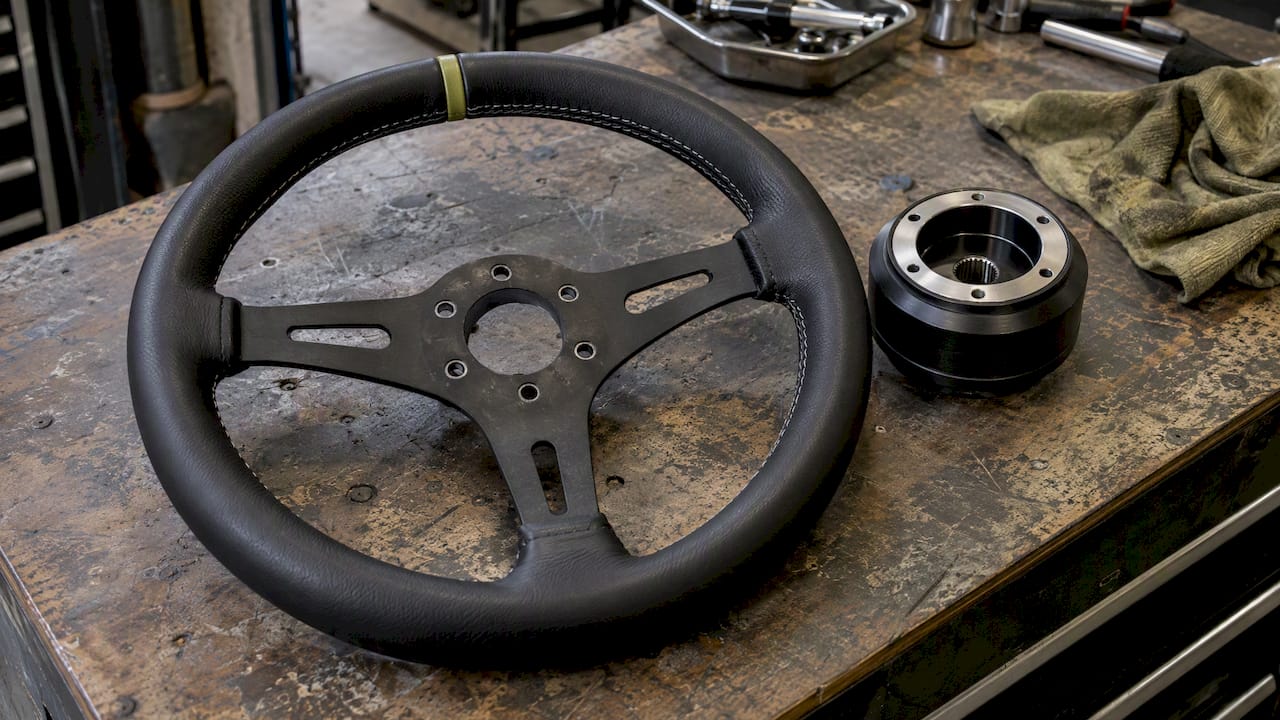
A steering wheel bolt pattern is the number of bolt holes in the wheel’s center plate and the diameter of the circle those holes sit on. For most aftermarket wheels, that answer is six holes on a 70mm circle, written 6x70mm. If your wheel, hub adapter and quick release all share the same pattern, they bolt together. If they don’t, nothing you do with a wrench fixes it.
This guide shows you how to measure a pattern yourself, how to tell near-identical patterns apart, and how to avoid the mistakes that cost you a weekend, or a clockspring.
TL;DR
- Three numbers define a match: bolt count, pitch circle diameter (PCD), and thread size of the bolts.
- 6x70mm is the most widely used aftermarket pattern. 6x74mm exists too, and a 4mm difference is enough to stop a wheel from seating.
- Measure hole center to hole center across the circle. Odd hole counts need a formula, covered below.
- The wheel pattern is only half the job. Your car’s column splines and hub adapter must match too.
- Mark the column, center the clockspring, and use a puller on the OEM wheel. Never hammer the shaft.
Table of Contents
- What a steering wheel bolt pattern actually tells you
- The common patterns you will run into
- How to measure your bolt pattern
- Wheel, hub, quick release: matching the whole stack
- Installing safely: what the bolt pattern doesn’t cover
- Our take: pattern first, looks second
- Shop wheels, hubs and the rest of the build
- FAQ
- Sources
What a steering wheel bolt pattern actually tells you
The pattern describes the face of the wheel where it mounts to a hub, adapter or quick release. Two numbers matter first:
- Bolt count: how many holes are in the mounting plate. Aftermarket wheels commonly use three, five or six.
- PCD (pitch circle diameter): the diameter of the circle that passes through the center of every hole.
A third number sits outside the pattern but decides whether your hardware fits: thread size. Support documentation from hub makers lists bolt count, thread size and diameter as the three things you need to know. We agree with that framing. Two parts with the same PCD but different threads will not bolt together safely.
One more thing to keep separate: the bolt pattern on the wheel is not the same as the splines on your steering column. The wheel pattern joins the wheel to the hub. The hub’s spline count joins the hub to your car. You need both right.
The common patterns you will run into
Most shopping comes down to a short list.
| Pattern | Typical use | Notes |
|---|---|---|
| 6x70mm (2.756 in) | Most aftermarket racing and street wheels | The pattern most hubs and quick releases are built around |
| 6x74mm | Some Italian-made wheels | Slightly larger, not interchangeable with 70mm |
| 6x2.75 in | Older American-style wheels | 2.75 in is 69.85mm, within 0.15mm of 70mm |
| 5x2.75 in | Older American-style wheels | Five-hole version of the same circle |
| 3x1.75 in | Older American-style wheels | Small three-hole plate |
The patterns above, including 6x70mm as the most common and 6x74mm as the larger Nardi and Personal pattern, come from a hub manufacturer’s support page. Treat the table as a map, then confirm with a ruler on your actual parts.
Why 6x70mm and 6x2.75 in often “just work”
The 6x2.75 in pattern is 69.85mm. That is 0.15mm off 70mm, which is inside normal hole clearance. Many builders bolt one onto the other without trouble. Still, check that the bolts thread in freely and that the wheel sits flat against the hub. Never force a bolt to pull a wheel into place.
Same diameter, different clocking
A matching count and diameter does not guarantee a match. Some wheels use a 70mm circle but rotate the hole pattern, so the holes land in different spots compared with a standard hub. That takes a specific adapter or spacer. If a wheel’s spec page says “70mm” but the holes won’t line up, look at the orientation of the holes, not just the diameter.
How to measure your bolt pattern
You need a caliper, or a good steel ruler with millimeter markings, and the wheel off the car and on a bench.
Six holes (or any even count)
- Lay the wheel’s mounting plate face up.
- Pick one hole and find the hole directly opposite it.
- Measure from the center of one hole to the center of the other. That is the PCD.
- Repeat with a second opposing pair. The numbers should agree.
If you can’t judge the hole center by eye, measure the inside edge of one hole to the outside edge of the opposite hole, then subtract one hole diameter. With a caliper this is fast and accurate. A reading near 70mm means a 6x70mm pattern. A reading near 74mm points to the larger pattern.
Five holes (or any odd count)
No hole sits directly opposite another, so you calculate. Hub manufacturers publish the method: measure the distance between neighboring holes and divide by the sine of half the angle between them. For a five-hole plate, the angle is 360 divided by 5, or 72 degrees, so half the angle is 36 degrees.
PCD = center-to-center distance between adjacent holes / sin(36°)

sin(36°) is about 0.588. So if adjacent holes measure 41.0mm apart, the PCD is about 69.7mm, which lines up with the 5x2.75 in family. Measure a few neighboring pairs and average them.
Check the thread, too
Once you know the PCD, look at the bolts or threaded holes. Metric threads are common on newer parts, and older American-style hardware often uses inch sizes. If you are unsure, take a bolt to a hardware store and match it to a thread gauge. Don’t guess here. A bolt that almost fits will strip the hub, and the hub is holding your wheel to your car.

Wheel, hub, quick release: matching the whole stack
A typical aftermarket setup stacks three parts between your hands and the column:
- Hub adapter: splines to your column, with a bolt pattern on its face.
- Quick release (optional): sits between hub and wheel, useful for track days and tight cockpits.
- Steering wheel: the part you grip.
Each joint needs its own match. The hub’s spline count and diameter must match your car’s column. The hub’s face pattern must match the quick release or wheel. Quick releases built around the common 6x70mm pattern accept wheels in the same pattern, which is why that pattern is so easy to shop around. Check the depth you are adding too. Hub plus quick release plus a deep-dish wheel moves the rim toward your chest, and it also changes how far your hands sit from the column controls.
Questions to answer before you buy
- What is the exact year, make and model of the car, and does the column have a splined shaft?
- Does the car have an airbag, and what is your plan for the horn and airbag warning light?
- Do you want a quick release, and which pattern does it use on each side?
- What diameter and dish depth fit your seat position, and does the wheel clear your gauge cluster and your legs?
We built our steering wheel and quick release hub collection so you can browse by what fits your platform instead of guessing from a spec sheet.
Installing safely: what the bolt pattern doesn’t cover
Getting the pattern right is half the job. Pulling the old wheel off and bolting the new one on is where cars get hurt.
Remove the OEM wheel the right way
Don’t tap the shaft to break the wheel loose. Mechanics and shop manuals agree on this: use a proper puller and keep the puller bolts shallow, because bolts threaded in too deep can hit the clockspring behind the wheel. That page also recommends a simple depth-stop made from jam nuts on the puller bolts. The same Honda service procedure has you set the front wheels straight ahead, disconnect the airbag connector, and loosen the center bolt three turns before pulling.
Puller thread sizes vary with the hub. A standard puller kit ships with adapter screws in 3/8"-16, 5/16"-24, 5/16"-18 and M8-1.25, so match the screw to the threaded holes in your wheel before you start.
Center the clockspring
The most common mistake is installing the wheel with the clockspring (cable reel) off center. Before you pull anything:
- Point the front wheels straight ahead.
- Mark the column shaft and the wheel position with paint or tape so the new wheel sits straight.
- Keep the steering from turning while the wheel is off.
A reel that gets turned out of position can damage the electronics or set SRS fault codes later. If your car has an airbag, read the factory service manual for your exact model first. Disconnecting the battery and waiting before touching airbag parts is common factory guidance, but follow your own manual’s wait time and procedure. If a warning light stays on after you swap parts, our airbag light troubleshooting checks walk through the safe order of operations. For anything involving a live airbag you aren’t sure about, take the car to a qualified technician rather than guessing.
Torque and thread-lock
Use the bolts supplied with the hub or quick release. Torque them evenly in a cross pattern, to the figure in the hub maker’s instructions. Check them again after the first drive and again after your first track session. Vibration finds loose hardware.
Keep the new wheel looking new
Suede and Alcantara rims pick up hand oils fast. Once the install is done, a short care routine pays off. Our suede steering wheel care steps cover the basics, and this walkthrough on restoring an Alcantara steering wheel nap is useful if the surface has already matted.
Our take: pattern first, looks second
The way we see it, a steering wheel is a contact point, not a trim piece. It is the part you touch every second you are driving, and a poor fit shows up in feel long before it shows up in photos.
We sell on fitment detail and technical specs, and we source from established suppliers rather than making parts ourselves. That matters here because wheel shopping goes wrong in a predictable way: someone falls for a rim, then finds out the bolt pattern, hub spline or depth doesn’t work with their column. The fix is boring and works every time. Write down your pattern and spline count first, shop second.
A few habits we’d push every builder toward:
- Measure, don’t assume. A two-minute caliper check is cheaper than a return.
- Buy the stack as a system. Hub, quick release and wheel from compatible patterns, planned together.
- Think about seat time. If you’ll spend hours on track, wheel diameter, grip and reach count for more than a logo.
- Don’t skip the safety steps. The airbag and clockspring are not places to save ten minutes.
If you’re unsure about a combination, that’s the moment to ask before you order.
— Ismael
Shop wheels, hubs and the rest of the build
If you have your pattern and want parts to match, start with our steering wheels and quick release hubs. Building the whole car? Our full catalog covers aero, coilovers, air suspension, lowering springs, intakes and exhaust, all with platform-specific fitment detail.
FAQ
How do I find my steering wheel’s bolt pattern?
Count the holes in the mounting plate, then measure center to center across opposing holes. That figure is the PCD. For odd hole counts, measure adjacent holes and divide by the sine of half the angle between them. Finish by checking the bolt thread size.
Do all aftermarket steering wheels use the same bolt pattern?
No. The 6x70mm pattern is the most common, but 6x74mm and several older 3-, 5- and 6-hole American patterns exist. Even among 70mm wheels, a rotated hole layout can stop a wheel from fitting a standard hub. Always confirm count, diameter, orientation and thread.
Can I use a 6x70mm wheel on a 6x2.75 in hub?
Often yes, because 2.75 in works out to 69.85mm, only 0.15mm smaller than 70mm. Confirm that the bolts thread in without force and that the wheel seats flat. If anything binds, stop and use the correct adapter.
Does the bolt pattern decide if a wheel fits my car?
No. The bolt pattern only connects the wheel to the hub. Your car needs a hub that matches its column splines, and the whole stack has to clear the airbag, horn and column controls. Check the spline count for your model before buying.
What size bolts do I need for a steering wheel puller?
It depends on the threaded holes in your wheel. Common puller kit screws include 3/8"-16, 5/16"-24, 5/16"-18 and M8-1.25. Test the screw by hand first, and keep it shallow so it can’t reach the clockspring.
Sources
- Steering Wheel Bolt Patterns, HGM Electronics
- Steering Wheel Bolt Patterns, Twist Machine Support
- Steering Wheel Bolt Patterns Explained, NLMotoring
- Honda Civic Service Manual: Steering Column Removal and Installation
- Steering Wheel Puller instructions, Eastwood