FREE SHIPPING ON ORDERS OVER $150

Cart
0
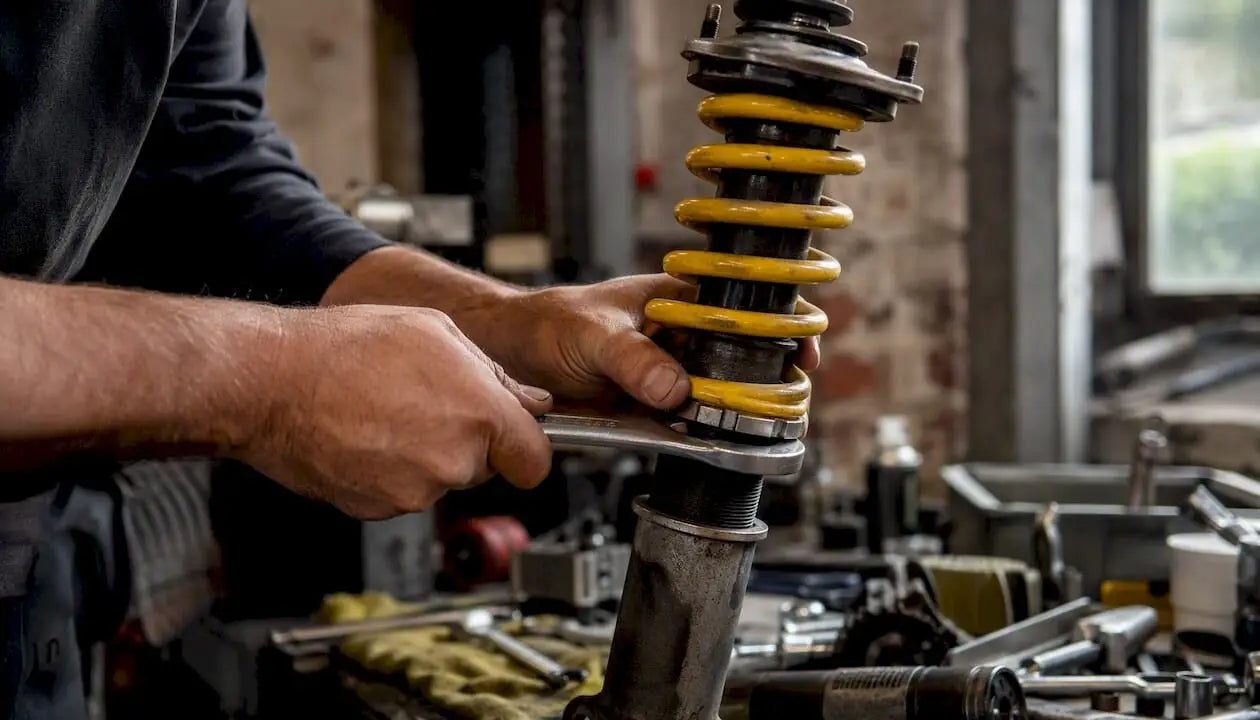
Coilover preload is the amount your spring is compressed when the shock is at full extension — and before you touch a single collar, measure your current installed length and count your exposed threads. That one step saves you from chasing a problem you accidentally created. The most common misconception in the community: preload does not change your spring rate. It changes breakaway force and available droop travel. That’s it.
Key Takeaways
Coilover preload changes breakaway force and available droop travel — it never changes the spring’s lb/in rate, and excessive preload is almost always a sign of the wrong spring, not a tuning solution.
| Point | Details |
|---|---|
| Preload vs. spring rate | Preload adds static breakaway force only; the lb/in rate of a linear spring is unchanged. |
| Measure before you adjust | Record installed length and thread count at full droop before touching any collar. |
| Street preload target | Most street setups need under 10–20 mm; more than that signals the wrong spring free length or rate. |
| Change springs, not preload | If large preload is required to hold ride height, replace springs with the correct rate and free length. |
| Undergrounddynamics suspension | Chassis-specific coilovers and springs with documented fitment data available at the suspension catalog. |
Table of Contents
- What coilover preload actually means
- Does preload change your spring rate or ride height?
- How do you measure preload accurately?
- How to adjust coilover preload step by step
- How much preload is right, and what are the symptoms of getting it wrong?
- A practical workflow for setting preload start to finish
- Common mistakes and how to fix them fast
- Why preload does not change spring rate: the technical explanation
- The street vs. track tradeoff nobody talks about honestly
- Undergrounddynamics has the suspension parts and fitment data you need
- Sources
- FAQ
What coilover preload actually means
Think of your spring sitting on the coilover at full droop. It has a free length — the length it naturally sits at with zero load. Once you install it between the perch and the top hat, the spring may be slightly compressed even before the car’s weight touches it. That compression is your preload.
Key terms worth knowing before you touch anything:
- Free length: The spring’s natural, unloaded length, usually measured in inches or millimeters.
- Installed length: The spring’s length as it sits on the coilover, measured between the spring seats.
- Zero preload: The position where the perch, spring, and top seat all make contact with no tension — the spring is neither compressed nor loose. Per Crawlpedia’s coilover setup guide, this is your baseline reference point.
- Negative preload: The spring has clearance between a seat and the spring end — it can rattle or “flap” at full extension.
- Excessive preload: The spring is compressed well beyond what the car’s weight requires to sit at ride height.
Preload exists because a spring with zero clearance at full droop stays seated and controlled. Without any preload, the spring can separate from a seat at full extension, causing inconsistent ride height and a clunking noise over dips. Most setups run a small amount — just enough to keep the spring from moving around.
Does preload change your spring rate or ride height?
No. A linear-rate spring has a fixed lb/in value regardless of how much you compress it before installation. High Performance Academy confirms that preload only raises the initial breakaway force and shifts where the shock sits in its travel range — the slope of the force-displacement curve stays identical.
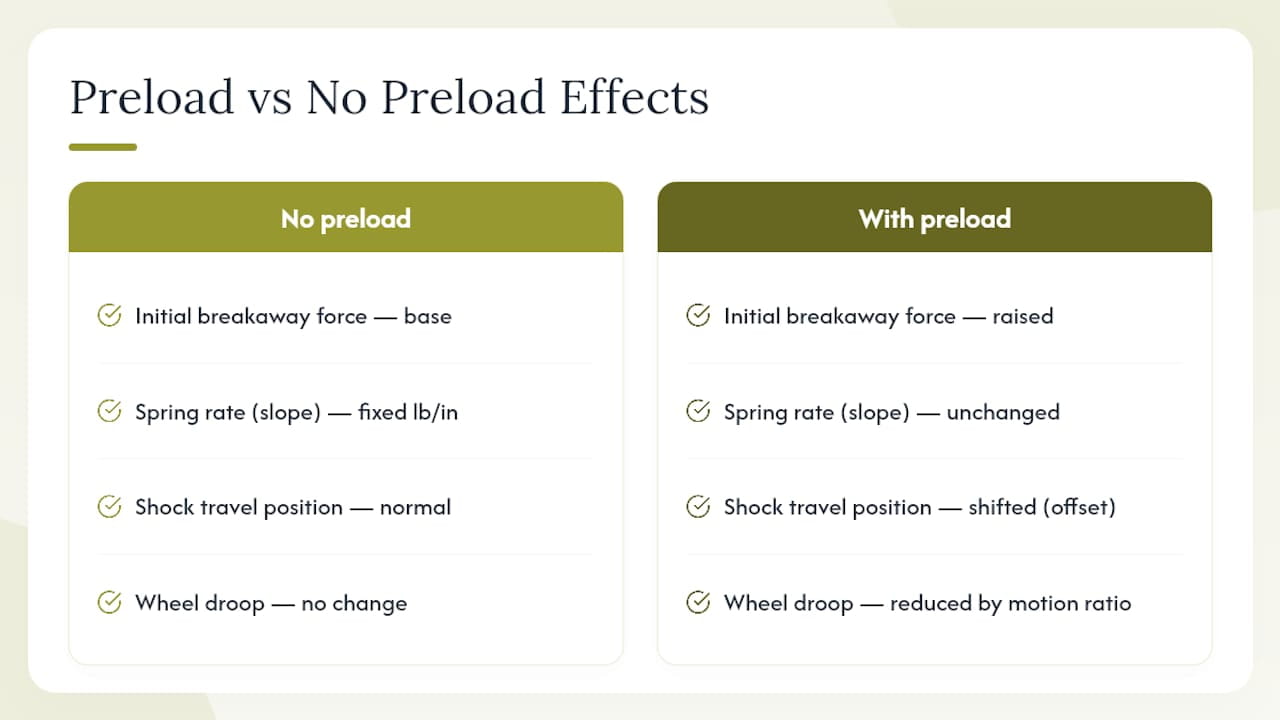
Here’s the practical consequence: if you add 1 inch of preload to a 400 lb/in spring, you’ve added 400 lbs of static force that must be overcome before the spring begins compressing further. The car feels stiffer at small inputs because the suspension resists moving until vehicle weight exceeds that preload value. Once it does, the spring compresses at exactly the same rate as before.
Motion ratio matters here. The motion ratio is the ratio of spring travel to wheel travel. On a typical MacPherson strut, the motion ratio is close to 1:1, so 1 inch of preload translates to roughly 1 inch of reduced droop at the wheel. On a double-wishbone setup with a motion ratio of 0.7, that same 1 inch of spring preload only reduces wheel droop by about 0.7 inches. Always account for your specific geometry.
Ride height is correctly set using the spring perch position or the shock body length — not preload. MotorTrend warns that shortening the shock body to lower a car alters suspension travel and bumpstop geometry, so always adjust perch height first and use preload only to remove spring play.
Pro Tip: If raising the perch to set ride height causes the spring to go loose at full droop, add just enough preload to eliminate the play — typically under 5 mm. That’s the correct use of preload as a fine-tuning tool, not a ride-height device.
How do you measure preload accurately?
Two methods work reliably in a home garage.
Method 1: Installed-length vs. free-length comparison
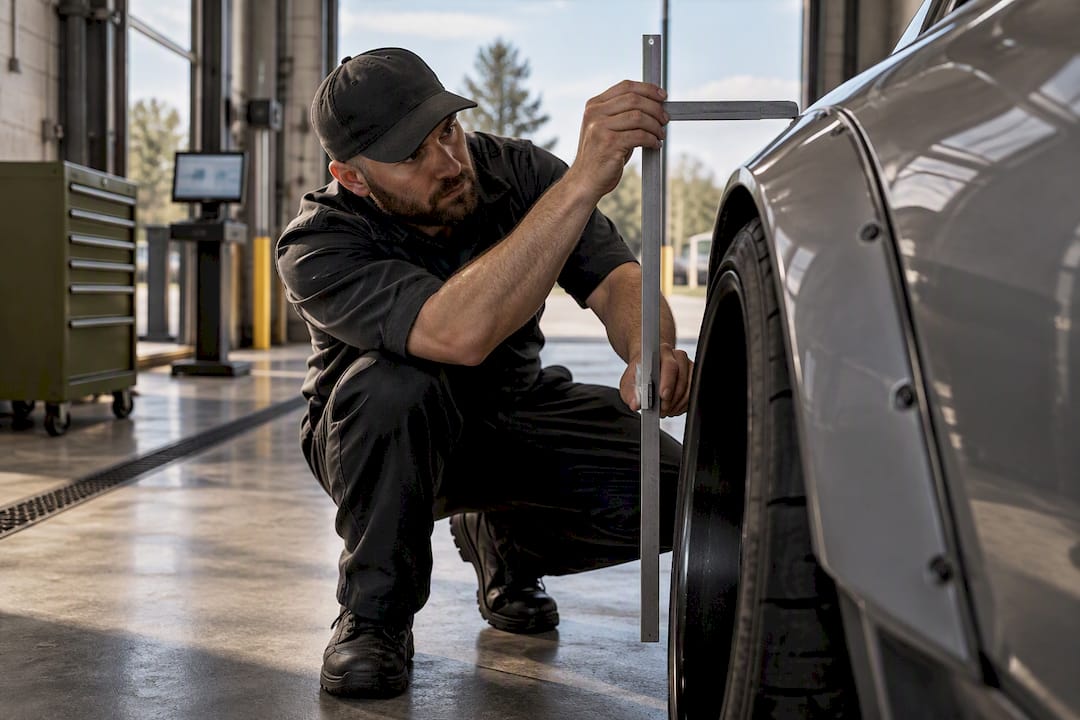
Measure the spring’s free length with a tape measure or digital caliper. Then measure the installed length with the coilover at full extension (car on jack stands, wheel hanging freely). The difference is your preload.
Preload = Free Length − Installed Length
Example: a spring with a 10-inch free length installed at 9.5 inches has 0.5 inches of preload. At 400 lb/in, that’s 200 lbs of breakaway force on that corner.
Method 2: Thread-count reference
Mark the exposed threads above the lower collar with a paint marker before any adjustment. Count the threads showing. AccuTune’s preload guide notes that on most setups, every inch you move the preload nut changes installed preload by roughly one inch — so thread count gives you a consistent, repeatable reference even without pulling the spring.
Tools you need: a digital caliper or tape measure, jack stands, a spanner wrench for the collars, a paint marker or paint pen, and a phone camera to document settings before and after.
How to adjust coilover preload step by step
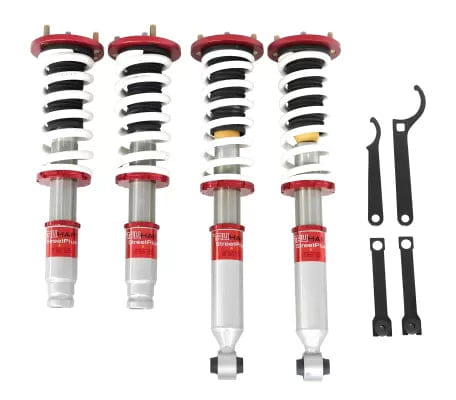
Never adjust preload with the car sitting on its springs. Always work with the suspension at full droop.
Safety first:
- Secure the car on jack stands at the chassis, not the suspension.
- Remove the wheel for clear access to the collars.
- Confirm the shock is fully extended before measuring or turning anything.
Adjustment sequence:
- Document baseline: photograph the collar position, count exposed threads, and record the installed spring length.
- Loosen the jam nut on the lower collar using your spanner wrench.
- Rotate the lower spring perch collar up (to add preload) or down (to reduce it). Each full rotation on most threaded coilovers moves the perch roughly 1–1.5 mm depending on thread pitch.
- Re-measure installed length and compare to your target.
- Snug the jam nut back against the collar — do not overtighten; just lock it in place.
- Reinstall the wheel, lower the car, and let it settle for a minute before measuring ride height.
- Re-check installed length at full droop to confirm the setting held.
For divorced spring/damper setups (common on rear multi-link cars), the spring sits on a separate perch from the damper. The same zero-preload reference applies, but you may need to remove the spring entirely to measure free length. Front setups on strut cars are generally more accessible and easier to measure in place.
Pro Tip: Apply a thin film of anti-seize to the collar threads before adjustment, but keep it off the spring seat contact surface. Dry-threaded collars can gall and seize, especially on aluminum-bodied coilovers.
How much preload is right, and what are the symptoms of getting it wrong?
For most street builds, minimal preload is the target — typically under 10–20 mm. If you’re spinning collars significantly to get the car to sit at ride height, that’s a signal the spring is the wrong free length or rate for your application, not a preload problem to solve.
Symptoms of too much preload:
- Harsh, abrupt feel over small bumps — the suspension resists initial movement until the preload threshold is exceeded, then moves suddenly.
- Reduced droop travel, which hurts traction on uneven surfaces.
- Frequent bumpstop contact on moderate road imperfections.
- The car “tops out” with a clunk when a wheel drops into a dip.
Symptoms of too little preload:
- Spring rattle or clunk at full extension (the spring separates from a seat).
- Inconsistent ride height between sessions.
- Soft, vague initial response before the spring loads up.
MotorTrend’s coilover guide makes the point plainly: using preload to compensate for a soft spring masks the real problem and reduces useful suspension travel. If you need large preload to support the car’s weight, change to a spring with the correct rate and free length. Per Crawlpedia, if springs are fully collapsed at ride height or require several inches of preload to hold the car up, replacement is the right call.
A practical workflow for setting preload start to finish
Follow this sequence every time you touch the collars — whether it’s a street tune or a track prep session.
- Measure and document baseline: record installed spring length, thread count, and ride height at all four corners before loosening anything.
- Set ride height using perches or shock base: get the car to target ride height first. Preload is not a ride-height tool.
- Apply minimal preload to remove play: with the suspension at full droop, add just enough preload so the spring has no free movement between seats.
- Check droop and bump travel: measure available wheel travel in both directions. High Performance Academy recommends targeting roughly 45% bump and 55% droop as a starting point for street cars without aero.
- Verify bumpstop engagement: confirm the bumpstop contacts at the correct point in compression travel, not prematurely.
- Test drive and re-measure: let the car settle over a short drive, then re-check installed lengths and ride height.
- Log final settings: record thread counts and installed lengths. This makes returning to a known baseline trivial after testing.
For track setups, prioritize travel over static ride height. Stiffer spring rates reduce the need for preload entirely, and corner weighting becomes more critical than fine preload adjustments. Check your coilover alignment settings after any significant suspension change.
Common mistakes and how to fix them fast
| Problem | Likely Cause | Quick Fix |
|---|---|---|
| Harsh ride over small bumps | Excessive preload or wrong spring rate | Reduce preload; if ride stays harsh, change springs |
| Spring rattle at full droop | Negative preload (spring loose) | Add preload until spring is seated with no play |
| Car sits lower than target after adjustment | Preload reduced without adjusting perch height | Raise perch to restore ride height, then re-set preload |
| Collar won’t turn smoothly | Dry or corroded threads | Clean threads, apply anti-seize, adjust without load |
| Inconsistent ride height corner to corner | Settings not documented; collars moved unequally | Reset from documented baseline; adjust in equal increments |
Log every change. Write down thread counts and installed lengths before and after each session. AccuTune emphasizes that this habit alone cuts setup time dramatically and makes it easy to return to a known baseline. If you’ve adjusted preload and the ride quality still doesn’t improve, the constraint is almost certainly spring rate, shock valving, or bumpstop design — not preload. Stop turning collars and evaluate those variables instead. A broader look at common tuning pitfalls can help you identify whether the issue sits upstream of the suspension setup entirely.
Pro Tip: Before any track day, photograph all four collar positions and write the installed spring lengths on a piece of tape stuck to the shock body. If something feels wrong mid-session, you have an instant reference without digging through notes.
Why preload does not change spring rate: the technical explanation
This is worth stating precisely because the forum advice gets it wrong constantly.
A linear coil spring follows Hooke’s Law: force equals spring rate multiplied by displacement. The spring rate (lb/in or N/mm) is a physical property of the coil — its wire diameter, coil diameter, number of active coils, and material. Preload does not alter any of those properties.
What preload does, mechanically:
- Adds a static force offset to the spring’s force-displacement curve.
- Raises the minimum force required to begin further compression (breakaway force).
- Shifts the shock’s resting position higher in its travel range, reducing available droop.
The practical implication: a corner with excessive preload acts like a rigid support until the vehicle’s corner weight exceeds the preload force. At that point, the spring compresses normally. This is why a heavily preloaded setup feels stiff on smooth pavement but can still bottom out on a hard hit — the spring rate hasn’t changed, so the suspension still runs out of travel at the same load. MotorTrend and High Performance Academy both identify this as one of the most persistent misconceptions in the enthusiast community. Experienced tuners treat spring rate and free length selection as the primary variables; preload is a small, secondary adjustment used to remove play and fine-tune shock position.
The street vs. track tradeoff nobody talks about honestly
Most street builds I see come into the shop with way too much preload — not because the builder wanted it that way, but because they bought springs that were too short for the shock body and compensated by winding up the collar. The car sits at the right height, but the droop is gone, the ride is punishing, and the builder thinks they need stiffer damping. They don’t. They need longer springs.
The honest recommendation: measure first, always. If your installed preload is more than about 15–20 mm and the car isn’t a dedicated track build on aggressive spring rates, you’re masking a spring selection problem. Change the springs. The short-term inconvenience of sourcing the right free length pays back immediately in ride quality and available travel. Preload is a fine-tuning tool, not a setup shortcut.
Undergrounddynamics has the suspension parts and fitment data you need
Getting preload right starts with having the correct spring rate and free length for your specific chassis. Undergrounddynamics carries a full suspension catalog — coilovers, lowering springs, and supporting hardware — with chassis-specific fitment data so you’re not guessing at spring lengths or rates for your build.

Whether you’re building a street Civic, a track 350Z, or anything in between, the catalog includes documented specs and fitment details for popular enthusiast platforms. Browse the performance parts section to find springs and coilover kits matched to your car, or visit Undergrounddynamics directly for fitment support and catalog navigation.
Sources
- How To Install Coilovers & Adjust Ride Height | High Performance Academy
- Coilovers & What You’ve Gotten Wrong | MotorTrend
- Coilover Setup Guide | How to Install and Set Up Coilovers
- How To Measure & Set Coilover Spring Preload | AccuTune
FAQ
What does coilover preload actually do to your suspension?
Preload increases the initial breakaway force required to begin compressing the spring and reduces available droop travel. It does not change the spring’s lb/in rate.
Is higher preload better for performance?
No. Excessive preload reduces droop travel, causes harsh initial response, and masks an incorrect spring rate. Most setups perform best with minimal preload — just enough to keep the spring seated at full extension.
What happens if you mess with preload on coilovers incorrectly?
Too much preload causes the suspension to resist small inputs, reduces droop, and can cause the car to top out violently over dips. Too little preload allows the spring to rattle or separate from its seat at full extension.
How do you tell if preload is too high?
The clearest signs are a harsh, abrupt ride over small bumps, frequent bumpstop contact on moderate roads, and reduced wheel droop when the suspension hangs freely. Measure installed length against free length — if the difference exceeds 15–20 mm on a street build, reduce preload or change springs.
Should you adjust preload with the car on the ground?
Never adjust preload with the vehicle loaded on the springs. Always work with the suspension at full droop on jack stands, as both Crawlpedia and AccuTune recommend, so measurements are accurate and collars turn freely.
Recommended
- Dialing in Coilover Alignment Settings: A Builder’s Guide – Underground Dynamics
- Honda Civic Coilover Setup: A Complete DIY Guide – Underground Dynamics
- Why Coilover Damping Matters for Faster Lap Times – Underground Dynamics
- What’s in a Full Coilover Kit: Complete 2026 Breakdown – Underground Dynamics