FREE SHIPPING ON ORDERS OVER $150

Cart
0
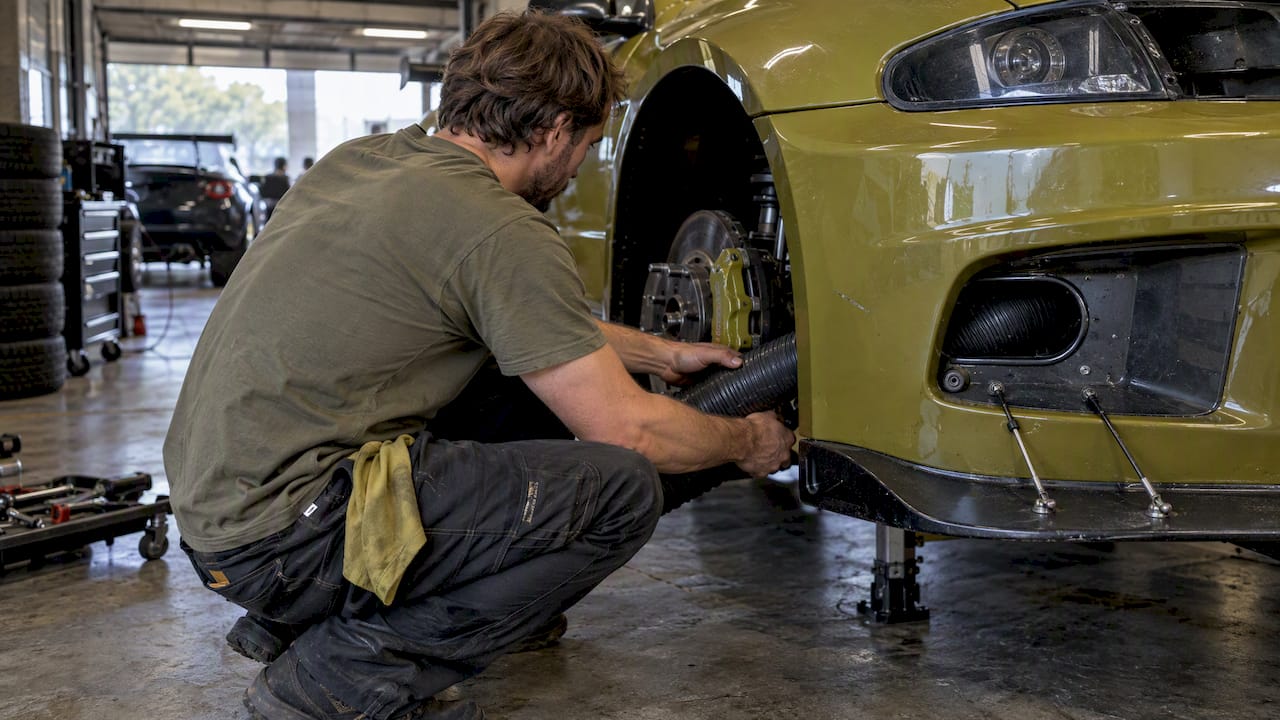
Brake cooling ducts materially reduce rotor and pad temperatures under sustained heavy braking, and for most track and endurance-use cars, they’re worth adding. The payoff shows up as less fade, more consistent pedal feel, and often longer pad and rotor life. The one caveat: packaging limits on some chassis mean you’ll want a fan to help move air at low speeds, especially in closed-nose cars.
TL;DR:
- Before installing ducts, confirm pads, fluid, and rotors suit the workload; cooling cannot compensate for tired pads, boiled fluid, or undersized hardware.
- Choose an inlet in a high pressure zone without starving the radiator or oil cooler, then size hose around wheel well clearance.
- Closed nose cars and pit or traffic use need a fan or sealed flange because ram air weakens at low speeds.
- Vehicle specific kits usually simplify fitment, but check hose clearance through full steering lock and suspension travel before track use.
Table of Contents
- What brake cooling ducts are and how they work
- Common duct types, components, and typical specs
- DIY vs. bolt-on kits: installation basics
- How to choose brake cooling ducts for your car: a checklist
- What CFD and engineering research say about duct performance
- Compatibility across different vehicle models and chassis
- Integration with existing aero packages and body kits
- Maintenance and durability of brake cooling ducts
- How ducting affects overall performance and safety
- Where ducting fits in a prioritized upgrade path
- A practical way to get your front-end airflow right
- FAQ
- Sources
What brake cooling ducts are and how they work
A brake cooling duct system is just a path for cold air: capture it at the front of the car, pipe it to the brake, and let it do its job. The basic setup has four parts.
- Inlet scoop: a molded or 3D-printed opening in the bumper or fascia that grabs air from a high-pressure zone.
- Duct hose: flexible or semi-rigid tubing that routes air from the scoop back to the wheel.
- Spindle or outlet duct: a backing-plate style fitting that aims the airflow directly at the rotor hat or hub.
- Fan or blower: an optional powered unit that keeps air moving when ram-air pressure drops off, like in the pits or at low speed.
The mechanism is forced convection: pushing fresh air across a hot rotor pulls heat away faster than still air ever could. Where ducting struggles is packaging. Bumper apertures are small, wheel wells are crowded with suspension arms and tie rods, and steering angle changes the geometry every time you turn the wheel, as noted in CFD work on steering angle and wheel-well effects.
Common duct types, components, and typical specs
Most buyers choose between two routes: a universal kit built from generic parts, or a vehicle-specific kit with a molded scoop designed for one chassis.
- Universal kits: flexible hose, generic flanges, and a backing plate you adapt yourself, usually the cheapest option.
- Vehicle-specific kits: a scoop shaped to match your bumper’s exact cutout, which saves fitment headaches but costs more.
- Hose: commonly sold in 2 inch and 3 inch diameters, in silicone or aluminized materials rated for sustained high heat near the rotor.
- Hardware: flanges, worm-gear clamps, and mounting brackets that keep the duct sealed and in place under vibration.
- Fans: add-on blowers for cars with limited front-end airflow, often paired with a sealed flange for maximum effect.
Vendor pages typically advertise 2 inch and 3 inch hose as the standard sizing, with high-temp hose and brake fans marketed specifically toward low-speed or closed-nose applications.
DIY vs. bolt-on kits: installation basics
Installing ducting isn’t complicated, but it does take some patience with fitment. Here’s the general sequence most installs follow.
- Remove the front bumper or fascia to access the inside of the nose.
- Mark a scoop location that lines up with a high-pressure intake zone, not a low-pressure recess.
- Cut or install the molded scoop into the bumper.
- Route the duct hose back toward the wheel, keeping clear of steering and suspension travel.
- Attach the spindle or outlet duct to the backing plate or hub, aiming airflow at the rotor hat.
- Clamp and seal every joint to stop air from leaking out before it reaches the brake.
- Reinstall the bumper and cycle the steering lock-to-lock to check for rubbing or pinching.
- Test drive, then recheck clamps and brackets after the first few hard stops.
The most common fitment issues are steering clearance (the hose pinches at full lock) and suspension travel (the duct fouls at full compression). Both are worth checking before you ever hit the track.
Pro Tip: If your car spends real time in the pits or crawling in traffic between sessions, add a fan. Ram-air alone disappears the moment your speed drops.
How to choose brake cooling ducts for your car: a checklist
Picking the right setup starts with being honest about how you actually use the car.
- Match the system to your use case: HPDE days need less airflow than endurance racing, where sustained heat buildup is the real enemy.
- Pick an inlet location in a genuine high-pressure zone, without stealing air meant for the radiator or oil cooler.
- Choose hose diameter based on run length: 3 inch hose moves more air but takes up more room; 2 inch is easier to route in tight wheel wells.
- Check the material’s temperature rating. Silicone and aluminized hose both tolerate sustained heat better than generic rubber tubing.
- Prioritize sealing hardware. A loose clamp or gap at the flange bleeds off airflow before it ever reaches the rotor.
- Add a fan or sealed flange when your car runs a closed or low nose, where ram-air pressure is naturally weak.
None of this needs to be perfect on the first try, but getting the inlet placement right matters more than any other single decision. A duct that captures air from a low-pressure recess will underperform no matter how good the hose is, a point echoed in coverage of how modern bumper packaging limits airflow to the brakes.
What CFD and engineering research say about duct performance
The research backs up what track veterans already assumed: airflow velocity is the single biggest driver of cooling performance, and it comes with trade-offs.
Reported duct temperature drops exceeding a substantial margin and heat-transfer coefficients in a typical range showing meaningful cooling performance appear in CFD modeling of forced-air duct cooling systems, depending on duct geometry and inlet velocity. That’s a meaningful swing in cooling capacity just from how fast air moves through the duct.
The catch is pressure drop. Pushing air faster through a duct cools better, but it also increases aerodynamic loss along the way, so you can’t just chase maximum velocity without a cost elsewhere. Steering angle changes the geometry too, shifting local cooling performance as the wheel turns.

Rotor design plays into this as well. Research on guided-pathway rotor geometry found that vaned or drilled rotor features can move more air through the rotor itself, meaning some rotor designs get a bigger benefit from added ducting than others. Ducting isn’t a universal multiplier, it interacts with what’s already spinning behind the wheel.
Compatibility across different vehicle models and chassis
Fitment is where brake ducting gets personal to your specific car. Bumper shape, wheel size, suspension type, and even brake caliper size all change what scoop and hose routing will actually work.
Cars with large factory brake cooling inlets, common on sport coupes and some sedans, give you a head start because the bumper already has a path carved out. Cars with smaller, more decorative bumper openings need more cutting and a molded scoop to create a usable inlet without compromising the rest of the fascia.
Suspension geometry matters just as much. A double-wishbone front end gives more room to route hose cleanly than a strut-based setup where the shock body and tie rod end crowd the space. Wheel size also affects how much room exists for a spindle duct behind the rotor, smaller wheels on some chassis leave less clearance for a backing plate and ducting hardware.
This is why vehicle-specific kits tend to fit better out of the box than universal parts bent to match. A kit designed around your exact chassis accounts for where the subframe, sway bar, and steering rack sit, so you spend less time trimming and more time driving. If you’re building a car with a less common bumper or widebody setup, expect to do some custom scoop work regardless of which kit you start from.
Integration with existing aero packages and body kits
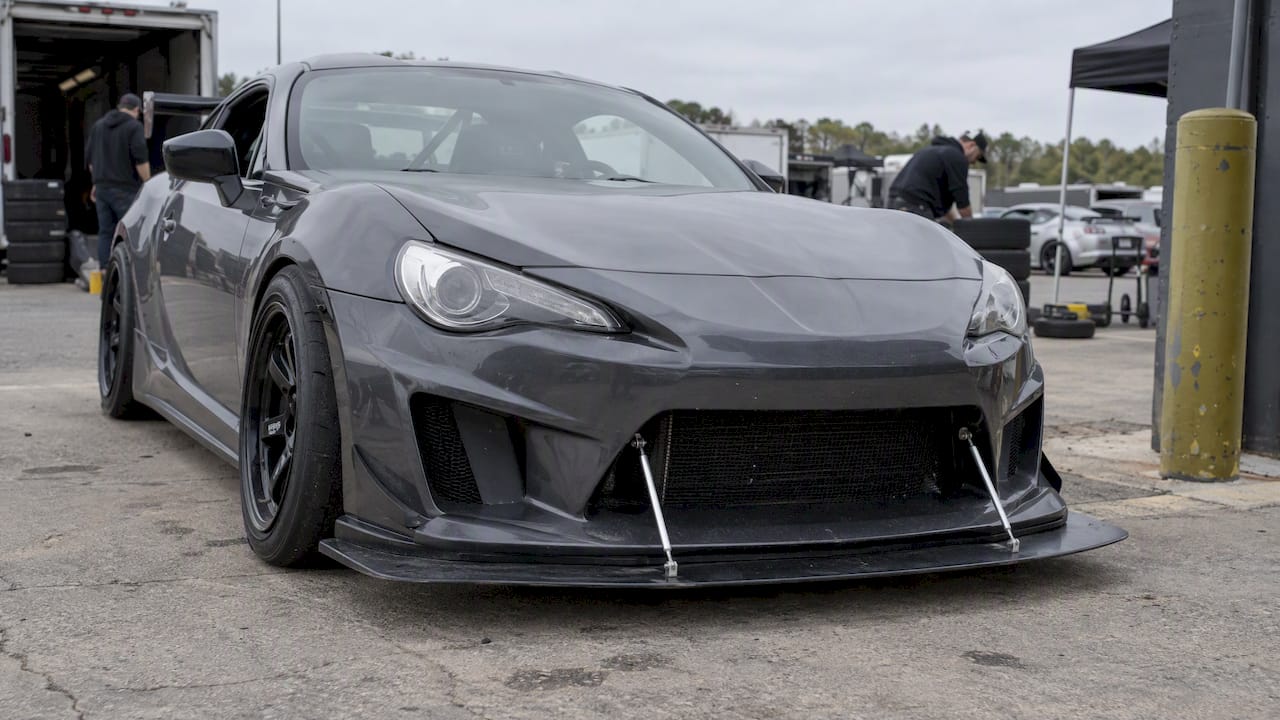
Brake ducting doesn’t exist in isolation. The front bumper is already doing a job, feeding the radiator, managing underbody pressure, and in some builds, generating downforce, so a new duct inlet has to share real estate with everything else up front.
Splitters, canards, and front lips change the pressure distribution across the nose, which can actually help duct performance if the inlet sits in a zone the aero piece is pressurizing. The flip side is that a poorly placed duct inlet can rob air from a splitter’s underside flow or interfere with how a lip channels air toward the sides of the car. Coordinating ducting with existing aero means mapping out where high and low pressure zones sit on your specific bumper, not just cutting wherever there’s open space.
Underbody components matter here too. Side skirts that seal the underbody help maintain the pressure differential that makes front splitters work, and that same airflow management affects how much air is actually available at the brake duct inlet. Builders running side skirt aerodynamics alongside a rear diffuser are already managing underbody flow end to end, and ducting should fit into that plan rather than compete with it. The goal is a front end where every opening, from the radiator to the brake inlet to the splitter, is pulling from a zone that actually has pressure to give.

Maintenance and durability of brake cooling ducts
Ducting is mostly maintenance-free, but it’s not zero-maintenance. The parts most likely to fail are the ones taking vibration and heat cycling every session.
Hose clamps loosen over time, especially after repeated heat cycles near the rotor. Check them at the same interval you check lug torque, before every track day if you can. Flexible hose can crack or soften where it sits closest to the hot spindle duct, so inspect for cracking, melting, or collapsed sections at least once a season if you’re running regularly.
Scoops and inlet hardware take road debris and curb strikes, particularly on lower-splitter builds. A cracked scoop still moves some air, but a chunk missing from the flange means you’re leaking cooling capacity you paid for. Rotor and pad wear doesn’t change because you added ducting, but ducts that are actually working should mean less brake fade and potentially slower wear, so a sudden drop in pad life is worth investigating as a possible airflow problem rather than just a pad quality issue. If you haven’t already gone through a basic brake hardware and pad shim check, that’s a good companion maintenance step alongside duct inspection.
How ducting affects overall performance and safety
The performance case for brake cooling ducts is straightforward: cooler rotors and pads resist fade longer under sustained heavy braking, which means more consistent stopping distances lap after lap or corner after corner in an endurance stint. That consistency is the real safety benefit, a driver who can trust the pedal on lap 40 the same way they trusted it on lap 2 is a driver less likely to overshoot a braking zone.
High-performance motorsport programs treat this as a tuning problem, not just a maximum-cooling problem. Formula 1 teams size brake intakes and use CFD to keep discs in an optimal temperature window rather than simply pushing as much air as possible, because discs that run too cold can underperform just as discs that run too hot can fade. For most enthusiast and club-racing applications, that level of precision tuning isn’t necessary, but the principle holds: more airflow helps up to a point, and matching duct size to your actual brake heat load matters more than installing the biggest scoop you can find.
The aerodynamic trade-off is part of the safety picture too. Every inlet you open at the front of the car adds some drag, so a duct sized for endurance-level heat on a car that only sees HPDE lapping is adding aerodynamic penalty without a matching benefit.
Where ducting fits in a prioritized upgrade path
Before you cut a bumper for ducting, check pads, fluid, and rotor condition. A tired pad compound or boiled fluid will fade before airflow becomes the limiting factor, and no duct fixes that.
Once your baseline hardware is solid, ducting is one of the highest-impact upgrades available for endurance and repeat-session track driving, and it pairs naturally with underbody aero work rather than competing with it. A fitment-minded approach to the surrounding aero parts, like the kind we build our catalog around, makes that pairing easier to get right the first time.
— Ismael
A practical way to get your front-end airflow right
Fitment is a common issue with ducting. With chassis-specific specs, you can avoid guessing whether a scoop, intake, or front piece will clear your suspension and steering before purchase.
A few categories pair naturally with a duct install:
- Air intakes: improve front-end airflow management, which affects how much cold air is available near the nose in the first place.
- Body kits and front fascia components: chassis-specific fitment data means fewer surprises when you’re cutting for a scoop location.
- Suspension parts like coilovers: ride height changes wheel-well geometry, which is worth planning for before you finalize duct routing.
If you’re mapping out a front-end airflow project that includes ducting, our air intake collection is a reasonable place to start, or browse our full collection index for chassis-specific parts. Reach out through Undergrounddynamics if you need help confirming fitment for your build.
FAQ
Are brake cooling ducts worth it?
For track days, endurance racing, or heavy street use, yes, they reduce rotor and pad temperatures and help prevent fade under sustained heavy braking. For light street driving without repeated hard stops, the benefit is much smaller and may not justify the install effort.
What are brake cooling ducts?
They’re a system of inlet scoops, duct hose, and spindle or outlet ducts that capture ambient air and route it directly to the brake rotor to increase convective cooling. Some setups add a fan for cars where ram-air pressure alone isn’t enough at low speed.
What is the best way to cool down my brakes?
Start with properly rated pads and fluid for your use case, since no duct compensates for undersized hardware. From there, a well-placed cooling duct that captures air from a genuine high-pressure zone, as described in brake cooling research, is the next most effective step.
Do I need brake ducts on my track car?
If you’re doing repeated sessions, endurance stints, or anything with sustained hard braking, ducting is one of the higher-impact upgrades you can add. For occasional light lapping, you may get by without it, but any car doing back-to-back hard stops benefits from the added airflow.
Sources
- Design and Numerical Evaluation of a Forced-Air Duct Cooling System for the Thermal Management of Brake Discs in a Heavy-Duty Van | IIETA
- Brake Cooling and Automotive Design - The BRAKE Report
- Design improvement of disc brake with guided pathways for better air-flow (IJERT)
- Ventilation of carbon brake discs in F1 — Brembo