FREE SHIPPING ON ORDERS OVER $150

Cart
0
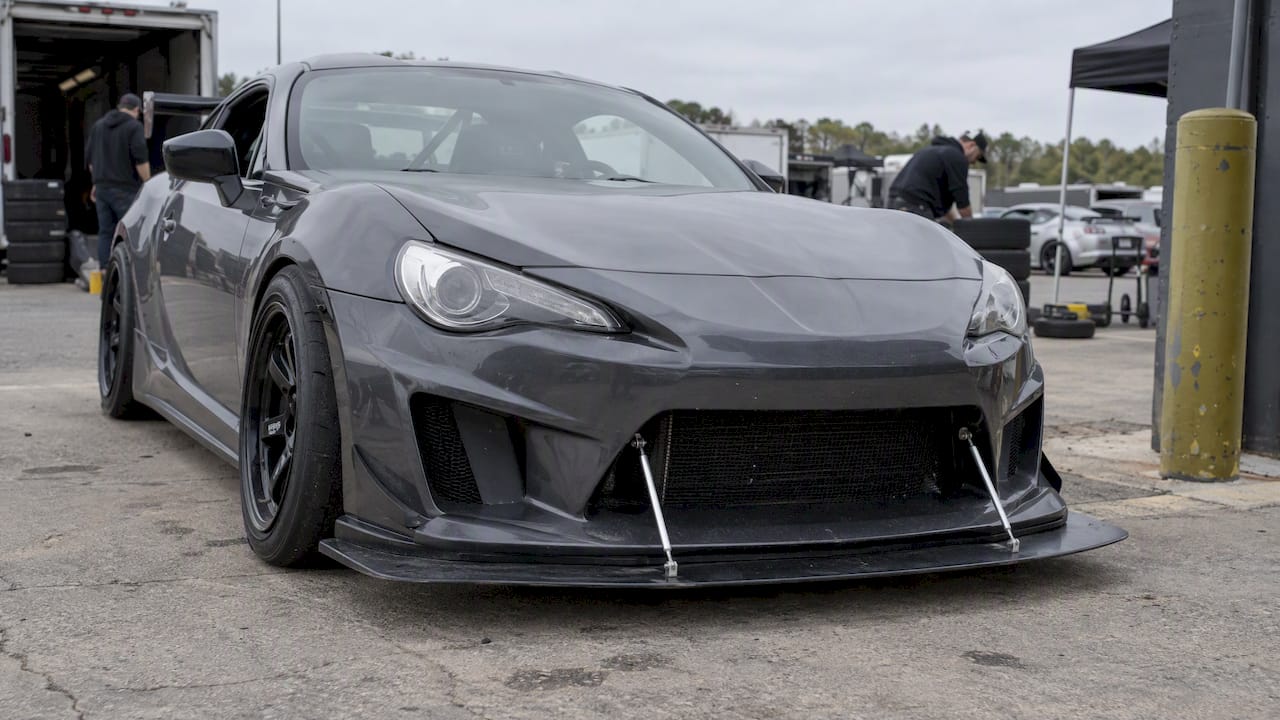
Splitter support rods stabilize your front splitter against airflow and road impacts, cutting down flutter at speed and keeping the blade from tearing loose on a curb strike or driveway lip. They come in a handful of distinct types, and getting the wrong length or attachment style means a splitter that still bounces or drags. We’ll walk through the common configurations, what to check before you buy, how to measure for your car, and a checklist to make sure your order shows up complete.
TL;DR:
- Choose adjustable rods for mixed street and track use, compressible rods for impact travel, fixed rods for track cars, or cable tiebacks for quick removal.
- Measure from the chassis mount to the splitter clevis with the bumper installed, check both sides separately, and allow for ride height and suspension travel.
- Confirm M8 thread compatibility and lower attachment style before ordering, because rods, clevises, and mounting hardware may be sold separately.
- Inspect fasteners, pins, and rods for corrosion or damage every few months or after an impact; replace any fiber rod showing delamination.
Table of Contents
- 1. Common rod types and which setup fits your car
- 2. What to look for: materials, hardware, and strength
- 3. Sizing, fitment, and measuring the right length
- 4. Installation essentials and mounting methods
- 5. Inspection, maintenance, and troubleshooting
- 6. Buying checklist: what to order and extras to budget for
- 6. How Underground Dynamics presents splitter hardware and fitment detail
- 7. A builder’s rule of thumb for choosing rods
- 8. Where to buy splitter hardware and fitment support
- FAQ
- Sources
1. Common rod types and which setup fits your car
Most builds land on one of four approaches, and picking the right one comes down to how you actually drive the car.
Adjustable threaded rods use a turnbuckle-style design so you can fine-tune splitter angle and ride height without pulling the bumper. They’re the pick for street cars that see occasional track days, since you can stiffen up for a session and back off for speed bumps the next morning. Compressible rods add a spring or elastomer element that lets the splitter move a controlled amount under impact, which protects the blade when you clip a steep driveway. Fixed-length rods skip the moving parts entirely: they’re stiffer, lighter, and common on dedicated track cars where ride height never changes. Cable or tieback setups, often paired with a quick-release bracket, trade some rigidity for fast removal before an event.
- Adjustable rods: best for mixed street and track use, tunable on the fly.
- Compressible rods: controlled vertical travel for impact protection.
- Fixed rods: stiffer and lighter, suited to track-only setups.
- Cable/tieback with quick-release brackets: fast removal, less precise geometry control.
A typical kit includes the rods themselves, clevises or end tabs, and the hardware to mount both ends.
2. What to look for: materials, hardware, and strength
Rod material drives both weight and stiffness. Carbon fiber and hybrid aluminum rods shave weight and resist flex better under aero load, while steel rods cost less but add unsprung-adjacent mass you’ll notice less in a straight line and more in how the splitter holds its angle at speed. End fittings matter just as much as the rod itself.
- Clevis and end fittings: stainless steel resists corrosion better than plated steel over a season of road salt or track moisture.
- Threading: M8 is the most common pitch on aftermarket rods, so confirm it matches your bracket before ordering.
- Attachment pins: cotter pins are cheap and secure but slower to service; quick-release pins cost more and let you pull the splitter in seconds.
- Fastener grade: look for corrosion-resistant hardware rated for outdoor and track exposure, not generic hardware-store bolts.
Pro Tip: Check whether a listing states a compressible travel range or a rigid load rating; the two numbers tell you completely different things about how the rod behaves under impact.
Research into splitter aerodynamics backs up why this matters beyond durability. CFD studies on splitter placement show that splitter effectiveness depends heavily on angle and ground clearance, so a rod that lets the blade sag or twist under load is quietly costing you the downforce you installed the splitter for in the first place.
3. Sizing, fitment, and measuring the right length
Getting length right is the single most common mistake buyers make, and it’s avoidable with a tape measure and a few minutes under the car.
- Measure from the upper chassis mounting point to the lower splitter clevis with the bumper fully installed, not removed.
- Account for your actual ride height and any expected suspension travel so the rod doesn’t bind at full compression.
- Measure both sides independently. Many bumpers aren’t perfectly symmetrical once body gaps and prior repairs are factored in.
- Check stock lengths against your measurement. Common options come in small, medium, and large lengths, and several suppliers offer cut-to-length or trimmable rods.
- Confirm thread pitch and clevis finish before you finalize the order so the rod actually threads into your bracket on arrival.
Recent wind-tunnel-validated research on front aero devices reinforces why these details matter: installation geometry and mounting rigidity measurably affect downforce and drag, even when the component itself doesn’t change.
4. Installation essentials and mounting methods
Upper mounting usually goes one of two ways: threading into an existing chassis point, or bolting a bracket to sheet metal where no factory point exists. Vehicle-specific kits differ here, which is why a bracket made for one platform rarely bolts straight onto another without modification.
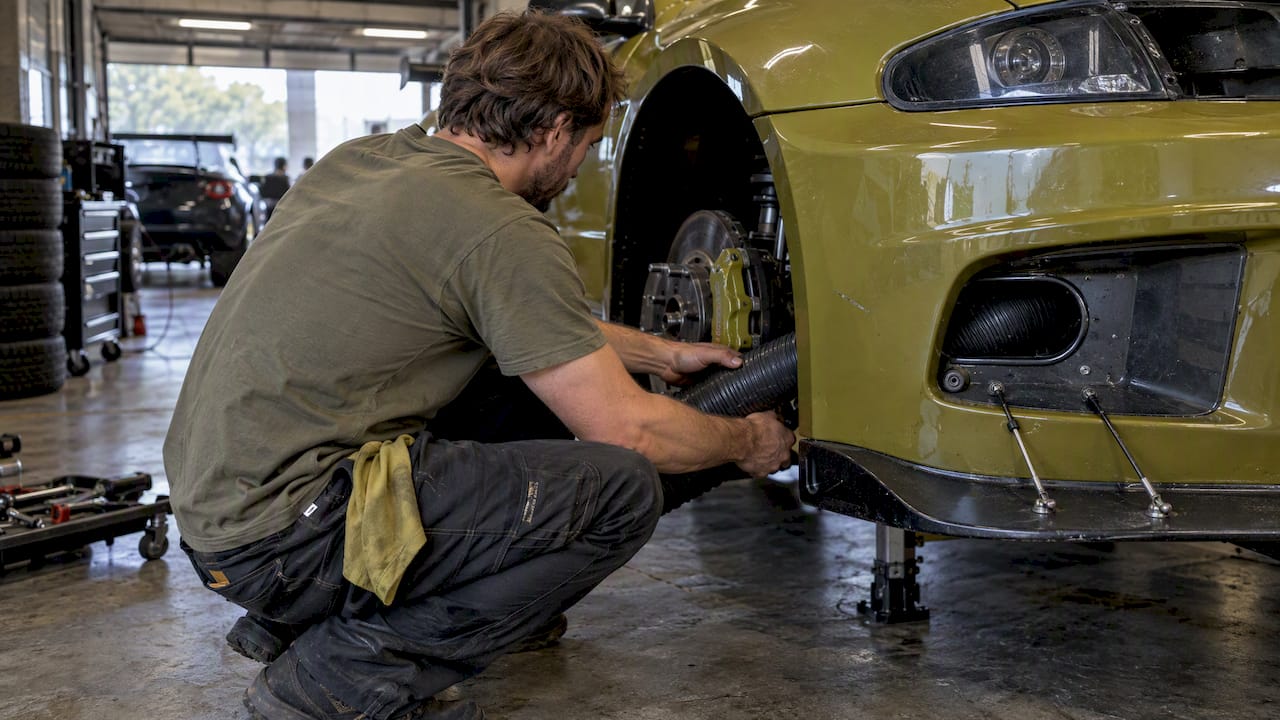
Lower attachment to the splitter itself varies by design. Elevator bolts spread load across a wider washer and work well on fiberglass blades, titanium pucks save weight on high-end setups, and some splitters use a welded clevis that skips separate hardware entirely. A few lightweight splitters run with no lower hardware at all, relying on the rod’s upper mount and the splitter’s own rigidity.
- Set pre-load evenly and check left-right symmetry before snugging everything down.
- Use quick-release pins if you expect to remove the splitter often for events or storage.
- Torque fasteners to spec rather than by feel, especially on carbon fiber mounting points.
- Expect some bumper trimming or an added bracket on cars without a factory mounting provision.
A vehicle-specific install guide for A90 Supra quick-release brackets documents this well, walking through symmetry checks with a tape measure and noting that extra support hardware is sometimes needed depending on bumper design.
5. Inspection, maintenance, and troubleshooting
Rods are low-maintenance but not maintenance-free. Check fastener torque, clevis pin wear, and any sign of fiber delamination or corrosion on plated surfaces every few months or after a hard impact.
- Fluttering splitter at speed: tighten pre-load or switch from a cable tieback to a rigid rod.
- Binding or grinding under compression: the rod is too short or isn’t accounting for suspension travel.
- Splitter bottoming out: raise ride height slightly or confirm the rod allows enough travel.
Pro Tip: A rod with surface corrosion on the threads but no structural pitting can usually be cleaned and reused; one with visible fiber delamination should be replaced outright, not patched.
6. Buying checklist: what to order and extras to budget for
A complete order avoids a second shipping wait when you’re halfway through an install.
- Confirm exact rod length, thread pitch (M8 is common), and which lower attachment style your splitter uses.
- Check what the kit actually includes: rods, clevises, and mounting hardware aren’t always bundled together.
- Add spare clevises, cotter pins, lock washers, and thread locker to your cart since these wear out or get lost during service.
- Pick up anti-seize for any dissimilar-metal fastener combination, like stainless hardware into an aluminum bracket.
- Read the product page’s vehicle-specific fitment notes before checkout to confirm bracket compatibility with your exact bumper.
If your splitter or body panels are a significant investment, it’s also worth looking at exterior protection upgrades once the install is done, since finish protection extends the life of carbon fiber and painted panels that take the brunt of road debris.
6. How Underground Dynamics presents splitter hardware and fitment detail
The catalog is built around platform-specific fitment data rather than generic listings, so rod length, clevis finish, and attachment options are laid out on each product page before you check out. It features carbon fiber and fiberglass parts sourced from established suppliers, and when a fitment detail isn’t clear for your exact build, support can help confirm compatibility before you order.

7. A builder’s rule of thumb for choosing rods
If you’re building a street car that sees the occasional track day, we’d point you toward adjustable threaded rods first. They let you dial in splitter angle without committing to a single ride height, and they forgive the small measurement errors that happen on a first install. One habit worth adopting: measure both sides with the car level and the bumper on, then write the numbers down before you order, because a quarter-inch difference side to side is enough to throw off symmetry you’ll notice every time you look at the front end. See our catalog fitment notes for the kind of detail we mean.
— Ismael
8. Where to buy splitter hardware and fitment support
Splitter support rods and related hardware are listed with platform-specific fitment notes, carbon fiber and fiberglass options, and clear attachment details so you can order once and install without guesswork.
Browse our Body Kits, Fenders & Flares, and Spoiler & Body Panels catalog to find hardware matched to your build.
FAQ
What is the point of splitter rods?
Splitter support rods hold the front splitter at a consistent angle and height, which keeps it from flexing, fluttering at speed, or tearing off during a curb or driveway impact. They connect the splitter’s leading edge to the chassis, turning a floppy panel into a rigid aero component.
Do front splitters increase drag?
Front splitters are designed primarily to generate front-end downforce, and their effect on drag depends on placement, angle, and ground clearance rather than the splitter alone. CFD research on splitter positioning shows that small changes in geometry can shift the balance between downforce gained and drag added.
How to attach a splitter?
Splitters typically attach at the top through existing chassis points or bolt-on brackets, and at the bottom through elevator bolts, titanium pucks, or a welded clevis, depending on the design. Support rods connect the two points to hold the splitter rigid under airflow and impact loads.
What is the point of a splitter on a car?
A splitter creates a pressure difference between the air above and below the front end, generating downforce that helps plant the front tires at speed. Support rods keep that geometry consistent so the splitter performs the way it was designed to, rather than flexing and losing effectiveness under load.