FREE SHIPPING ON ORDERS OVER $150

Cart
0
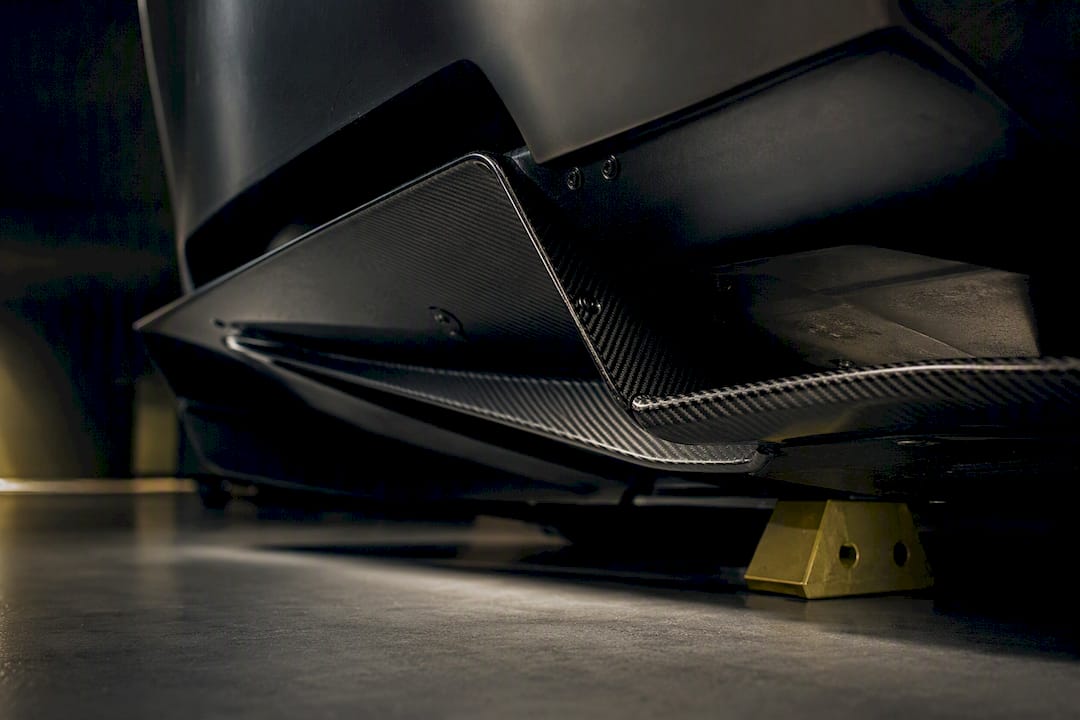
Yes, a properly designed and integrated rear diffuser can measurably increase rear downforce and often reduce wake drag, improving high-speed stability. That “properly designed and integrated” part is doing a lot of work in that sentence. A diffuser needs low ride height, a clean underbody, and the correct ramp geometry to actually earn its keep. Skip those, and you’re bolting on a shelf. The next sections cover the how and why.
TL;DR:
- A diffuser’s effectiveness depends heavily on low ride height, a smooth underbody, and proper ramp geometry to prevent flow separation and turbulence.
- Properly designed diffusers can reduce drag by over 10 percent on sedans and increase downforce dramatically, especially with skirted, sealed setups.
- Triggered by the whole underbody system, diffuser performance varies based on ride height, sealing, and body shape, making precise fitment and proper installation crucial.
- The main benefits include enhanced cornering grip and stability, with some drag reduction, but a diffuser’s true value comes with a clean, sealed underbody and correct setup.
- Material choices like carbon fiber or fiberglass impact diffuser stiffness, with genuine parts specifically engineered for particular chassis delivering the best aerodynamic results.
Table of Contents
- What Rear Diffuser Benefits Actually Come From
- Downforce, Drag, and Stability: What the Research Shows
- Diffuser Geometry: Ramp Angle, Length, and Endplates
- Why Your Whole Underbody Determines Diffuser Performance
- How to Tell a Functional Diffuser From a Cosmetic One
- Installing and Validating Your Rear Diffuser
- Underground Dynamics’ Approach to Underbody Aero
- Should You Buy a Rear Diffuser for Your Build?
- What the Data Actually Tells Builders
- Get a Diffuser That’s Built for Your Chassis, Not a Universal Shelf Part
- Sources
- FAQ
What Rear Diffuser Benefits Actually Come From
A diffuser doesn’t create downforce out of nowhere. It works by managing air that’s already moving under your car, and the physics are closer to a garden hose nozzle than most people assume.
Air entering the front of the car and traveling underneath gets squeezed into a shallow gap between the underbody and the road. That gap acts as a throat, similar to the narrow part of a venturi tube. Squeeze a fluid through a smaller opening and it has to speed up to keep the same volume moving through. Speed up the air and, per basic Bernoulli principles, its pressure drops. Lower pressure under the car versus higher pressure on top is what generates downforce, no wing required.
Here’s where the diffuser actually does its job: at the rear of the car, that low-pressure air has to slow back down and rejoin the slower-moving air in the car’s wake. A diffuser’s upward-angled ramp gives that acceleration a controlled path to decelerate gradually, called pressure recovery. Racecar-engineering analyses describe this expansion chamber effect as the core mechanism that separates a functional diffuser from a flat rear fascia, because it lets the low-pressure zone extend further under the car before the air has to slow down.
Without a ramp, that transition happens instantly and violently right at the bumper. That abrupt pressure change creates a wide, turbulent wake, which is just drag with a different name. A gradual ramp angle spreads the pressure recovery over distance instead of over an instant, which is the entire reason a diffuser’s shape matters more than its size.
Flow separation is the failure mode to understand here. If the ramp angle is too steep, the air can’t follow the diffuser’s surface anymore. It detaches, tumbles, and stops doing useful work. At that point, you’ve built a very expensive turbulence generator.
The mechanism breaks down into three stages:
- Acceleration — air compresses into the underbody throat and speeds up, dropping pressure and creating downforce.
- Pressure recovery — the diffuser ramp lets that fast, low-pressure air decelerate gradually as it exits.
- Wake management — a smoother pressure recovery produces a narrower, less turbulent wake, which is where drag reduction comes from.
Comparative testing backs this up directly. In one aerodynamic aid study, a diffuser-equipped setup produced a drag coefficient of 0.3248, compared with 0.3439 for a bare baseline body and 0.4023 for a rear spoiler alone. The diffuser configuration beat both the unmodified car and the wing on drag, while still adding downforce. That’s the case for why a diffuser is often a smarter first aero investment than a static wing on the same car.
Downforce, Drag, and Stability: What the Research Shows
The honest answer to “does a diffuser make a car faster” is: it depends heavily on angle and ride height, but the directional evidence is strong. SAE Mobilus research on underbody diffuser designs confirms that a properly shaped diffuser reduces aerodynamic drag and converts lift into negative pressure, with a measurable gap between a poorly angled unit and an optimized one.
Sedan-body studies published through SAE found drag reduction potential of roughly 10% on sedan shapes, versus only 2 to 3% on wagon bodies fitted with a comparable diffuser design. Body shape upstream of the diffuser changes how much benefit the diffuser itself can extract, which is why the same diffuser bolted to two different chassis platforms can produce noticeably different results.
The real headline number, though, comes from work on skirted venturi-style underbodies. A study out of UPC (Universitat Politècnica de Catalunya) modeling sealed, skirted diffuser configurations found downforce coefficient gains of up to 1780% versus a flat-underfloor baseline. That’s not a typo, and it’s not a number you should expect on a street car. It’s a demonstration of just how much underbody sealing changes the equation. A diffuser with skirts that actually seal the sides behaves like an entirely different device than the same diffuser with air leaking in from the fenders.
Why the numbers vary so much:
- Diffuser response to ramp angle is non-linear, not a straight line you can extrapolate from one data point.
- Ride height changes the throat height, which changes flow velocity, which changes pressure, which changes downforce, all in a tight feedback loop.
- Sealing (or lack of it) at the sides can swing results by an order of magnitude, as the UPC skirted-configuration data shows.
- Body style, front-end management, and exhaust routing all shift where the “sweet spot” angle actually sits for a given car.
That non-linearity is the reason two nearly identical diffusers on two nearly identical cars can perform very differently. A half-inch of ride height, or a poorly sealed fender liner, can be the difference between a diffuser that works and one that’s decorative.
What this means for actual driving. More rear downforce loads the rear tires harder in a corner, which raises available grip at the back axle. For a car that’s been prone to snap oversteer on throttle, that added rear grip often shows up as a more predictable, controllable rotation instead of a sudden one. At speed, the same downforce reduces the rear end’s tendency to feel light or float, which is the stability improvement most drivers actually notice on the highway or at the end of a long straight.
There’s a trade-off worth being honest about. Downforce is never free. A diffuser that’s working hard is also adding some drag, and on a car chasing outright top speed, that can shave a little off the number at the far end of the speedometer. For anything short of a pure top-speed record run, the stability and grip gains are almost always worth that small cost. This is a corner-speed and confidence upgrade first, and a top-speed tool a distant second.

Diffuser Geometry: Ramp Angle, Length, and Endplates
Geometry is where a diffuser earns the title of functional part instead of styling accessory. Get the shape wrong and none of the venturi effect described above matters.
Ramp angle is the single biggest lever. Multiple parametric CFD and wind-tunnel studies on simplified vehicle bodies point to an optimal region around 10 degrees, where drag is minimized and downforce peaks. Push the angle steeper than that and you invite flow separation, the point where air can no longer follow the ramp surface and detaches into turbulence. Once separation happens, you lose the pressure recovery benefit and can actually increase drag while losing downforce, which is the opposite of what a diffuser is supposed to do.
That optimal angle isn’t a universal constant carved in stone. It shifts with ride height, underbody smoothness, and how much air the front of the car is actually feeding the system. But 8 to 12 degrees is a reasonable working range for most street and track builds using a bolt-on unit.
- Ramp angle sets the ceiling. Too shallow and you leave downforce on the table; too steep and separation kills the whole effect.
- Length determines how much pressure recovery you can extract. A longer diffuser spreads the pressure transition over more distance, generally producing smoother recovery and less abrupt wake formation, though packaging and departure-angle clearance put a real limit on how far you can stretch it.
- Width changes how much of the underbody flow the diffuser can actually process. A wider diffuser captures air across more of the car’s rear track, but only if the underbody feeding it is wide and clean enough to supply that air in the first place.
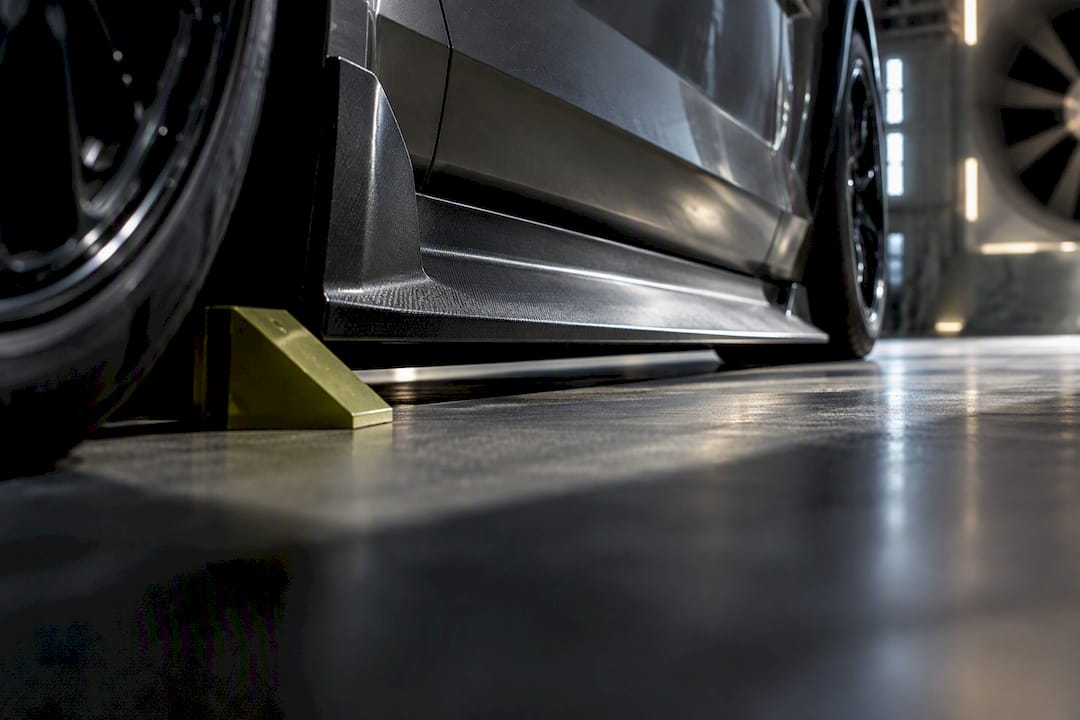
- Endplates and strakes control lateral bleed. Racecar-engineering breakdowns of diffuser design note that endplates keep low-pressure underbody air from being contaminated by higher-pressure air spilling in from the car’s sides, which is what lets the diffuser draw consistently from underneath instead of the surrounding wake.
- Sealing skirts amplify everything else. Given how dramatically the UPC skirted-configuration study showed downforce scaling with sealing, a diffuser without any side sealing is operating well below its potential ceiling.
Pro Tip: If you’re comparing two diffusers with similar ramp angles, check strake count and depth before price. A diffuser with properly sized strakes at consistent intervals is doing real aerodynamic work; one with shallow decorative fins is mostly there to look the part.
Strakes (sometimes called fences) do double duty. They resist that lateral air bleed at the sides of the diffuser channel, and they also help straighten flow that’s coming off a rear differential housing, exhaust piping, or suspension arms, all of which disturb otherwise clean underbody air before it reaches the diffuser throat. On a street car with a stock exhaust running down the centerline, strakes matter more than they do on a car with a full flat-bottom undertray and side-exit exhaust, simply because there’s more mess for them to manage.
Why Your Whole Underbody Determines Diffuser Performance
A diffuser is a system component, not a standalone part. Treating it like a bumper add-on is the single most common reason enthusiasts end up disappointed with a purchase that was, on paper, well engineered.
Ride height sensitivity is not optional knowledge here, it’s the whole game. Car and Driver’s breakdown of diffuser physics makes the point directly: a diffuser needs a largely smooth underbody and low ride height to function as intended, and without those two things, it’s primarily cosmetic. Raise the car an inch and you’ve opened the throat height, slowed the underbody airflow, and reduced the pressure drop that generates downforce in the first place. Lower it too far without matching underbody clearance and you risk grounding the diffuser lip on driveways, speed bumps, and steep parking ramps.
This is also where a car with sagging factory springs or worn shocks quietly sabotages a diffuser purchase. Inconsistent ride height under braking, acceleration, and cornering means the diffuser’s throat geometry is constantly changing, and it can never settle into its most effective operating window. Pairing a diffuser purchase with a coilover or lowering spring setup that holds a consistent, correct ride height is often the difference between a part that works and one that doesn’t.
Exhaust routing interacts with the diffuser more than most builders expect. A center-exit exhaust tip running straight through the diffuser channel disrupts the smooth flow the diffuser is trying to manage, while side-exit or properly routed exhaust tucked away from the main channel keeps that airflow cleaner. Heat is a factor too. Composite diffusers mounted close to hot exhaust components need proper clearance and sometimes heat shielding to avoid warping over time.
Complementary aero shifts the diffuser’s whole operating point. Add a front splitter and you’re feeding more managed air into the underbody, which gives the diffuser more to work with. Add a big rear wing and you change the car’s overall pitch balance and rear-axle loading, which changes how much the diffuser needs to contribute versus how much the wing is already providing. A car’s front and rear aero pieces need to be considered together, not bolted on one at a time with no plan.
- Confirm ride height stays consistent across braking, acceleration, and steady-state cornering before trusting diffuser numbers.
- Route or reposition exhaust tips away from the diffuser’s primary channel where the platform allows it.
- Treat splitter, diffuser, and wing as one aero package, not three separate purchases.
- Check ground clearance at your daily-driving locations before committing to an aggressive ride height.
Pro Tip: Before buying a diffuser, measure your current rear ride height at the pinch weld and compare it to your platform’s stock spec. If you’re not at least an inch lower than stock with matched front-end management, a diffuser purchase should probably wait until the suspension work is done first.
Street and track builds also diverge here in practical ways. A track-only car can run aggressive ride height and accept some ground-clearance risk because it’s not navigating daily speed bumps and steep driveways. A daily-driven street build needs to balance the diffuser’s ideal operating height against real-world clearance, and that usually means accepting a slightly less aggressive setup in exchange for not scraping the lip off every time you pull into a gas station.
How to Tell a Functional Diffuser From a Cosmetic One
Material choice affects more than looks. It changes how rigid the diffuser stays under aerodynamic load, how it survives a scrape, and how much it weighs at the very back of the car, which matters for rotational inertia in a way that front-end weight doesn’t.
Carbon fiber offers the best stiffness-to-weight ratio of the common options, which matters because a diffuser that flexes under load is a diffuser whose ramp angle is changing while you drive, undermining the exact geometry it was designed around. It’s also the most expensive option and the least forgiving to repair after a hard scrape, since cracked carbon layers typically need professional attention rather than a home fix.

Fiberglass costs less than carbon fiber and is considerably easier to repair with basic body shop tools, making it a practical choice for a car that’s going to see curb strikes and speed bumps regularly. It’s heavier and flexes more than carbon under the same load, which can matter at higher speeds but is often a non-issue for street use.
ABS plastic is the material most associated with purely cosmetic diffuser attachments. It’s light and cheap to produce, but it lacks the stiffness to hold a precise ramp angle under real aerodynamic load, and it tends to be the material of choice for parts designed to look aggressive in a parking lot rather than do anything at speed.
Watch for these signs that a diffuser is styling first, function second:
- Excessive rake or fin height with no corresponding ramp structure underneath — a diffuser that’s all show on the outside and flat plastic on the inside isn’t managing any airflow.
- Poor fitment gaps between the diffuser and the bumper or underbody — those gaps are exactly where the lateral air bleed problem starts.
- No sealing strategy at the sides — if there’s no mention of skirts, strakes, or a sealing lip, the part is likely relying on looks alone.
- Universal-fit claims across wildly different platforms — a diffuser genuinely tuned to a specific chassis’s ride height and underbody shape can’t also be a universal fit for a dozen unrelated cars.
Model-specific parts with real fitment documentation are worth the premium over generic universal kits for exactly this reason. A diffuser engineered around a specific platform’s underbody geometry and stock ride height has a real shot at delivering the pressure recovery this whole mechanism depends on. A generic shape stamped out to loosely fit several bumpers at once usually can’t.
Installing and Validating Your Rear Diffuser
Getting the part right is only half the job. Installation and basic validation determine whether that part actually does anything once it’s on the car.
Before you install anything:
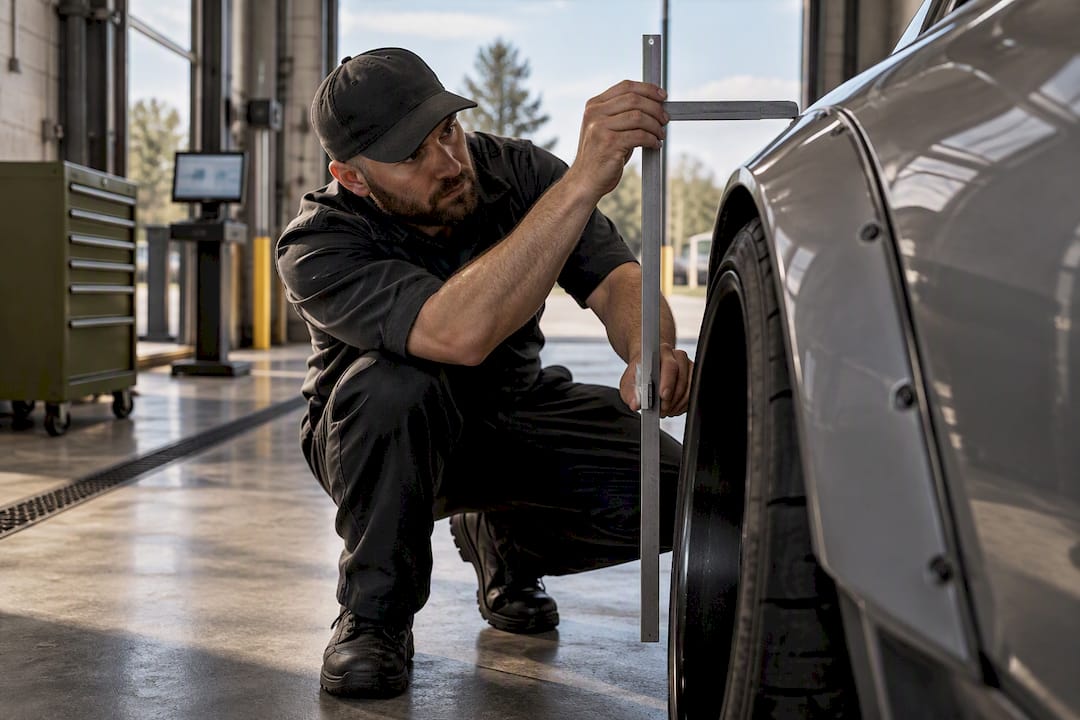
- Measure current ride height at a consistent reference point front and rear, and compare it against your platform’s stock spec and your target post-install height.
- Inspect the underbody for anything protruding into the diffuser’s intended airflow path, including sagging heat shields, loose liners, or aftermarket exhaust hangers.
- Note your exhaust routing relative to the diffuser channel and plan for clearance or rerouting if the tips run through the primary flow path.
During mounting and sealing, prioritize consistency over speed. Diffusers typically mount at multiple fastener points along the bumper support and rear subframe or floor pan, and every point needs to sit flush. A diffuser that’s torqued down unevenly will sit at a slightly different angle than it was designed for, quietly undermining the exact ramp geometry the manufacturer engineered. If your setup includes side skirts, install them before final diffuser torque so you can adjust for a consistent seal rather than fighting a gap after everything’s tight. Endplates, where included, should be added at this stage rather than left off “for now,” since a diffuser running without them is giving up the lateral sealing benefit entirely.
Validation doesn’t require a wind tunnel. Run the same stretch of road, at the same speed, in similar wind conditions, before and after install, and pay attention to how the rear end feels under trail-braking and mid-corner load. A properly working diffuser usually shows up as more settled rear-end behavior at speed and less of that light, floaty feeling on fast sweepers. On the objective side, even simple checks help: consistent tire wear patterns across the rear axle over time, and no new vibration or noise from the diffuser mounting itself, are both signs the part is behaving the way it should.
Pro Tip: Log your baseline “feel” notes on a specific road or track section before installation. Aero improvements are subtle at street-legal speeds, and without a written before-and-after comparison, it’s easy to talk yourself into feeling a difference that isn’t really there.
If you’re chasing real numbers instead of seat-of-the-pants impressions, that’s when it makes sense to escalate to a track day with lap timing, or a proper CFD consultation for a race-focused build. For most street and track-day cars, though, a careful install plus a consistent before-and-after driving comparison tells you what you need to know.
Underground Dynamics’ Approach to Underbody Aero
Underground Dynamics builds its aero catalog around chassis-specific fitment data rather than generic shapes stretched across multiple platforms. Every body kit, fender, and hood listing is paired with real fitment detail so builders can evaluate compatibility before buying, not after a part shows up and doesn’t seal against the bumper correctly.
That focus matters more for diffusers than almost any other aero part, given how sensitive results are to ride height, underbody geometry, and sealing at the sides. A part that fits loosely is a part that’s leaking the exact air pressure it’s supposed to be managing.
For builders who want to go deeper on the underbody side of the equation, the Underground Dynamics blog on underbody aero panels covers flow management and fitment considerations that pair directly with diffuser installs. A few starting points worth bookmarking:
- Review underbody panel options alongside diffuser choices, since the two work as one system rather than separate purchases.
- Check chassis-specific fitment notes before buying, especially ride height assumptions baked into the part’s design.
- Cross-reference exhaust routing and heat clearance requirements against the specific diffuser material you’re considering.
Fitment transparency doesn’t replace wind-tunnel data, but it does mean fewer surprises when the part arrives and gets bolted to a real car in a real garage.
Should You Buy a Rear Diffuser for Your Build?
Diffusers deliver the most value on lowered, track-focused cars with a mostly managed underbody, where they can extract real downforce and stability gains. On a stock-height daily driver with an untouched underbody, expect the benefit to lean cosmetic rather than functional.
Before buying, check three things: your current ride height against a lowered target, whether your underbody is flat or littered with hanging brackets and shields, and whether your build is chasing track lap times or just daily-driver confidence. If two of those three line up in your favor, a diffuser is a reasonable next investment. If none of them do, suspension work probably comes first.
What the Data Actually Tells Builders
Most of what gets written about diffusers online treats them as a binary: either they’re magic downforce generators or they’re useless plastic. Neither read survives contact with the CFD and wind-tunnel numbers. It’s proof that sealing and underbody management do almost all the heavy lifting, and the diffuser shape gets credit for work the whole system did together.
The conventional advice to “just add a diffuser for downforce” skips the actual prerequisite, which is ride height and underbody control. That’s the gap between lab numbers and garage results. A 10 degree ramp angle tested on a clean, sealed underbody in a wind tunnel isn’t the same part bolted to a stock-height car with a factory exhaust hanging into the airflow path.
If you take one thing from the research, prioritize ride height and underbody smoothness before the diffuser purchase, not after. The part is real. The system around it decides whether that part matters.
— Ismael
Get a Diffuser That’s Built for Your Chassis, Not a Universal Shelf Part
Some chassis-specific aero parts are matched to real fitment data for specific platforms rather than loosely fitting multiple unrelated bumpers. That matters more here than on almost any other part, since a diffuser that doesn’t seal correctly against your specific underbody is giving up most of the benefit this article just walked through.

The catalog covers body kits, fenders, hoods, and body panels in carbon fiber and fiberglass, plus the suspension side of the equation, coilovers, air suspension, and lowering springs, needed to actually hit the ride height a diffuser depends on. If you’re still working through low-height clearance and daily-driving durability, the suspension category is worth reviewing before the diffuser itself. And if your build’s finish matters as much as its function, protecting your paint around newly installed aero pieces prevents chips and scuffs from undoing the fitment work you just did.
Start by browsing the full aero and performance catalog and cross-checking your chassis against the fitment notes on any diffuser or body kit you’re considering.
Sources
- SAE Mobilus — diffuser and underbody studies
- UPC study on venturi diffusers (skirted configurations)
- Parametric diffuser optimization and ride-height sensitivity (Herts U.)
- Car and Driver — the physics of diffusers
FAQ
Does a rear diffuser make a real difference?
Yes, but only under the right conditions. A diffuser needs low ride height and a mostly smooth underbody to generate meaningful downforce, and Car and Driver’s analysis notes that without those two things, the part functions mainly as styling rather than aerodynamics.
Does adding a diffuser increase drag?
It depends on the design and how well it’s integrated. Comparative testing found a diffuser-equipped setup with a drag coefficient of 0.3248, lower than both a bare baseline body at 0.3439 and a standalone spoiler at 0.4023, meaning a well-designed diffuser can add downforce while actually reducing drag compared to some alternatives.
Does a diffuser make a car faster?
A diffuser primarily improves cornering grip and high-speed stability rather than straight-line top speed. The added downforce can cost a small amount of top-end speed on a car chasing outright velocity, but for cornering and braking stability, the trade generally favors the diffuser.
What is the purpose of a rear bumper diffuser?
A rear diffuser manages the low-pressure air accelerated under the car, letting it decelerate gradually through an angled ramp instead of hitting the wake abruptly. That gradual pressure recovery reduces turbulent drag behind the car while the acceleration phase underneath generates downforce.
Do vented hoods offer similar benefits to a diffuser?
Vented hoods work on a different part of the airflow path, releasing pressure buildup from the engine bay rather than managing underbody flow like a diffuser does. Both are aero tools that reduce unwanted pressure and drag, but a vented hood addresses top-side heat and pressure while a diffuser addresses underbody downforce and wake control.