FREE SHIPPING ON ORDERS OVER $150

Cart
0
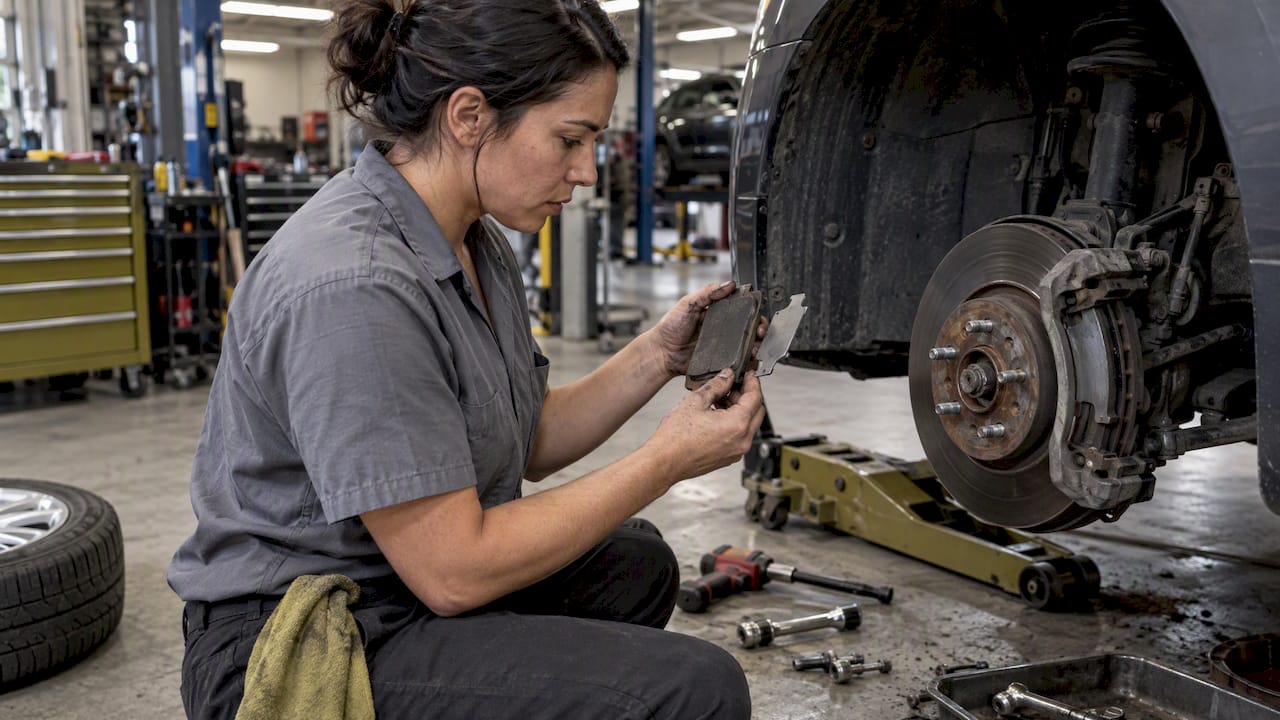
Pad shims often stop or reduce brake squeal by adding damping and decoupling the pad from the caliper, but they are not a guaranteed fix. Before you swap parts, check for a missing or misaligned shim, clean the contact points, and reseat it with the correct anti-squeal compound. If hardware looks bent, cracked, or the pads are worn thin, stop and get a mechanic to look at it before you drive on it.
TL;DR:
- Proper shim installation involves cleaning contact points, inspecting for damage, and applying anti-squeal paste to the back, not the friction surface, to ensure effective damping.
- Shims work by isolating the pad from caliper vibration and damping specific resonance frequencies that cause squeal, but their effectiveness varies with shape, material, and operating temperature.
- Squeal often results from hardware issues, rotors with surface problems, or improper bedding, requiring a systematic troubleshooting process before replacing parts.
- Correct fitment and matching hardware during installation prevent misalignment caused by incompatible components, reducing the likelihood of noise before starting repairs.
- If squeal persists after proper installation and cleaning, the cause is likely rotor or caliper issues, not the shim, necessitating professional diagnosis with specialized tools.
Table of Contents
- What brake pad shims actually do
- Why squeal happens: the physics behind the noise
- Grease, adhesive, and getting the install right
- Working through the noise: a step-by-step troubleshooting order
- When shims aren’t the answer
- Why fitment accuracy matters before noise even starts
- Three rules worth remembering
- Looking for parts with fitment detail you can trust
- Where this information comes from
- Sources
- FAQ
What brake pad shims actually do
A brake pad shim sits between the back of the pad and the caliper piston or finger, riding on what’s called the backing plate. Its job is simple to describe but tricky to engineer: keep the pad from transmitting its own vibration into the caliper, where it can turn into that high-pitched squeal you hear at low speed.
Most shims are built from a thin steel plate coated in rubber or a viscoelastic polymer. That layered construction matters more than people think. A bare steel shim can still rattle or resonate on its own, but bonding a soft, energy-absorbing layer to it changes how the assembly behaves under vibration. This is what engineers call constrained-layer damping, and it’s the same principle used in everything from aircraft panels to speaker enclosures.
Here’s what a properly functioning shim does for your brakes:
- Isolates the pad from direct metal-to-metal contact with the caliper.
- Absorbs high-frequency vibration energy instead of letting it pass through and radiate as noise.
- Fills small manufacturing gaps between the pad and caliper, reducing the microscopic movement that triggers squeal.
- Maintains consistent pressure distribution across the pad’s back face, which keeps the pad from chattering unevenly.
When a shim goes missing, shifts out of place, or wears down, you lose that damping layer. The pad is now free to vibrate directly against bare metal, and that’s often exactly when squeal shows up. This is why reinstalling or replacing a shim fixes a surprising number of noise complaints without touching a single other component.
Why squeal happens: the physics behind the noise
Squeal isn’t a random annoyance. It’s what engineers call a modal coupling problem, and understanding it explains why shims work sometimes and not other times.
Every brake pad and rotor has natural frequencies at which it wants to vibrate, the same way a tuning fork rings at a specific pitch when struck. Under braking, friction between the pad and rotor can excite one of these frequencies. If the pad’s vibration and the rotor’s vibration link up, or “couple,” at the same frequency, that energy builds instead of dying out, and you get a sustained, audible squeal. SAE research on shim geometry treats this exact issue as a system-level resonance problem, one that manufacturers address by running noise dynamometer trials to find shim geometries that shift or eliminate the specific frequencies causing trouble.
That’s the key insight: shims don’t just dampen noise in general, they’re often tuned to interrupt a particular resonance. Change the shim’s shape, thickness, or contact pattern across the pad’s back face, and you change which frequencies get suppressed. This is also why a shim that works perfectly on one pad and caliper combination can do almost nothing on another.

A related SAE study on material selection found that damping performance shifts with temperature and pressure, meaning a shim engineered to work well at typical street-driving pressures and temperatures may lose effectiveness once the brakes get hot on a mountain descent or a track day. This helps explain why squeal often comes and goes rather than staying constant: the resonance conditions are shifting as your brakes heat up, cool down, and see different pedal pressures throughout a drive.
Older but still relevant research backs up the mechanism itself. A review of constrained-layer damping theory demonstrated how a viscoelastic layer bonded to a steel plate, which is exactly what a typical shim is, reduces bending vibration in the assembly. The rubber or polymer layer flexes slightly under vibration and converts that mechanical energy into small amounts of heat instead of letting it radiate as sound.
None of this means shims are a cure-all. Pressure distribution across the pad’s contact area, the specific alloy and coating of the rotor, and even how the pads were bedded in all interact with the shim’s damping properties. That’s why manufacturers test multiple shim geometries on a dynamometer rather than assuming one design solves every squeal case.
Grease, adhesive, and getting the install right
Getting the shim itself right is only half the job. How you install it, and what you put on it, matters just as much.
Grease belongs on the back of the pad where it meets the caliper piston or fingers, and on the caliper slide pins where the caliper needs to move freely. It never belongs on the friction surface, meaning the pad face that contacts the rotor or the rotor surface itself. Contaminating either with grease reduces stopping power and can glaze the pad, which often makes noise worse, not better.
Follow this sequence when installing or reseating a shim:
- Clean the pad backing plate and caliper contact points with brake cleaner to remove old grease, rust, and debris.
- Inspect the shim for cracks, delamination, or excessive wear, and replace it if the rubber coating has separated from the steel plate.
- Apply a thin layer of high-temperature silicone or ceramic anti-squeal paste to the shim’s back face, never the friction side.
- Seat the shim fully against the pad’s backing plate, checking that it sits flush with no gaps or curling edges.
- Apply a small amount of caliper slide grease to the pins, not the pads, so the caliper can float and apply even pressure.
- Reinstall anti-rattle clips and hardware, confirming everything is torqued to spec and the pad moves freely in its bracket.
Most pad sets come with a shim already bonded to the backing plate, but some designs, especially aftermarket pads, ship with a separate shim you install yourself. Whether you need one shim or both depends on the caliper design: single-piston floating calipers often only shim the inner pad, while some setups call for shims on both pads. Check the pad packaging or a fitment guide rather than guessing, since adding an unnecessary second shim can sometimes throw off pad seating.
Pro Tip: If a shim came pre-bonded to your pad, don’t add a second aftermarket shim on top of it unless the pad manufacturer specifically recommends it. Doubling up can change how the pad seats and sometimes creates new noise instead of solving it.
Working through the noise: a step-by-step troubleshooting order
Squeal troubleshooting works best as a ladder. Start cheap and quick, then escalate only if the noise persists.
- Look first. Pull the wheel and visually check for a missing, cracked, or shifted shim, along with loose anti-rattle clips or hardware that’s rattling in its bracket.
- Check for glazing. Glazed pads have a shiny, hardened surface and often squeal regardless of shim condition; a light sanding or pad replacement may be needed alongside the shim fix.
- Clean everything. Remove the pads, clean the caliper bracket, backing plate, and slide pins with brake cleaner, then wipe away any rust or built-up brake dust.
- Reseat and grease. Reinstall the shim with high-temp anti-squeal paste on the back face and slide grease on the caliper pins, following the install sequence above.
- Test drive. Drive normally for several stops and pay attention to whether the noise changes with brake temperature or only happens on the first or last application.
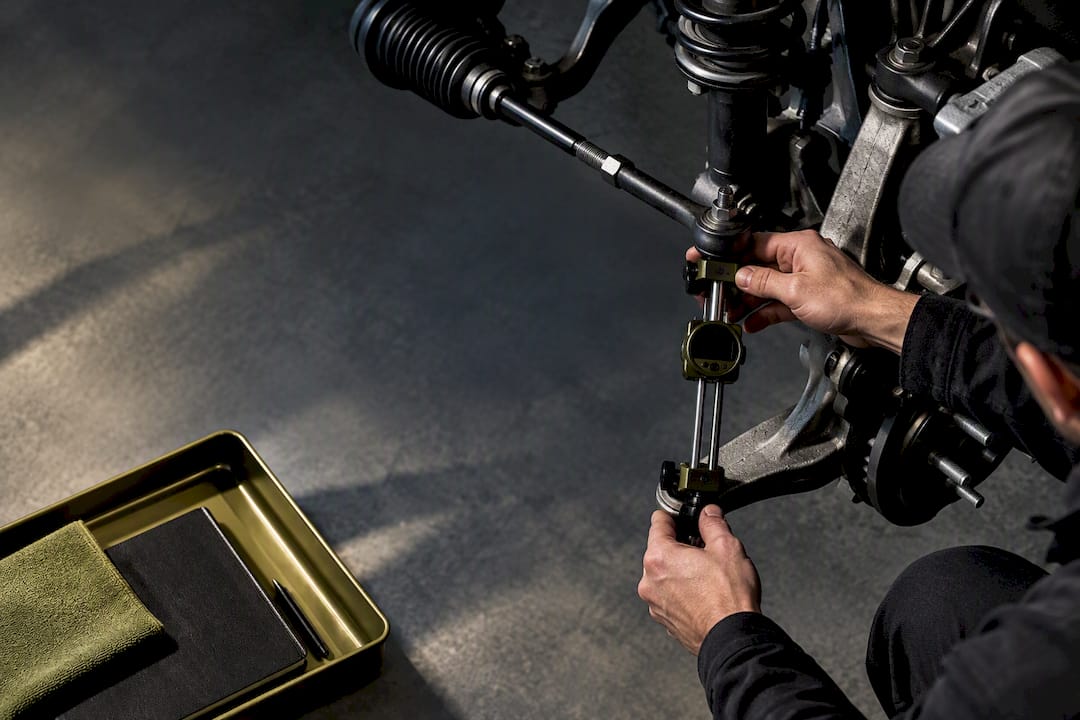
- Check rotor runout. If squeal continues, measure lateral runout with a dial indicator; excessive runout causes the pad to pulse against the rotor at a frequency that can override any shim’s damping.
- Confirm bedding. Poorly bedded pads leave uneven friction material transfer on the rotor, which creates its own noise independent of shim condition; a proper bed-in cycle sometimes resolves this without further parts.
- Escalate to a shop. If none of the above resolves it, or if the noise comes with pulsation, grinding, or a soft pedal, the issue is likely rotor surface, caliper function, or hardware wear that needs a lift and proper diagnostic tools.
Mechanic-facing guides tend to converge on this exact order. Integrity Auto’s guide to post-pad-replacement squeal walks through the same inspect, clean, reseat, and test sequence before recommending any parts replacement. A shop guide aimed at drivers doing their own checks offers a similar shortlist before suggesting a visit to an ASE-certified technician, which is a reasonable line to draw if you’re not comfortable pulling a caliper apart yourself.
Watch for signs that point past the shim entirely: a grinding sound instead of a squeal usually means the pad is worn to the backing plate, a pulsing brake pedal points to warped rotors, and a caliper that won’t release fully after braking suggests a seized slide pin or piston. None of those are shim problems, and no amount of grease or anti-squeal paste will fix them.
When shims aren’t the answer
Sometimes the shim is fine and the squeal keeps coming back anyway. That usually points to one of a handful of other culprits.
- Rotor surface problems. Glazing, thickness variation, or lateral runout create their own vibration independent of the shim, and resurfacing or replacing the rotor is the only real fix.
- Caliper hardware. Seized slide pins or a sticking piston cause uneven pad contact, which generates noise no shim can absorb since the pad isn’t sitting flat against the rotor to begin with.
- Worn or corroded hardware. Old anti-rattle clips and abutment hardware lose their spring tension over time, letting the pad move more than it should inside the bracket.
- Pad compound mismatch. Some aftermarket friction materials are simply noisier by design on certain rotor metallurgy, and no shim geometry fully compensates for a mismatched pairing.
- Improper bed-in. Pads that weren’t bedded correctly leave uneven material transfer on the rotor face, producing noise that mimics a shim problem but isn’t one.
Shops confirm the real cause with tools most driveways don’t have: road tests at varying speeds and pressures, chassis ears that pinpoint exactly where a noise originates, and in manufacturer testing, a noise dynamometer that isolates squeal frequencies under controlled pressure and temperature. If you’ve worked through the home checklist and the noise persists, that’s the point where a diagnostic visit saves you more money than guessing at parts.
Why fitment accuracy matters before noise even starts
A lot of squeal complaints trace back to installation, not the shim itself. Underground Dynamics built its catalog around chassis-specific components, body kits, fenders, hoods, and suspension upgrades, with real fitment detail attached to each listing rather than generic descriptions. That same principle applies to brake work: a backing plate or caliper bracket that doesn’t match your exact application can throw off shim seating before you ever get to greasing anything.
When you’re sourcing hardware or asking a mechanic to diagnose noise, bring the backing-plate design notes and part numbers with you rather than a vague description. Keeping documentation on file, the pad brand, shim type, and any fitment specs from the seller, saves diagnostic time and rules out mismatched parts as a variable before anyone starts pulling calipers apart.

Three rules worth remembering
Inspect first, reseat and clean second, grease the slides third, then test drive before you assume anything’s broken. That order solves more squeal cases than people expect, and it costs you nothing but time.
If the noise sticks around, write down exactly what you tried, which shim, which grease, how many miles you drove before it came back. Handing that to a shop cuts their diagnostic time significantly. And if the squeal is intermittent or shows up alongside pulsation in the pedal, skip the home fixes and get it looked at. That combination usually points to rotor or caliper issues that need a lift, not another tube of anti-squeal paste.
— Ismael
Looking for parts with fitment detail you can trust
If you’re already under the car dealing with brake noise, it’s worth knowing where to find hardware that won’t add fitment guesswork to the mix later. The brand sells aftermarket parts for enthusiast-built cars, with fitment specs and technical detail attached to each listing rather than generic catalog copy.

The catalog covers ground well past brakes:
- Body kits, fenders, flares, hoods, and body panels in carbon fiber or fiberglass.
- Coilovers, air suspension, and lowering springs for chassis work paired with brake upgrades.
- Air intake and exhaust systems for builds that need matched performance components.
Every listing is built around real compatibility data, so you know what you’re buying before it shows up at your door. Browse the full catalog or check the body kit category for fitment specs on your platform, and reach out if you need help confirming a part matches your setup before you order.
Where this information comes from
The engineering explanations here draw on SAE dynamometer research on shim geometry and constrained-layer damping studies. Bring these to your mechanic if you want a deeper technical conversation about your specific squeal.
FAQ
Why are my brake pad shims making noise?
Shims usually make noise when they’re loose, cracked, or missing their rubber damping layer, which lets the pad vibrate directly against the caliper instead of being isolated from it. Cleaning the contact surfaces and reseating the shim with anti-squeal paste often resolves this.
What does the anti-squeal shim do?
An anti-squeal shim isolates the brake pad from the caliper and absorbs vibration energy through a viscoelastic layer bonded to a steel backing, a principle known as constrained-layer damping. This interrupts the resonance that causes audible squeal during braking.
How do I get rid of brake pad squeal?
Start by inspecting the shim and hardware for damage or misalignment, then clean the contact points and reapply high-temp anti-squeal paste to the shim’s back face and grease to the caliper slide pins. If squeal continues after that, check the rotor for glazing or runout before assuming a part needs replacing.
Should you grease brake pad shims?
Yes, but only on the shim’s back face where it contacts the caliper, using a high-temperature anti-squeal paste rather than standard grease. Never apply anything to the friction surface of the pad or rotor, since that reduces braking performance and can worsen noise.