FREE SHIPPING ON ORDERS OVER $150

Cart
0

A complete widebody conversion typically lands between $6,500 and $25,000 installed, with most mid-range builds settling around $10,000 to $18,000. Three things drive that spread: what your kit is made of, how many hours a shop spends fitting and blending it, and whether you paint or wrap the finished panels. Everything else, wheels, alignment, suspension, is smaller money but it’s rarely optional once the fenders go wide.
TL;DR:
- Most widebody builds cost between $10,000 and $18,000 in total, with kit material choices significantly affecting final expenses.
- Labor for fitment and blending can range from $600 to $4,000, with seamless molded kits requiring the most hours and costs.
- The finished look depends heavily on paint or wrap costs, which add $1,500 to $5,000, and supporting modifications like wheels and suspension.
- Kit material options vary from fiberglass at $800 to $3,000 to carbon fiber at $4,000 to $15,000, with premium materials suited for show or weight savings.
- Proper fitment checks before installation, detailed written quotes, and understanding long-term upkeep are crucial to avoid costly rework and surprises.
Table of Contents
- How Much Does a Widebody Kit Cost?
- What Does a Widebody Kit Cost by Material?
- How Much Does Widebody Kit Installation Cost?
- Paint vs. Wrap: Which Finish Costs Less?
- What Do Wheels, Suspension, and Alignment Add to the Cost?
- What Are Realistic Widebody Build Costs by Budget Tier?
- How Long Does a Widebody Install Take, and What Fees Get Missed?
- How Do You Cut Fitment Risk Before Paint?
- What Should a Widebody Shop Quote Include?
- Does a Widebody Kit Raise Your Insurance Cost?
- What Does Custom Fabrication Cost Beyond a Stock Kit?
- What Are the Long-Term Maintenance Costs of a Widebody Kit?
- When Does a Widebody Actually Make Sense?
- Get the Fitment Data Before You Buy the Kit
- Sources
- FAQ
How Much Does a Widebody Kit Cost?
That $6,500 to $25,000 range isn’t a random spread. It reflects three distinct build tiers, and understanding where you land on that scale before you order parts saves you from the most common budgeting mistake in this hobby: pricing the kit and forgetting everything attached to it.
The kit itself is usually the smallest line item on the invoice. Parts-only prices range roughly from $800 to $15,000 depending on material, but that number is commonly just 30 to 40% of what the finished car actually costs you. A lot of builders quote themselves the kit price, feel good about it, and then get hit with the real number three weeks into the project.
Here’s the practical breakdown of where your money actually goes:
- Kit purchase: 30 to 40% of total cost
- Labor and fitment: often the single largest line item on a molded install
- Paint or wrap: $1,500 to $5,000 depending on scope
- Wheels, tires, alignment, suspension: $1,500 to $7,000 depending on what your car already has
Budget accordingly, and read on for the material breakdowns, labor math, and finish comparisons that turn this from a guess into an actual plan.
What Does a Widebody Kit Cost by Material?
Material is the first fork in the road, and it changes your total build cost more than almost any other single decision. Fiberglass reinforced plastic (FRP) kits typically run $800 to $3,000 for parts alone. That’s the entry point for most street builds, and it’s where Underground Dynamics’ fiberglass body kit options tend to land, offering good strength-to-weight and a surface that takes paint well once it’s prepped.

PU and ABS kits sit a notch higher, generally $1,200 to $4,000. These materials flex more than FRP, which some builders like for durability on daily-driven cars, but that flexibility can complicate panel gaps during fitment. Dry carbon and premium carbon fiber kits are the top tier, running $4,000 to $15,000 for parts alone. You’re paying for weight savings and a finish that can be clear coated without paint, but you’re also paying for a material that’s far less forgiving if a panel needs adjustment on the bench.
Kit scope matters just as much as material. A basic 4-piece flare kit (front and rear fenders only) costs a fraction of a full 6 to 8 panel widebody system that includes side skirts, rocker extensions, and front/rear aero pieces. Bolt-on rivet kits are also meaningfully cheaper than molded-in kits of the same material, because they skip the bonding and blending labor entirely, even though the aesthetic is more aggressive and less “factory.”
| Material | Parts-only price range | Best fit |
|---|---|---|
| FRP/fiberglass | $800–$3,000 | Budget and mid-range street builds |
| PU/ABS | $1,200–$4,000 | Daily drivers, flex-tolerant applications |
| Dry/premium carbon | $4,000–$15,000 | Show cars, weight-focused track builds |
One thing that catches people off guard: rare or discontinued platforms can push kit prices well above these ranges, and waitlists of several months are common for niche chassis. If you’re building something outside popular enthusiast vehicles crowd, expect to pay a premium simply because the tooling exists for fewer units.
How Much Does Widebody Kit Installation Cost?
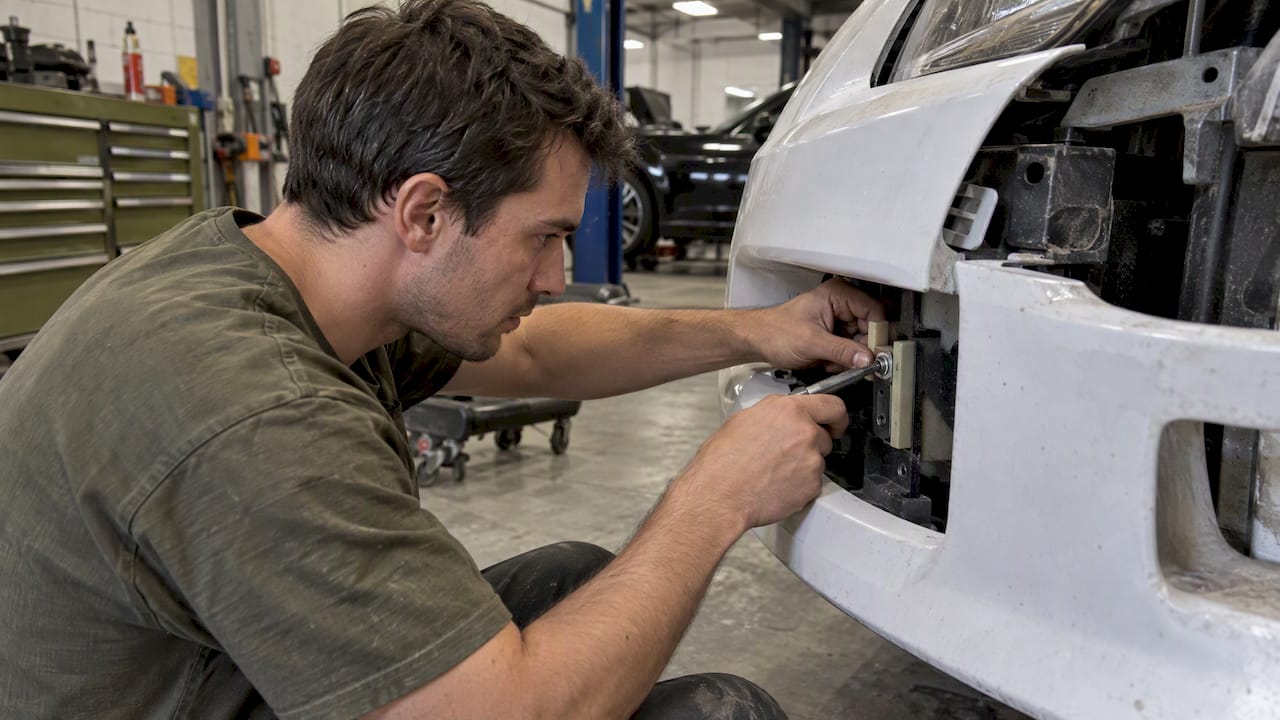
Labor is where most people’s budgets fall apart, and it’s also the part of a widebody install cost that’s hardest to estimate from the outside. Shops estimate fitment and prep labor between roughly $600 and $4,000, depending heavily on whether you’re bolting on flares or molding a seamless widebody into the factory bodylines.
A trial fit comes first. The shop mounts each panel dry, checks panel gaps against the doors and bumpers, and marks where trimming needs to happen. From there the work generally breaks down like this:
- Trial fitting and marking cut lines
- Trimming fenders, cutting inner liners for clearance
- Bonding (adhesive) or welding steel flares to the body
- Filling seams and blending transitions with body filler
- Rough sanding, then finish sanding before primer
Pro Tip: Ask your shop to send progress photos after the trial fit and before any cutting. If the panel gaps look wrong at that stage, it’s a five-minute fix. After bonding, it’s a multi-hour do-over.
Molded, seamless widebodies take dramatically more labor than bolt-on rivet kits. A bolt-on flare kit might take a shop 8 to 15 hours total because there’s minimal blending required, just drilling, riveting, and sealing. A fully molded kit with blended fenders and disappearing seams can eat 30 to 60 hours or more, since every transition needs filler, multiple sanding passes, and a guide coat check before it’s paint-ready. At a typical performance shop rate, that difference alone can swing your labor bill by several thousand dollars.
Labor reality check: Community threads on forums like ChallengerTalk consistently show DIY builders underestimating labor by a wide margin, because the parts-only budget they researched online never accounted for shop hours at all.
Paint vs. Wrap: Which Finish Costs Less?
Paint and wrap solve the same problem, matching your new panels to the rest of the car, at very different price points and with very different long-term tradeoffs. Paint or wrap work generally costs $1,500 to $5,000 depending on how much of the car you’re covering and how good the color match needs to be.
- Partial-panel paint: Cheapest option; you’re only painting the new fenders and blending into existing panels. This works fine on solid colors but gets risky on metallics and pearls where blend lines can show under sunlight.
- Full respray: Pricier, but it guarantees uniform color and clearcoat across the entire car, which matters most on premium or resale-sensitive builds.
- Vinyl wrap: Generally cheaper than a full respray and fully reversible, which is why a lot of lease-conscious or platform-hopping builders lean this way.
- Paint plus PPF (paint protection film): The premium route. You get a factory-quality paint job protected by film at the impact zones, which is the standard finish on higher-budget show builds.
Wrap has real advantages beyond price. It’s reversible if you sell the car or change your mind, and it can outlast paint in climates that fade color quickly. The tradeoff is edge sealing. Where the wrap meets the widebody kit’s molded edges, a rushed install job will lift within a year or two, so this is not the place to save money on installer skill.
If you’re running dry carbon panels, you may skip paint entirely and just clear coat the weave for that exposed carbon look, which is cheaper than a full color match but only works if the whole car’s aesthetic supports bare carbon accents.
What Do Wheels, Suspension, and Alignment Add to the Cost?
Widening the body without addressing what’s underneath it is how you end up with a car that looks aggressive and drives like it’s on stilts. Supporting mods commonly add $1,500 to $7,000 to your total, and this is the category budget-conscious builders most often skip in their initial math.
- Wheels and tires: Filling wide arches properly usually means new wheels with a more aggressive offset, not just spacers. Spacers are cheaper up front but stress hub bearings and studs over time; a purpose-fit wheel set is the safer long-term call. A wheel type guide helps here if you’re new to offset and fitment math.
- Suspension: Coilovers or air suspension become almost mandatory once fender gaps get tight. Coilovers are the cheaper of the two and give you adjustable ride height; air suspension costs more but lets you raise the car for speed bumps and driveways, which matters a lot once your fenders are sitting inches from the tire.
- Alignment: Budget for a proper alignment after any suspension or wheel change. This is a small line item next to everything else, but skip it and you’ll eat a tire in a few thousand miles.
What Are Realistic Widebody Build Costs by Budget Tier?
Numbers mean more once you see them stacked into a real build. These three scenarios reflect typical installed totals across the widebody market, with each tier built around a coherent set of choices rather than a mix-and-match wish list.
1. Budget build ($6,500–$9,500 total)
FRP kit ($800–$2,000), minimal body prep with bolt-on style fitment, basic wrap or single-stage paint ($1,500–$2,000), used or budget wheels with spacers, and an alignment. This tier gets you the widebody look without the seamless factory blend, and it’s the right call for a first-time build or a car you’re not planning to keep for years.
2. Mid-range build ($10,000–$18,000 total)
Quality FRP or PU kit ($1,500–$3,500), full molded fitment with proper blending (30 to 50 labor hours), a good two-stage paint job or premium wrap ($3,000–$5,000), a real wheel and tire package built for the new offset, plus suspension and alignment. This is where most serious builders land, and it’s the tier where per-arch cost math becomes useful. Per-arch installed costs for FRP including prep and paint typically run $600 to $1,200 per arch, which is a handy way to sanity-check a shop’s quote against the number of panels involved.
3. Premium build ($20,000–$40,000+ total)
Dry carbon or premium carbon kit ($4,000–$15,000), professional molded install with extensive blending, full respray or paint plus PPF ($4,000–$5,000+), forged wheels, air suspension, and pro shop labor throughout. Carbon per-arch installed cost, including prep and finish, runs $1,800 to $3,500 per arch, which explains why premium builds scale so fast once you’re doing all four corners plus rockers.
| Tier | Total range | Kit material | Finish |
|---|---|---|---|
| Budget | $6,500–$9,500 | FRP | Wrap or single-stage paint |
| Mid-range | $10,000–$18,000 | FRP/PU, molded | Two-stage paint or premium wrap |
| Premium | $20,000–$40,000+ | Dry/premium carbon | Full respray or paint + PPF |
How Long Does a Widebody Install Take, and What Fees Get Missed?
Plan for four to eight weeks from the day your kit ships to the day the car rolls out finished, and that’s assuming no rework. Trial fitting and cutting typically takes a few days; molding, filling, and sanding for a seamless kit can run one to three weeks on its own; paint or wrap adds another few days to a week depending on shop backlog.
Hidden costs show up in predictable places:
- Shipping: Carbon fiber and specialty kits ship in oversized, padded crates and freight costs for these can run several hundred dollars, especially for international or low-volume kits.
- Rework fees: If a panel doesn’t fit right and needs to go back for re-fiberglassing, expect a separate labor charge.
- Hardware shortages: Fasteners, adhesive, and wheel well liners aren’t always included in the kit box. Budget $50 to $200 for these extras.
- Re-painting: Color mismatches on blended panels sometimes require a second pass, which is a full re-charge, not a touch-up rate.
- Disposal fees: Some shops charge to dispose of your old fenders or bumper if you’re not keeping them.
Pro Tip: Ask your shop upfront whether hardware, liners, and adhesive are included in their labor quote or billed separately. This single question catches the most common invoice surprise in the widebody world.
The most common mistake is ordering a kit before confirming fitment notes for your exact trim and model year. Small variations between trims can mean a kit that “should” fit needs extra trimming labor, which is an avoidable cost if you check fitment data before you buy, not after the box arrives.
How Do You Cut Fitment Risk Before Paint?
Underground Dynamics built its fender fitment workflow around one idea: every dollar you spend catching a fitment problem before paint is a dollar you save compared to catching it after.
1. Dry-fit every panel before any cutting. Bolt or clamp each piece in place and check gaps against doors, bumpers, and the hood line before a single cut is made.

2. Photograph every gap and seam. Take reference shots from three angles per panel, straight on, low angle, and high angle, so you and your shop have a shared record if something shifts during bonding.
3. Mark cut lines twice, cut once. Confirm trim lines against the reference photos a second time before the grinder comes out.
4. Confirm inner liner clearance before final bonding. Tires need room to articulate at full lock and full compression, not just at rest.
5. Sand in stages with a guide coat between passes. Skipping guide coat checks is how blend lines show up under sunlight months later.
DIY builders can handle the dry-fit, photo documentation, and liner trimming with basic tools. Bonding, structural welding on steel flares, and final blend sanding are pro-shop tasks. Trying to save labor money on the bonding step is the single most common source of expensive redo work in this hobby.
Bring three things to your shop before the first cut: reference photos of every panel gap, your exact trim and model year, and a written note of any prior bodywork on the car. Shops quote faster and more accurately when they’re not guessing.
What Should a Widebody Shop Quote Include?
A vague quote is the biggest risk in this entire process, because “widebody install, $3,500” tells you nothing about what happens if the fit is off or the paint doesn’t match. Before you commit, ask every shop the same set of questions so you can actually compare bids apples to apples.
Ask about estimated labor hours, whether paint or wrap is done in-house or subcontracted, what warranty covers the bonding and paint work, and the shop’s return policy if a panel arrives defective. A shop that hesitates on any of these is telling you something.
A complete written quote should itemize:
- Parts cost with material and brand specified
- Labor hours and hourly rate, broken out separately
- Paint or wrap cost, including how many stages/coats
- Hardware, adhesive, and liner costs (included or separate)
- Alignment and any suspension work
- Estimated timeline with a stated rework policy
Pro Tip: Email shops a one-paragraph scope description with your exact model year, kit material, and desired finish before asking for a number. You’ll get a far more accurate quote than a phone call where the shop is guessing at your build.
Red flags worth walking away from: a quote with no labor hours listed, a shop that won’t commit to a warranty on bonded panels, or a price that’s dramatically lower than every other bid you collected with no explanation for the gap.
Does a Widebody Kit Raise Your Insurance Cost?
Yes, in most cases, though the increase is rarely dramatic on its own. Insurers generally treat a widebody conversion as a modification that raises the vehicle’s declared value and, in some cases, its risk profile, which can nudge premiums up.
The size of the increase depends on a few factors. A car that’s now worth more after a $15,000 build needs comprehensive coverage that reflects that added value, or you’re underinsured if it’s totaled or stolen. Some insurers also view aggressive body modifications as a signal of a performance-oriented driving style, which can affect rate calculations independent of the actual parts installed.
The practical move is to call your insurer before the build, not after. Many standard policies require you to disclose modifications, and failing to do so can jeopardize a claim down the road, which is a far more expensive problem than a modest premium bump. Specialty or classic-car insurers sometimes offer better terms for modified builds than a standard carrier, since they’re built around agreed-value coverage rather than standard depreciation schedules. If your build includes carbon components or a premium paint job, get an updated appraisal so your coverage actually matches what you’d need to rebuild the car.
What Does Custom Fabrication Cost Beyond a Stock Kit?
Stock kits are designed for a specific chassis and trim, but plenty of builds need something a catalog kit can’t deliver. Custom fabrication, whether that’s a one-off fender flare, a modified rocker to match a specific stance, or a fully bespoke widebody sculpted from scratch, runs well above stock kit pricing because you’re paying for design time, not just materials.
Professional design work alone, sketching, CAD modeling, or clay/foam buck sculpting for a one-off panel, can add several thousand dollars before any material gets cut. Hand-laid fiberglass or carbon fabrication from a buck is slower and more skilled labor than trimming a mass-produced kit, and shops price it accordingly.
Where this usually makes sense: rare or unsupported chassis where no kit exists at all, or builds chasing a specific look that no catalog kit replicates. Where it usually doesn’t: standard platforms like the Civic, 350Z, or Mustang where mature kit options already exist at a fraction of the custom price. If you’re on a well-supported chassis, a proven kit paired with skilled fitment labor almost always beats a custom fabrication project on cost and turnaround time, without sacrificing much on the final look.
What Are the Long-Term Maintenance Costs of a Widebody Kit?
A widebody kit isn’t a one-time expense you forget about after installation. Fiberglass and PU panels can develop stress cracks at mounting points over years of flex and vibration, especially on cars driven hard or over rough roads, and repairing a cracked seam means redoing part of the bonding and blending work you paid for originally.
Curb damage is the most common repair. Widebody fenders sit closer to obstacles than stock panels, and a scraped corner on a molded kit often means matching paint and blending a repair section rather than a simple bumper cover swap. Rock chips and road debris hit these outer edges disproportionately too, so expect more frequent touch-up paint work than you’d budget for a stock car.
Wrapped panels need re-wrapping every few years depending on climate and UV exposure, typically running a smaller fraction of the original wrap cost since it’s a straightforward reapplication. Painted panels hold up longer but a color mismatch on a future repair is a real risk if you don’t keep detailed paint code records from the original job.
Budget a modest annual reserve for touch-ups and edge repairs if you daily-drive a widebody build. Garage-kept show cars obviously see far less of this wear, but any car that sees regular street use will need occasional attention to the areas where the kit meets the factory body.
When Does a Widebody Actually Make Sense?
A widebody is worth the money when the car is a keeper and the wider stance solves a real problem, more tire under the fenders for grip, a stance that matches a build theme you’re committed to, or a track car that needs the wheel width a stock fender can’t cover. If any of those apply, the cost stops being just cosmetic.
It doesn’t make sense as a first modification on a car you’re not sure you’ll keep for years. Resale value on widebody cars is a mixed bag: the right buyer pays a premium, but you’ve narrowed your buyer pool considerably, and a mediocre paint match or loose bolt-on flare can tank a sale faster than no kit at all.
Ongoing upkeep is the part people forget to weigh. A widebody adds curb-strike risk, paint-matching complexity down the road, and a car that’s harder to sell without documentation of who did the work.
— Ismael
Get the Fitment Data Before You Buy the Kit
Underground Dynamics exists because guessing at fitment is how a $10,000 budget turns into a $16,000 invoice. Every carbon fiber and fiberglass body kit we carry ships with real fitment data attached, not a generic product photo, so you know what a panel actually clears before your shop starts cutting.
We source from established suppliers rather than manufacturing in-house, which means the parts you’re buying have a track record on the exact chassis you’re building, whether that’s a Civic, a Supra, a 350Z, or a Miata. Pair a kit with the right suspension setup from our catalog and you’re solving the fitment and stance problem in one order instead of chasing parts from three different vendors.
If you’ve read this far, you already know the kit price is only part of the number. Start by browsing the body kit catalog for your platform, check the fitment specs against your trim and model year, and get a real shop quote before anything ships.
Sources
The figures in this guide come from cost breakdowns published by TunedRides, which details material-based kit pricing and the 30 to 40% rule for kit-to-total cost ratio, and Miami Wrapping, which breaks down labor and paint/wrap pricing in detail. Scenario totals for U.S. builds draw on Cost Insider’s per-arch and tier analysis, and real-world labor variability is corroborated by builder discussions on the ChallengerTalk forum.
These ranges give you a realistic starting budget, but get a written quote from a local shop before committing. Regional labor rates and shop specialization can shift these numbers meaningfully in either direction.
- What a real widebody build costs in 2026 — TunedRides
- How Much Does It Cost to Install a Widebody Kit? — Miami Wrapping
- Widebody a Car: Cost Guide for U.S. Buyers 2026 — Cost Insider
- Widebody Kit Labor Pricing — ChallengerTalk forum
FAQ
How much does it cost for someone to install a widebody kit?
Installation labor alone typically runs $600 to $4,000, depending on whether you’re bolting on flares or molding a seamless kit into the body. Add paint or wrap and the total installed cost usually lands in the mid-range build cost bracket, often around ten to eighteen thousand dollars.
Is a widebody kit worth it?
It’s worth it when the wider stance solves a real function, more tire clearance, a track-focused build, or a stance you’re committed to keeping long term. It’s a harder sell as a quick cosmetic upgrade on a car you might sell soon, since resale buyers for widebody cars are a narrower pool.
How much does it cost to install a body kit?
A standard (non-widebody) body kit install generally costs less than a widebody conversion because there’s no fender widening or extensive molding involved, though paint and labor still apply. A widebody specifically adds the labor-intensive step of blending wider fenders into the factory bodylines, which is where most of the added cost comes from.
How much does it cost for a body kit?
Parts-only prices for a widebody kit range from about $800 for FRP up to $15,000 for premium carbon, but that’s typically just 30 to 40% of the finished installed cost once labor and paint are added.