FREE SHIPPING ON ORDERS OVER $150

Cart
0
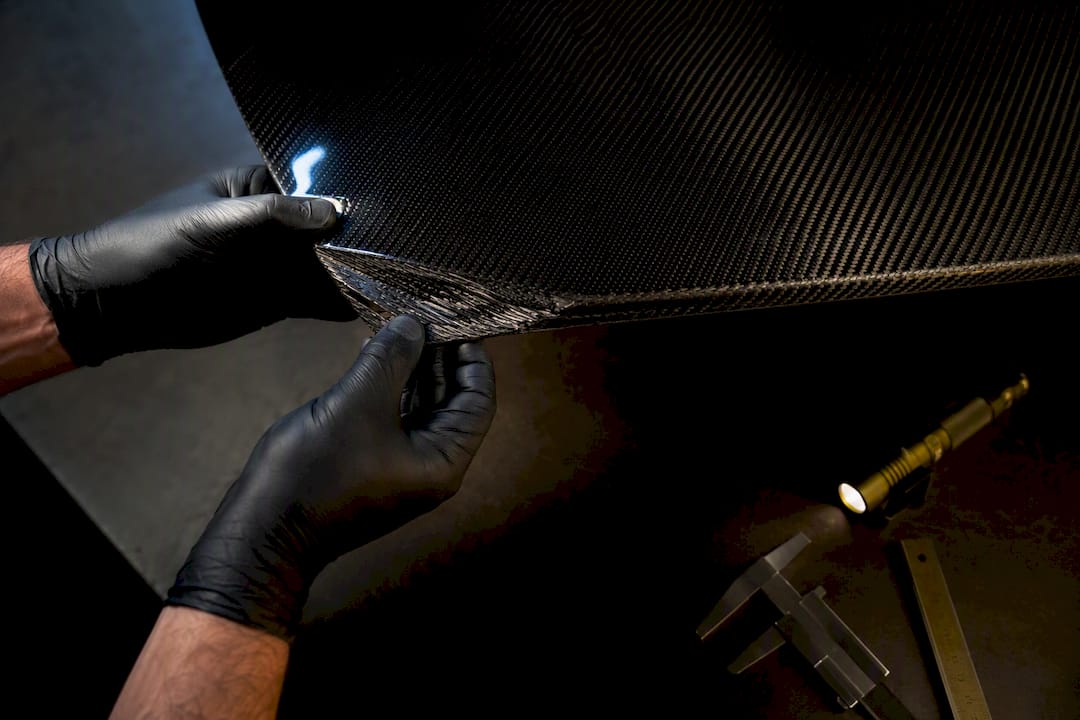
Most cracked hoods, splitters, and mirror caps are DIYable, and the method that works is always the same: cut back the damage, cut a shallow scarf taper into the good laminate, lay in fabric that matches the original weave and ply orientation, wet it with structural epoxy, and consolidate it under pressure while it cures. Done right, that process restores a high proportion of the original strength. Done on a lug mount, suspension point, or crash structure, the repair should be performed by a professional using ultrasound inspection rather than as a garage project.
TL;DR:
- Proper scarf taper ratios of at least 12:1, ideally 20:1 for thin panels, are crucial for strong, durable repairs; neglecting this can cause early cracking.
- Using the right materials, especially low-viscosity structural epoxy and matching fabric weave and ply orientation, significantly increases repair longevity and strength.
- Vacuum bagging or equivalent pressure application ensures optimal fiber-to-resin ratio and final panel performance, with improvised clamping being a less effective alternative.
- Damage near structural mounts, large delamination, or multi-direction cracks requires professional inspection and repair to prevent safety risks.
- DIY repair is viable for surface and moderate damage when proper techniques are followed, but costly or complex damage is better handled by certified professionals or replacement panels.
Table of Contents
- When Should You Repair Carbon Fiber vs. Replace the Part?
- What Safety Gear Do You Need for Carbon Fiber Repair?
- How Do You Assess Carbon Fiber Damage Before Repairing It?
- What Materials and Tools Do You Need to Fix Carbon Fiber?
- How to Repair Carbon Fiber: The Full Structural Process
- How Do You Fix Cosmetic Carbon Fiber Damage?
- Why Do Carbon Fiber Repairs Fail (and How Do You Fix Them)?
- When Should You Get Professional Help for Carbon Fiber Repair?
- Who Wrote This Guide?
- Our Take on DIY Carbon Fiber Repair
- Where to Buy Replacement Carbon Fiber Panels and Repair Supplies
- Sources
- FAQ
When Should You Repair Carbon Fiber vs. Replace the Part?
Not every crack deserves a repair kit. The first question is whether the damage is cosmetic (surface resin cracking, a clear coat chip, a scuffed weave) or structural (a crack that runs through multiple plies, a soft spot when you press on the panel, or a dent that doesn’t spring back).
Hidden damage is the real risk. A panel can look fine and still be delaminated underneath, especially after an impact. Watch for:
- Large delaminated areas (bigger than a few inches across) that feel spongy under light pressure
- Core crush on any panel with a foam or honeycomb core sandwiched between carbon skins
- Cracks that cross more than one ply direction, which usually means the impact traveled deeper than it looks
Location matters more than the crack itself. Anything near a suspension mount, subframe connection, or a body panel’s structural lug should go to a professional or get replaced outright and not patched at home. For a cosmetic splitter lip or a hood with a surface crack, expect $40 to $150 in materials for a DIY repair versus several hundred dollars and a shop’s turnaround time for professional work.
What Safety Gear Do You Need for Carbon Fiber Repair?
Carbon dust and epoxy resin are not casual materials. Cured carbon dust is a lung and skin irritant, and uncured epoxy is a known sensitizer, meaning repeated skin contact can trigger allergic reactions over time.
- Wear a NIOSH-rated respirator with organic vapor cartridges, or a P100 powered respirator if you’re sanding for extended periods
- Use nitrile gloves (not latex) and change them the moment resin gets on them
- Wear safety glasses and long sleeves, and vacuum or wet-wipe carbon dust rather than blowing it into the air
- Work outdoors or with forced extraction, and keep solvents like acetone away from any open flame or spark source
Pro Tip: Bag your sanding dust in a sealed container immediately. Loose carbon dust conducts electricity and has been known to cause problems if it gets into nearby switches or outlets.
How Do You Assess Carbon Fiber Damage Before Repairing It?
Start with your eyes and your knuckles. A visual inspection catches surface cracking, resin flaking, and obvious fiber breakage, but a tap test tells you what’s happening underneath. Tap the panel with a coin or the plastic handle of a screwdriver, moving in a grid pattern across the suspected damage. A sharp, consistent “tink” sound means solid laminate. A dull thud or hollow “thock” means you’ve found a delaminated pocket, where the resin bond between plies has failed even though the surface looks intact.
If the finish is hiding the extent of the damage, sand or strip the clear coat back until you can see bare fiber. Delamination often looks like a cloudy or whitish patch under the weave, sometimes with visible air gaps between layers.
- Soft spots under thumb pressure usually mean core crush or resin starvation
- Visible fiber pull or fraying at the edges of a crack signals the damage has spread beyond what’s visible on the surface
- A crack that runs in a straight line along one ply direction is often shallower than a crack that branches across multiple directions
For anything you can’t confirm by hand, professional non-destructive inspection using ultrasound is the reliable next step. These services can detect subsurface voids and delamination that no amount of tapping or visual checking will reveal, which matters most on parts where a hidden weak spot could fail under load, according to case studies on automated composite inspection.
What Materials and Tools Do You Need to Fix Carbon Fiber?
The resin choice alone decides whether your repair holds or fails. Two-part structural epoxy is the only real option for load-bearing carbon fiber; polyester resin lacks the adhesion strength and toughness needed for a durable bond, according to Rapidrepair. Look for a system with low viscosity for wet-out, an appropriate glass transition temperature (Tg) for your application, and a working time that matches the size of your repair.
- Fabric: match the original weave (2x2 twill or plain weave) and ply count. Mismatched fabric creates a stiffness mismatch that leads to premature cracking, per Epoxyworks’ guidance on carbon fiber repair
- Consumables: peel ply, breather/bleeder cloth, release film, and a gram scale for accurate resin mixing
- Tools: a random orbital sander or die grinder with sanding discs, cutting templates for tracing ply shapes, a vacuum bag kit (or spring clamps and cauls for small repairs), and a heat lamp or heat gun for post-cure
How to Repair Carbon Fiber: The Full Structural Process
This is the core of any real carbon fiber crack repair, and it’s worth doing in order. Skipping steps is how amateur patches end up weaker than the panel around them.
-
Set up your workspace and PPE. Ventilate the area, put on your respirator and gloves, and lay down plastic sheeting to catch dust and resin drips.
-
Cut back the damage. Remove all delaminated and cracked material until you hit solid, well-bonded laminate. Tap-test the edges of your cutout to confirm you’ve cleared the bad zone entirely.
-
Cut the scarf taper. This is the step most DIY repairs get wrong. A scarf joint spreads the load transition across a shallow slope instead of a hard edge, which is what makes a repair strong instead of brittle. Industry guidance recommends a 12:1 taper ratio as a baseline, and pushing to 20:1 on thin automotive carbon skins reduces stress concentration even further, according to Epoxyworks’ scarf ratio recommendations. On a 2mm thick panel, a high scarf ratio means grinding a wide, shallow taper around the damage; the exact width depends on the chosen ratio.
-
Template your plies. Trace each ply of the original layup onto plastic film before you cut into the panel, and cut your repair plies smallest to largest so they stack in the same sequence as the original laminate. This keeps the ply schedule and orientation matched, which is one of the two biggest factors in whether a repair lasts.
-
Wet out and lay up. Apply an interface coat of epoxy to the scarfed surface first, then place each ply and wet it out from the center outward, pressing air toward the edges as you go. Avoid resin-rich patches. A shiny, glassy surface with visible fiber texture means you’ve wetted it correctly; a thick, glossy pool means you’ve used too much resin.
-
Consolidate under pressure. Vacuum bagging is recommended to apply uniform pressure, using peel ply, breather/bleeder cloth, and bag film, and pulling vacuum to an industry-recommended pressure range. That pressure pulls excess resin into the bleeder layer and pushes the fiber-to-resin ratio up, which is directly tied to final strength, per RapidRepair.blog’s vacuum bagging guidance. No vacuum pump? Improvised clamping with cauls can work for small, flat repairs, but expect a resin-richer, slightly heavier patch with somewhat lower performance.
-
Cure and post-cure. Most structural epoxies cure at room temperature over an extended period, but a post-cure heat cycle at the resin manufacturer’s recommended temperature range for some hours can raise the glass transition temperature and improve final strength. Never post-cure near open flame, and ventilate any solvent fumes during heating.
-
Debag, inspect, and finish. Peel away the bag, breather, and peel ply, then tap-test the repair itself to confirm a solid bond. Wet-sand the surface progressively (220 through 600 grit) to blend it flush before moving to cosmetic finishing.
Statistic Callout: Lab research on resin pre-coating (RPC) and its self-curing variant (SC-RPC) has restored up to 94.9% of original compressive strength in delaminated CFRP test specimens, using a pressure-less, capillary-driven resin infusion method. It’s a promising option for small internal delaminations where full scarf-and-bag isn’t practical, though it demands careful handling of acetone-rich solutions and isn’t a substitute for proper scarf technique on larger structural damage.
Pro Tip: If you don’t own a vacuum pump, a simple venturi vacuum generator that runs off a shop air compressor costs a fraction of a dedicated pump and hits the same 25 to 29 inHg range for small panel repairs.
How Do You Fix Cosmetic Carbon Fiber Damage?
Surface chips, hairline clear coat cracks, and scuffed weave don’t need a full structural rebuild. For shallow damage that hasn’t broken any fibers, a thin clear epoxy overlay fills the gap and restores the surface without touching the laminate underneath.
- Sand the damaged area with progressively finer grits, starting around 320 and working up to 1000 or 1500 before clear coating
- Apply a compatible primer if the repair area shows bare resin, then finish with a UV-stable 2K urethane clear coat to prevent yellowing and micro-cracking over time
- If the weave pattern got disturbed, a thin veil of fresh carbon cloth under clear resin can restore the visual match before final polishing
- Wet-sand and buff in stages, working up to a fine polishing compound for a glass-like finish
If you’re finishing a full hood or panel after a repair, the surface prep and clear coat process closely follows the same steps in Underground Dynamics’ carbon fiber hood painting guide.
Why Do Carbon Fiber Repairs Fail (and How Do You Fix Them)?
Most repair failures trace back to one of a few repeatable mistakes, and all of them are fixable if you catch them early.
- Resin-rich patches look glossy and feel heavy for their size. Sand the surface back and check whether you actually wetted the fabric or just coated it; a proper wet-out shows fiber texture through the resin, not a shiny pool.
- Dry plies or trapped air show up as white or pale patches and small bubbles under the surface. Cut out the affected section locally, re-wet the exposed fiber, and re-lay a fresh patch rather than trying to inject resin into a sealed pocket.
- Wrong ply orientation causes cracking along the same line as the original damage, usually within weeks. There’s no patching this. Cut it out and re-lay the ply in the correct direction relative to the load path.
- If a repair shows multiple failure signs at once, strip it back to bare laminate and start over. A bad repair redone properly beats a bad repair reinforced on top of itself.
When Should You Get Professional Help for Carbon Fiber Repair?
Some damage isn’t a DIY call, full stop. Skip the garage repair and go to a certified shop for:
- Any crack, delamination, or impact near a suspension mount, subframe lug, or other load-bearing attachment point
- Large delaminated areas, core crush, or damage where fibers have failed in more than one direction
- Any repair where you genuinely can’t tell how deep the damage goes
Professional shops use ultrasound and trained tap-test technicians to map subsurface damage precisely. Expect inspection costs in the low hundreds of dollars, with professional structural repairs running higher depending on panel size and access. If you’re weighing a quote against a repair, a guide to verifying auto repair estimates can help you tell a fair price from an inflated one.
Who Wrote This Guide?
This guide is written by a team experienced in fitting, replacing, and specifying chassis-specific carbon fiber body kits, hoods, and aero parts for enthusiast builds. That’s a different vantage point than a general repair blog: we see which panels get repaired successfully and which ones get quietly replaced because the repair cost more time than it saved.
For readers finishing a repaired panel, our carbon fiber hood painting walkthrough covers the final clear coat stage in more depth. If the damage points toward replacement instead, our fiberglass repair guide explains why laminate compatibility matters even when you’re not working with carbon.

Our Take on DIY Carbon Fiber Repair
The scarf-and-vacuum method has been the industry standard for years, and it deserves to be, but most DIY guides oversell how forgiving it is. A shallow scarf, mismatched weave, or a skipped vacuum step doesn’t just make the repair “a little weaker.” It changes how the panel fails, often turning a slow crack into a sudden one.
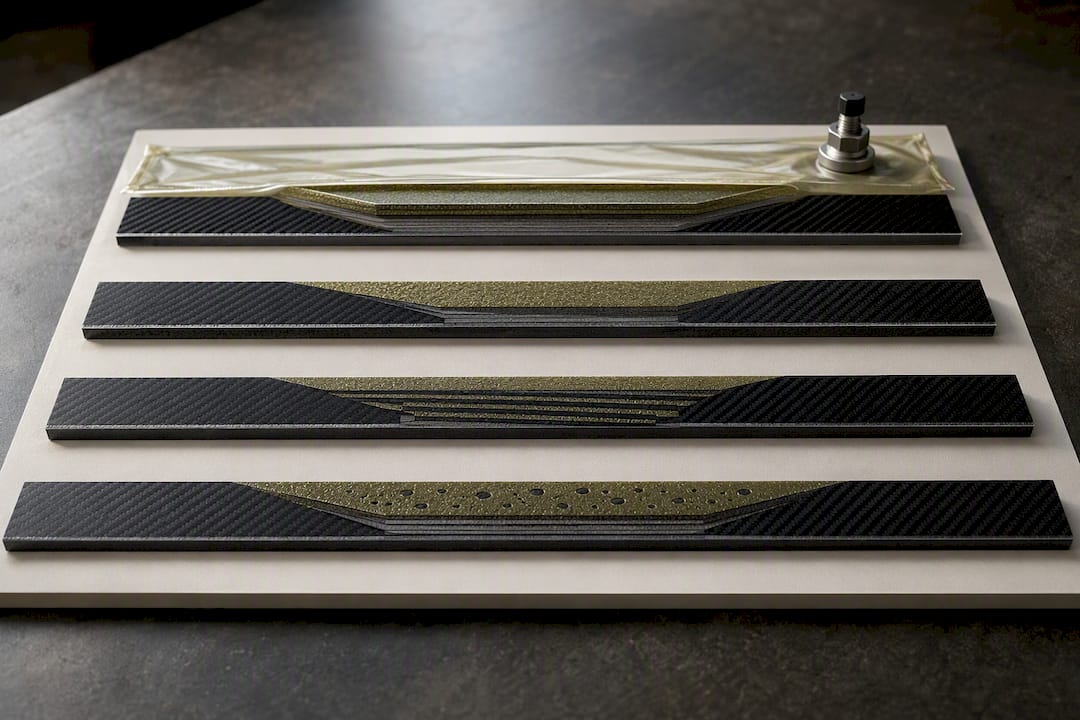
What the newer RPC and SC-RPC lab research actually tells us isn’t that vacuum bagging is obsolete. It’s that pressure-less resin infusion is a legitimate option for small, contained delaminations where a full scarf rebuild would be overkill. Treat it as a second tool, not a replacement for the fundamentals.
If there’s one thing hobbyists underestimate, it’s how much the scarf ratio matters compared to the resin brand. A 20:1 taper with a mediocre epoxy will usually outperform a butt joint with a premium one. Get the geometry right first, then worry about which resin to buy.
— Ismael
Where to Buy Replacement Carbon Fiber Panels and Repair Supplies
Sometimes the honest answer after inspecting the damage is that repair isn’t worth it, especially when a panel has core crush, multi-direction fiber failure, or sits near a structural mount. Some companies offer direct-to-consumer catalogs of chassis-specific carbon fiber and fiberglass body kits, hoods, and wide-body fenders, sold with fitment data instead of vague generic sizing, reducing guesswork about whether a replacement panel will bolt up to your chassis.

If your repair estimate is creeping past what a new panel costs, or the damage sits somewhere a patch shouldn’t go, replacing the part outright is often the more reliable path. Browse the body kit and aero catalog for chassis-specific options, check the fitment specs against your exact make and model, and order the panel that matches your build instead of gambling on a repair that might not hold.
Sources
- Polymers (MDPI) — Resin pre-coating (RPC) and SC-RPC repair research (2025)
- Epoxyworks — Understanding carbon fiber
FAQ
Can You Repair Damaged Carbon Fiber Yourself?
Yes, for most cosmetic and moderate structural damage away from safety-critical mounting points. A proper scarf repair with matched plies, structural epoxy, and vacuum consolidation can restore roughly 90% of original strength.
What Is the Best Epoxy for Repairing Carbon Fiber?
Structural two-part epoxy resin, not polyester, is the standard for load-bearing repairs. Look for low viscosity for wet-out, a Tg suited to your application, and a working time that matches your repair size.
How Much Does It Cost to Repair Carbon Fiber?
DIY structural repairs typically run $40 to $150 in materials for a moderate-sized panel, while professional shop repairs often cost several hundred dollars depending on panel size and inspection needs. Replacement panels from a catalog like Underground Dynamics’ body kits can be a more predictable cost when damage is extensive.
Why Is Carbon Fiber Hard to Repair?
The difficulty comes from matching the original ply schedule, fiber orientation, and stiffness exactly. Get any of those wrong and the repair creates a stiffness mismatch that leads to cracking right at the repair’s edge.
Do I Need Vacuum Bagging for a Small Carbon Fiber Repair?
Vacuum bagging isn’t strictly required for small cosmetic patches, but skipping it on structural repairs almost always leaves a resin-rich, weaker patch. Improvised clamping can work in a pinch, at the cost of some final strength.