FREE SHIPPING ON ORDERS OVER $150

Cart
0
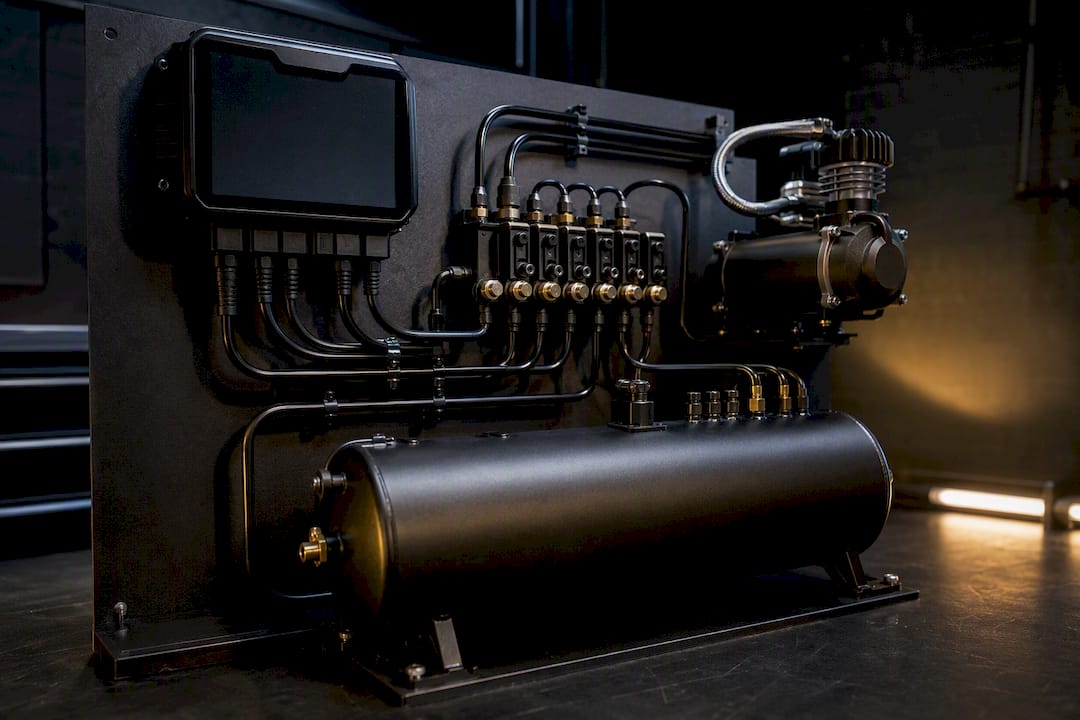
Air suspension management is the control system that runs your bags: it routes compressed air through valves and lines, sets ride height and pressure through a controller, and gives you a way to adjust it on the fly. For most builds, the right call is a digital ECU paired with an appropriately sized compressor and tank rather than a manual setup. A complete kit needs five things working together: a controller, a manifold or valve block, a compressor, a tank, and the lines and sensors connecting them. Skip the sizing math and you’ll be fighting slow fills and a compressor that never shuts off.
TL;DR:
- Digital systems with height sensors and app control provide more consistent ride heights and automatic leveling, especially for daily drivers or mixed-use builds.
- Proper compressor and tank sizing, typically a 3 to 5-gallon tank for occasional use or larger tanks with dual compressors for frequent adjustments, are key to responsiveness.
- Regular maintenance involves leak checks, moisture filter servicing, and monitoring compressor performance to prevent costly component failures.
- Choosing a manifold type depends on your load handling needs; 3H with sensors offers automatic adjustments, while 3P relies on pressure and is simpler but less precise.
- Correct fitment and careful installation, including wire routing and line protection, are crucial to maximize system longevity and avoid additional repair costs.
Table of Contents
- What Are the Core Components of an Air Suspension Management System?
- Digital vs. Manual Air Ride Control: Which Fits Your Build?
- How Do You Choose the Right Air Suspension Setup?
- How Do You Configure and Calibrate a New Air Management Kit?
- What Maintenance Does Air Suspension Need, and What Does It Cost?
- Builder Tips That Actually Extend the Life of Your Setup
- Ready to Build Your Air Management Kit?
- Sources
- FAQ
What Are the Core Components of an Air Suspension Management System?
Every management system boils down to the same five parts, and knowing what to check on each one saves you from a mismatched kit.
The controller/ECU is your interface. Basic setups use physical buttons; better ones add touchscreens or Bluetooth app control with saved presets. When comparing controllers, check preset count (multiple corners plus several saved ride heights is standard) and whether the firmware gets updates, since modern management systems increasingly rely on software for self-leveling and height memory.
The manifold decides how air gets distributed. This is where the Air Lift 3P vs 3H question comes up constantly: 3H uses height sensors for automatic leveling and repeatable presets, while 3P relies on pressure only, which is simpler but less consistent corner to corner. Both typically run a single valve block feeding all four corners rather than fully independent manifolds.
Compressor and tank sizing follows a rough rule: a single compressor with a 3 to 5 gallon tank works for light, occasional adjustments, while daily drivers or anyone airing out often should look at dual compressors and a 5 gallon or larger tank to keep fill times reasonable.
- Air lines should be rated for your working pressure, with DOT-rated or push-to-connect fittings depending on how often you plan to service the system
- Height sensors add repeatability; pressure-only sensors are cheaper but drift more with load changes
- Valve-integrated tanks reduce plumbing runs and cut down on potential leak points
Digital vs. Manual Air Ride Control: Which Fits Your Build?
The choice between digital and manual air ride control comes down to how you actually use the car, not which one looks more impressive on a spec sheet.
- Digital management gives you presets, automatic self-leveling, and app or touchscreen control. It’s the better pick for mixed-use builds that go from a show to a daily commute, since height-sensor-based systems hold a consistent stance regardless of passenger or cargo load.
- Manual management strips out the electronics in favor of switches tied directly to valves. It costs less, has fewer failure points, and appeals to purists who don’t want a screen in the cabin, but every adjustment takes more guesswork and repeat visits to a laser level.
- Performance impact favors digital setups for handling consistency, since automatic weight compensation keeps corner balance stable through a session, something manual air ride control can’t replicate without constant driver input.
- Installation and support lean digital too. Kits with an ECU usually ship with wiring diagrams and calibration steps, while manual setups depend more on the installer’s own experience with plumbing runs.
How Do You Choose the Right Air Suspension Setup?
Start with how the car gets used, because that single decision drives almost every part choice that follows.
- Use case first: a show car that sits most of the time needs less compressor capacity than a daily driver airing up multiple times a day
- Manifold type: 3H/3P setups cut down on plumbing if you’re fine with shared control logic; go 4-corner independent if you want each wheel dialed in separately, common on lowered trucks handling uneven loads
- Compressor and tank sizing: as a rough guide, pair a 444cc-class compressor with at least a 5 gallon tank for fill times under a minute and decent kneel speed
- Electrical prep: confirm battery capacity, add relays sized for compressor draw, and run wire gauge appropriate for the amperage, not just what’s leftover in the garage
- Fitment check: verify shock or strut clearance, bag compatibility with your specific chassis, and enough harness length to reach the trunk-mounted manifold without splicing
Pro Tip: Order your tank and manifold together from the same fitment listing. Mismatched thread sizes between a tank kit and an aftermarket manifold are one of the most common return reasons builders run into.
How Do You Configure and Calibrate a New Air Management Kit?
Getting a kit from the box to a working system on your car follows a predictable sequence, and skipping steps is how leaks and bad calibration happen.
- Pull your fitment data first. A vehicle selector or configurator needs your exact chassis, strut or shock length, and sometimes wheel offset, before it can recommend a compatible bag and bracket combo.
- Mount and route before you wire anything. Keep compressors isolated from vibration with rubber mounts, and route lines away from exhaust heat and moving suspension components.
- Wire the ECU through switched power with a relay, not a direct battery tap, so the compressor isn’t drawing current when the car is off. Battery-saver cutoffs prevent a dead battery after a week of sitting.
- Run the auto-level calibration the ECU’s setup procedure specifies, then set and test your ride height presets at each corner individually before trusting them together.
- Road test and adjust gradually. Drive it, recheck for leaks at every fitting, and nudge pressures in small increments rather than chasing the lowest stance on day one.
A detailed sequence, including wiring and mounting checkpoints, helps builders working through their first install.
What Maintenance Does Air Suspension Need, and What Does It Cost?
Air suspension maintenance is lighter than most builders expect, but skipping it turns small problems into compressor rebuilds.
- Check for leaks every few months with a soap-and-water test at fittings and valve connections
- Inspect the moisture filter or dryer, since trapped water corrodes valves and freezes lines in cold climates
- Watch compressor duty cycle. If it’s running constantly instead of cycling, you likely have a slow leak or an undersized tank for your usage
Wear items follow a predictable order: valve seals and O-rings fail first (often within a couple of years of regular use), followed by air springs and then compressor internals as the highest-mileage part. Pressure drop overnight, a compressor that won’t shut off, or a clicking valve are the three most common early warning signs, and all three usually trace back to a fitting, a seal, or a stuck solenoid rather than a catastrophic failure.
Cost expectations vary by how much you do yourself, but aftermarket retailer guidance generally frames a full kit plus install as a multi-part investment where the compressor and tank represent the biggest line items. A fuller cost breakdown is available for those budgeting a build from scratch.
Builder Tips That Actually Extend the Life of Your Setup
Most air suspension problems trace back to shortcuts taken during install, not bad parts. Mock up your compressor and tank mounts before you drill a single hole. Once you commit to a bracket location, you’re stuck with whatever service access it gives you, and trunk-mounted setups get cramped fast if you didn’t plan for filter changes.
Protect every line and wire run from heat and abrasion with split loom, and clamp it every foot or so instead of letting it hang loose against a chassis rail. That’s the difference between lines lasting a decade and lines chafing through in eighteen months.
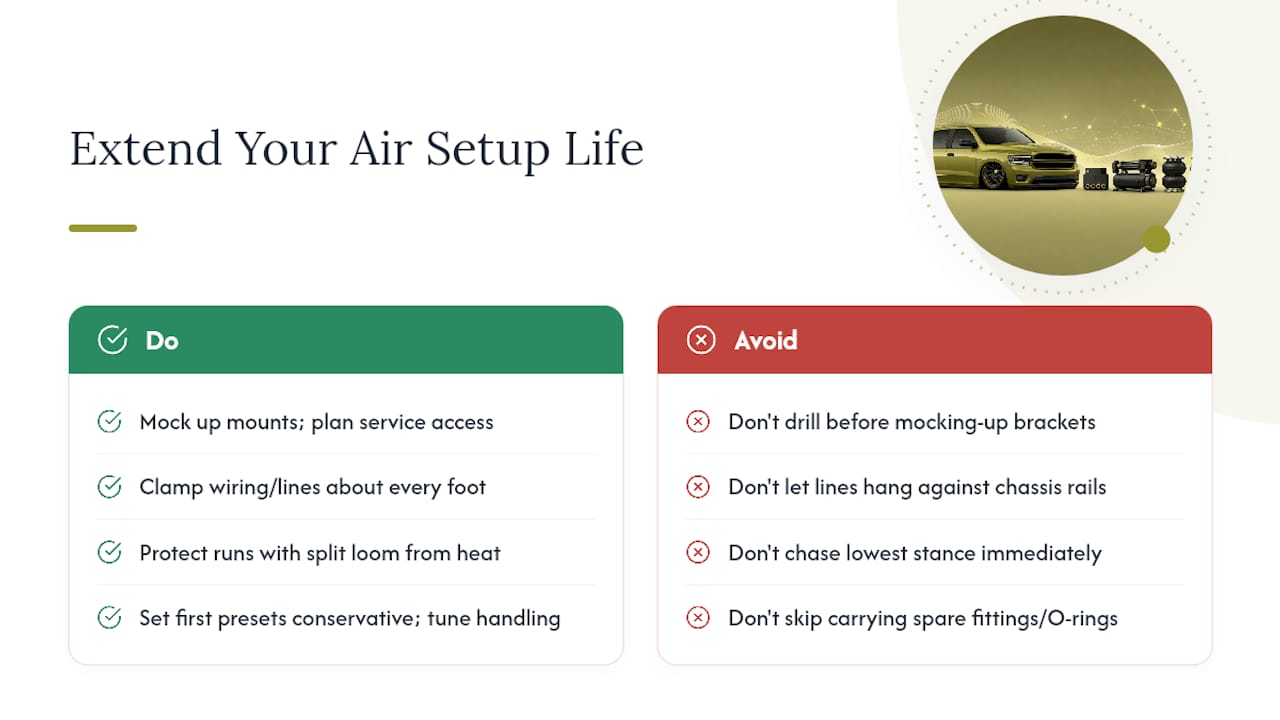
Set your first presets conservative. Chasing the lowest stance out of the gate stresses seals and looks worse anyway once the geometry binds. Tune for handling and corner balance first, then drop it once the system is calibrated and leak-free.
Keep a small service kit in the trunk: spare push-to-connect fittings, a handful of O-rings, a spare valve seal, and a basic soap-solution leak tester. It’s cheap insurance against a slow leak turning into a stranded car.
— Ismael
Ready to Build Your Air Management Kit?
Underground Dynamics is built around fitment first, which matters more in air suspension than almost any other part category. A mismatched bag bracket or the wrong tank thread pitch turns a weekend install into a return shipment. Our suspension category lists coilovers, air ride kits, and lowering springs with the fitment data you need before you order, not after.
Every product page ties back to real chassis fitment, and the Air Suspension Explained guide walks through the same components covered here in more installation detail, from wiring diagrams to calibration checkpoints. If you’re still deciding between a digital ECU setup and a simpler manual kit, that guide breaks down the tradeoffs by build type. When you’re ready to move, browse the suspension parts catalog and check the fitment specs against your chassis before checkout.
Sources
For technical background, see the Wikipedia overview of air suspension and peer-reviewed research on pneumatic control dynamics. For build-specific guidance, Underground Dynamics covers long-term reliability and why builders choose air ride for show cars.
FAQ
What Is the Best Air Suspension Management System?
There’s no single best system across every build, but for most enthusiasts a digital ECU with height sensors and app control, like the systems from Air Lift Performance, offers the best mix of repeatable presets and daily-driving convenience.
What Are the Downsides of Air Suspension?
The main downsides are added complexity and more parts that can fail compared to coilovers, plus ongoing maintenance like leak checks and moisture filter service that a static setup doesn’t require.
What Maintenance Does Air Suspension Need?
Air suspension needs periodic leak testing, moisture filter checks, and attention to compressor duty cycle, with valve seals and O-rings typically the first wear items to replace.
How Much Does It Cost to Maintain Air Suspension?
Maintenance costs stay modest for routine leak checks and filter service, but budget more when air springs or a compressor eventually need replacement, since those are the highest-cost components in the system according to retailer cost guidance.