FREE SHIPPING ON ORDERS OVER $150

Cart
0
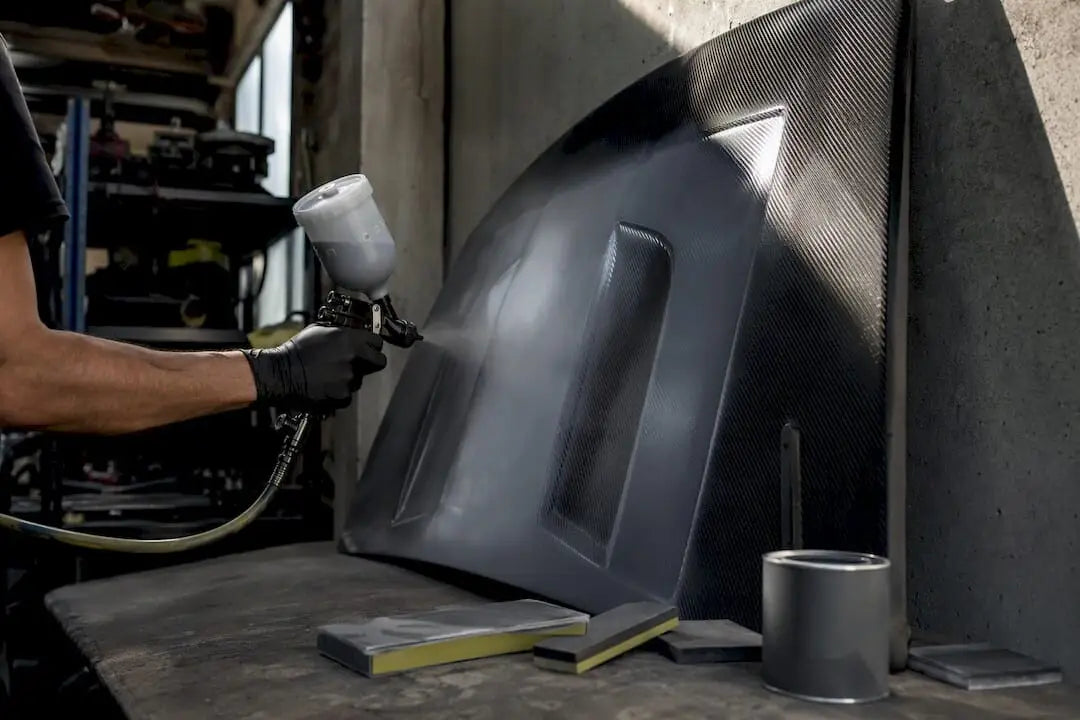
Yes, you can paint a carbon fiber hood, and you have two real paths to choose from. Go with a clear-coat refresh if you want to keep the weave visible and just restore depth and UV protection, or go full paint if you want to hide the weave entirely and match body color. Either route lives or dies on the same three non-negotiables: proper sanding to kill surface gloss, a composite adhesion promoter, and 2K epoxy or urethane products with UV inhibitors baked into the clear. Skip any one of those and you’re refinishing the hood twice.
Before you touch a spray gun, do three things:
- Inspect the whole panel for exposed fiber, resin burn spots, and stress cracks.
- Scuff the surface with the correct grit for your stage (we’ll get specific below).
- Stage your 2K primer, 2K clear, and adhesion promoter so you’re not mixing chemistry mid-job.
Key Takeaways
Painting a carbon fiber hood works when sanding, composite adhesion promoters, and 2K UV-stable primer and clear are applied in the correct sequence and thickness.
| Point | Details |
|---|---|
| Choose your route early | Decide between clear-coat refresh to keep the weave visible or full paint to hide it before you start prep. |
| Sand in stages | Progress from 320 to 400 grit for initial scuffing up to 3000 grit for final polish, never skipping steps. |
| Adhesion promoter is mandatory | Standard primers can’t bond to cured resin; skipping a composite promoter leads to peeling within weeks. |
| Build clear coat in thin layers | Target 1.5 to 2.0 mils total dry film thickness across 2 to 4 light coats rather than two heavy ones. |
| Control your environment | Keep the shop between 65 and 80°F and 40 to 60 percent humidity throughout spraying and cure. |
Table of Contents
- How Do You Paint a Carbon Fiber Hood Correctly?
- Should You Repair the Panel Before Painting?
- What Grit Sandpaper Do You Use on Carbon Fiber?
- Why Won’t Paint Stick to Carbon Fiber Without a Primer?
- Should You Mask Off the Weave or Cover It Completely?
- How Do You Spray Basecoat on a Carbon Fiber Hood?
- Which Clear Coat Protects Carbon Fiber From Yellowing?
- How Do You Wet Sand and Polish a Painted Hood?
- Why Do Painted Carbon Hoods Peel, Yellow, or Fisheye?
- What Safety Gear Do You Need for This Job?
- Why Fitment Details Matter as Much as Paint Quality
- What This Job Actually Rewards
- Sources
- FAQ
How Do You Paint a Carbon Fiber Hood Correctly?
The short version: prep is 80 percent of this job, spraying is the other 20. Get the tools right before you crack open a single can.
Consumables:
- 2K epoxy or urethane primer (composite-rated)
- Adhesion promoter formulated for composite substrates
- 2K urethane clear with UV inhibitor
- Basecoat, if you’re going full paint, matched to your color code
- Correct hardeners and activators for your temperature and humidity
Equipment:
- HVLP spray gun (1.3 to 1.4mm tip works for most basecoat/clear combos)
- Compressor with a working regulator
- Mil thickness gauge
- P100 or organic vapor cartridge respirator
- Sanding blocks in multiple grits, plus tack cloths
Environment: Hold the shop between 65 and 80°F with 40 to 60 percent relative humidity. Outside that window you’ll fight blushing, slow cure, and orange peel no matter how good your technique is. Dust control matters as much as gun control here. One stray fiber in your clear coat means you’re wet-sanding it out later.
Should You Repair the Panel Before Painting?
Not every carbon hood is paint-ready straight out of the garage. Some have cosmetic issues you can fix in an afternoon. Others have structural problems that need a composite repair shop, not a spray gun.
Look for these red flags during inspection:
- Resin burn-through, where the clear resin layer has worn away and fibers look dry or fuzzy.
- Exposed fiber edges, usually at vent cutouts or hood lips where handling wears the resin thin.
- Delamination, which sounds hollow or crackly when you tap the panel with a knuckle.
- Stress whitening around mounting points, a sign the weave has flexed past its limit.
- Cracks that run through multiple layers rather than sitting on the surface.
Cosmetic resin loss is fixable in-house. Delamination, cracked structural layers, or anything affecting the hood’s rigidity is not a DIY job. Send it to a composite repair specialist instead of gambling on a hood that could fail at speed.
A basic repair checklist looks like this: clean the surface, run a dye-penetrant check on suspicious spots, tap-test for hollow delamination sounds, fill minor resin loss with a compatible epoxy filler, then feather the repair flush before you sand for primer. If you’re already comfortable with basic composite work, our fiberglass repair guide walks through the same epoxy fill and feather technique in more detail.
Pro Tip: Shine a flashlight across the panel at a low angle before you commit to any repair. Raking light reveals waviness and burn-through that’s invisible under normal shop lighting.
What Grit Sandpaper Do You Use on Carbon Fiber?
Sanding is where most DIY jobs succeed or fail, and the surface prep step accounts for the majority of adhesion failures when it’s rushed or skipped. Getting the grit progression right matters more than the paint you eventually spray.
- Initial scuff: Wet sand at 320 to 400 grit to knock down the glossy factory resin layer. You’re not trying to remove material, just kill the shine so primer has something to grab.
- Feathering pass: Move to 600 to 800 grit around repairs or transition zones to blend edges smooth.
- Pre-primer finish: A light 800 to 1000 grit scuff right before primer removes any dust nibs from the previous step.
- Post-clear leveling (later in the process): Once clear is cured, you’ll progress 1500 to 2000 to 3000 grit for the final polish stage.
Work in a controlled circular pattern on flat sections to avoid digging channels into the weave. On edges and vent openings, switch to hand sanding with light, even pressure. Power tools are too aggressive for tight radii and will cut through the top resin layer before you notice.
Watch for a dull, matte gray patch that looks slightly fuzzy. That’s your warning sign you’ve sanded into the fiber itself, not just the resin coating. Stop immediately if you see it and reassess before continuing.
Why Won’t Paint Stick to Carbon Fiber Without a Primer?
Cured epoxy resin has low surface energy, which is a technical way of saying paint molecules have nothing to physically or chemically bond to. Standard automotive primers, and definitely anything made for plastic or wood trim, were never engineered to bridge that gap. That mismatch is the single biggest reason DIY carbon fiber paint jobs fail, and skipping a proper composite primer almost guarantees peeling within weeks rather than months or years.
Composite adhesion promoters solve this by chemically etching into the resin at a molecular level, giving the primer coat something real to lock onto. Apply it as a thin, even mist coat and let it flash per the manufacturer’s spec, usually 10 to 15 minutes, before moving to primer.
For the primer itself:
- Use a 2K epoxy filler primer if you have minor imperfections to level out.
- Use a 2K urethane primer built specifically for composite substrates if the surface is already smooth.
- Apply 2 to 3 coats, targeting a dry film thickness in the 2 to 3 mil range total.
Before you commit to color, run a cross-hatch adhesion test on a hidden section or scrap panel. Score a small grid through the primer with a razor blade, press adhesive tape firmly over it, and pull sharply. If primer lifts with the tape, your surface prep or promoter application has a problem, and you need to strip back and redo it before spraying another dollar of paint over a bad foundation.
Pro Tip: A small test panel or hidden inner fender area is worth the extra 20 minutes. It confirms adhesion, color match, and cure behavior before you risk the whole hood.
Should You Mask Off the Weave or Cover It Completely?
This decision shapes your whole approach, so make it before you sand another square inch. If you want the weave visible through clear coat, mask only the areas getting full paint using fine-line tape pressed down firmly with a plastic squeegee to prevent bleed. The edge-press method, running your thumbnail or a burnishing tool along the tape edge, seals it tight against texture that regular masking tape can’t grip.
Vents and louvers need extra patience. Cut small tape sections rather than trying to wrap one long piece around a curve, and back-mask the underside to stop overspray creeping through gaps. A partial paint approach, where painted sections blend into untouched weave panels, works fine as long as your transition line follows a natural body crease instead of cutting across an open surface.
How Do You Spray Basecoat on a Carbon Fiber Hood?
Spray order matters more here than on flat sheet metal, because vents, louvers, and hood vents create shadowed areas that are easy to under-coat.
- Start with edges and vents using a lighter, lower-pressure warmup pass around 30 psi. Shops that hit these hard-to-reach areas first get more even coverage than those that save them for last, since thin spots show up almost every time on parts painted edges-last.
- Move to the flat sections once edges are covered, holding the gun 6 to 8 inches from the surface at a consistent angle.
- Overlap each pass by roughly 50 percent to avoid banding or light streaks between passes.
- Apply 3 to 4 light coats rather than trying to achieve coverage in one or two heavy passes. Thin coats reduce runs and give solvents a chance to release properly.
- Flash between coats for 5 to 10 minutes, adjusting based on your specific paint manufacturer’s data sheet and current shop humidity.
Environment control isn’t optional here, and proper preparation steps like masking and dust control can make all the difference in a successful paint job when you follow how to prepare your vehicle for a professional wrap. Stay in that 65 to 80°F, 40 to 60 percent RH range, because basecoat sprayed outside that window blushes, dries too fast, or takes forever to flash. Run a tack cloth over the panel immediately before spraying, and keep the booth or garage area free of foot traffic that kicks up dust. Set your HVLP gun’s fan pattern wide for flats and narrower for edges, and always run a test spray on cardboard before the first pass on the actual hood.
Which Clear Coat Protects Carbon Fiber From Yellowing?
UV exposure is the enemy of any clear coat, and carbon fiber panels without UV-stable protection yellow noticeably faster than painted steel panels sitting in the same driveway. Choosing the right clear coat here is not a place to cut corners on price.
Use a 2K urethane clear formulated with UV inhibitors, not a single-stage or cheap hardware-store clear. Proven UV stabilizers in a 2K clear are the single most effective defense against long-term yellowing on exposed carbon parts, more effective than any wax or sealant applied after the fact.
Application specifics:
- Target a total dry film thickness of 1.5 to 2.0 mils, built from multiple thin coats rather than two heavy ones.
- Apply 2 to 4 coats, checking your mil gauge between rounds instead of guessing.
- Flash each coat for 8 to 12 minutes, adjusting for shop temperature.
- If you’re accelerating cure, IR lamps or a low-temperature bake work, but never exceed the panel’s safe thermal limit.
A clear coat with weak UV additives will start showing amber tint within a year or two of regular sun exposure, especially on a hood that sits horizontal and takes direct overhead sun all day. If yellowing shows up early, that’s usually a sign the clear itself was undersped for UV resistance, not an application mistake. At that point, a wet-sand and re-clear with a proper UV-stable product is the fix rather than stripping the whole job.
How Do You Wet Sand and Polish a Painted Hood?
Once your clear has cured fully, usually 24 to 48 hours minimum depending on product and cure method, it’s time to level the surface and bring out the gloss.
- Wet sand at 1500 grit first to knock down orange peel, rinsing the sandpaper frequently to avoid dragging grit across the surface.
- Progress to 2000 grit, keeping pressure light and letting the paper do the work rather than pushing hard.
- Finish at 3000 grit for a surface smooth enough to take a compound without leaving visible scratches.
- Compound and polish using a cutting compound on a foam or wool pad, working in overlapping sections, then follow with a finishing polish for final gloss.
- Inspect under raking light one more time before calling the job done, checking edges and vents for missed spots or compound residue trapped in tight areas.
Machine polishing speeds things up but carries burn-through risk on edges and raised details, so hand-finish those tight spots instead of running a buffer over them.
Why Do Painted Carbon Hoods Peel, Yellow, or Fisheye?
Most failures trace back to one of three root causes, and all three are preventable if you catch them early.
- Peeling almost always means no adhesion promoter was used, or the wrong primer went down. Standard primers simply can’t bond to composite resin the way a 2K system does. Fix it by stripping back to sound substrate and redoing the promoter and primer steps correctly.
- Yellowing comes from UV breakdown in a weak clear coat. Wet-sand the affected layer and re-clear with a proper UV-stable 2K product rather than layering more clear over the damaged one.
- Fisheyes happen when silicone, oil, or wax contaminates the surface before spraying. Clean thoroughly with a wax and grease remover and always run a test spray before committing to the full panel.
What Safety Gear Do You Need for This Job?
Automotive coatings off-gas isocyanates and solvents that do real damage to your lungs over time, so this isn’t a step to shortcut.
- Wear a respirator with organic vapor cartridges, or a P100 combo cartridge, rated for isocyanate exposure, not a basic dust mask.
- Protect eyes with sealed goggles, and wear nitrile gloves throughout mixing and spraying.
- Keep compressors grounded and away from open flame or spark sources, since solvent vapors are flammable.
- Cure in the 65 to 80°F range where possible, and never push accelerated cure methods past roughly 140°F on a composite panel, since excess heat can warp or stress the underlying resin structure.
- Let the finish cure fully before handling or reinstalling, since fresh clear coat marks easily from fingerprints or straps.
Why Fitment Details Matter as Much as Paint Quality
A flawless paint job on a hood that doesn’t sit right in the gaps still looks like an amateur build. Fitment and finish are two sides of the same job, which is why Underground Dynamics builds detailed fitment data into every hood listing instead of treating carbon fiber panels as one-size-fits-all.
If you’re working on a specific platform, our Mustang carbon fiber hood guide and Miata carbon fiber hood guide cover panel-specific prep notes worth reading before you start sanding. Our Projects page also shows real installs where builders worked through the same weave-versus-paint decision covered here.
A few things worth knowing about the parts side of this equation:
- Panel thickness and resin quality vary between suppliers, and that affects how forgiving the surface is during sanding.
- Pre-preg carbon panels typically hold up better to aggressive scuffing than wet-layup parts.
- Underground Dynamics sources carbon fiber and fiberglass hoods, body kits, and aero components built with fitment accuracy as the priority, not just looks.
This piece was put together by Ismael, drawing on shop-level refinishing practices and manufacturer application data rather than a single test build.
If refinishing an existing hood isn’t worth the labor, or the panel has damage beyond a reasonable repair, browsing carbon fiber hoods and aero parts built with documented fitment specs might save you more time than fighting a warped or burned panel. Underground Dynamics stocks hoods, body kits, and matching aero components across popular enthusiast platforms, along with performance upgrades for builders planning more than just a cosmetic refresh. Check the full catalog at Undergrounddynamics before you decide whether to repaint or replace.
What This Job Actually Rewards
The conventional advice on painting carbon fiber treats it like painting sheet metal with extra steps, and that framing undersells how different the chemistry really is. Sheet metal forgives a mediocre primer choice. Composite resin does not. The gap between a job that lasts five years and one that peels in five weeks almost always comes down to a single decision: did you use a real composite adhesion promoter and 2K system, or did you reach for whatever primer was already on the shelf.
What’s overrated in most DIY guides is the paint gun itself. Plenty of people obsess over gun brand and tip size while rushing the sanding stage, and that’s backwards. A cheap gun with correctly prepped substrate outperforms an expensive gun sprayed over glossy, unscuffed resin every time.
If you take one thing from this guide, prioritize the cross-hatch adhesion test before you commit to color. It costs you twenty minutes and a scrap panel. Skipping it costs you an entire hood’s worth of labor when the finish lifts six weeks later.
Sources
- How To Paint Or Clear Coat A Carbon Fiber Hood: Diy Guide - hyperx carbon
- You Can Paint Carbon Fiber Car Parts Yourself, But You Have To Do It Right - Jalopnik
- Painting Carbon Fiber Hoods: Tips, Techniques, And Best Practices | ShunShelter
- Carbon Fiber Maintenance Guide: How to Care for Carbon Fiber Products - JC Sportline
FAQ
Can a carbon fiber hood be painted?
Yes. You can either apply a clear coat over the visible weave to protect and refresh it, or apply full paint with a basecoat and clear to hide the weave completely.
What kind of paint do you use on carbon fiber?
Use a 2K urethane basecoat system paired with a 2K urethane primer and a UV-stable 2K clear coat. Standard single-stage or plastic-specific primers don’t bond well to cured composite resin.
Will paint stick to carbon fiber?
Not without proper prep. Paint bonds poorly to cured epoxy resin’s low surface energy unless you scuff the surface and apply a composite adhesion promoter before priming.
What grit should I start with when sanding a carbon fiber hood?
Start with 320 to 400 grit wet sanding to remove the glossy factory resin layer, then move to 600 to 800 grit for feathering before priming.
How thick should the clear coat be on a carbon fiber hood?
Aim for a total dry film thickness of 1.5 to 2.0 mils, built from 2 to 4 thin coats rather than one or two heavy applications.