FREE SHIPPING ON ORDERS OVER $150

Cart
0
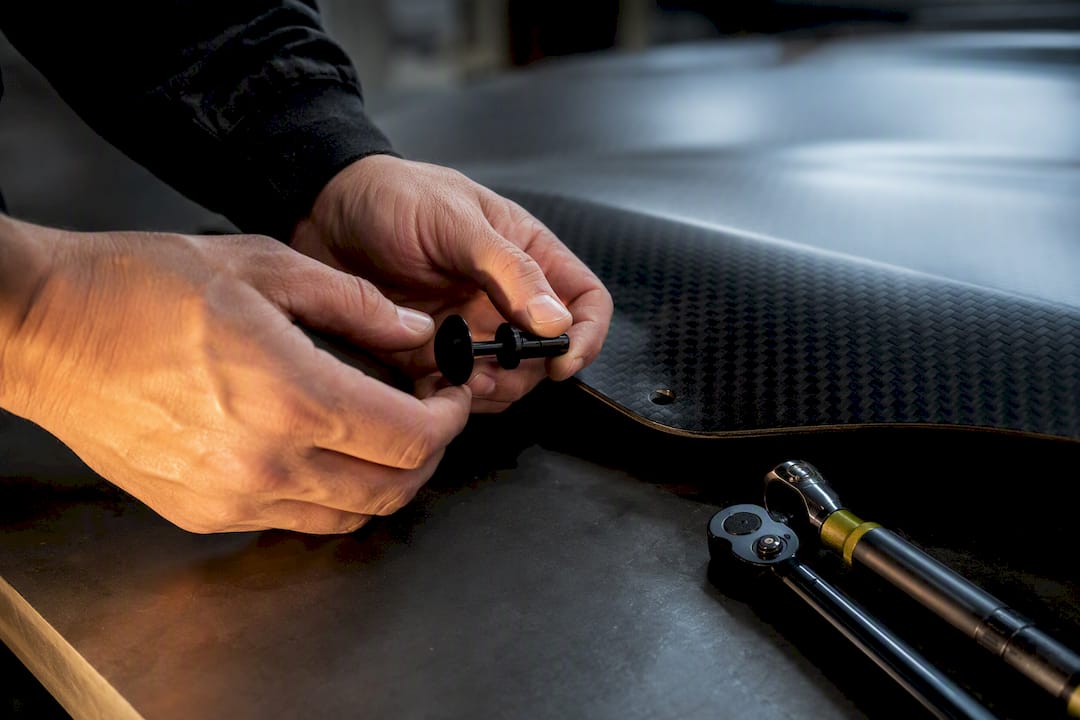
Yes, you can install hood pins yourself, and you can do it well. The whole job hinges on three things: transferring your drill centers with a witness mark instead of eyeballing them, sandwiching composite hoods with a real backing plate, and keeping your factory latch engaged as a backup once the pins are in. Follow that order and you’ll end up with a setup that holds at speed, sits flush, and doesn’t chip your paint or crack a $1,500 carbon panel in the process.
TL;DR:
- Using a witness mark transfer technique ensures precise hole alignment, preventing misplacement and off-center drillings that could lead to misfit issues.
- Installing a full-size backing plate and rubber gasket is crucial on composite hoods to evenly spread clamping load and avoid cracking or delamination.
- Proper alignment and testing through highway-speed road tests are essential to ensure the pins engage correctly and prevent rattles or looseness over time.
- Regular rechecking of hardware torque and inspecting backing plates after initial installation help maintain long-term reliability and safety.
- Exposed billet pins are easier to install for DIYers, but flush systems demand tighter tolerances and may require professional fabrication for complex panels.
Table of Contents
- What You Need Before You Start a Hood Pin Installation
- Step-By-Step Hood Pin Installation Instructions
- Installing Hood Pins on Carbon Fiber or Fiberglass Hoods
- Getting the Alignment and Latch Engagement Right
- Finishing Touches and Keeping Your Hood Pins Reliable
- An Enthusiast’s Take on Exposed Pins vs. Flush Systems
- Where to Go for Composite Hoods and Fitment Parts
- Where This Guide’s Information Comes From
- Sources
- FAQ
What You Need Before You Start a Hood Pin Installation
Hood pin installation goes sideways more often from rushing the prep than from the drilling itself. Gather everything below before you make a single mark, especially if you’re working on a fiberglass or carbon hood where a bad bit choice can shred fibers instead of cutting them cleanly.
Drill bits and cutting tools:
- 1/8 inch pilot bit to start every hole
- Step-up bits (or a stepped hole saw) sized to match your specific pin kit’s rod diameter
- Carbide bits if you’re drilling carbon fiber or fiberglass. Twist bits made for steel will grab and fray composite layers.
- Deburring or chamfer tool for cleaning edges after the final pass
Hardware and mounting components:
- Top plate, inner backing plate, and rubber gasket or bumpers (the “sandwich” for composite panels)
- The pin rod, cotter pin or locking clip, and lock nuts
- Threadlocker for any fastener that will see vibration
Alignment and protection supplies:
- Grease or a dab of toothpaste for the witness-mark transfer technique
- Painter’s tape to mask the drill zone and stop chip-out on paint or clear coat
- A spring-loaded center punch, small clamps, safety glasses, and gloves
- A cardboard template or laser level for keeping left and right holes symmetrical
Pro Tip: Buy one extra top plate before you start. If you botch a hole size on your first attempt, you’ll want a fresh plate on hand rather than waiting three days for a replacement to show up.
Step-By-Step Hood Pin Installation Instructions
This is the core hood pin installation guide sequence. Work through it in order. Skipping the witness-mark step to save ten minutes is the single most common reason installs end up misaligned.
-
Mount the posts first. Bolt the hood-pin base posts to a solid mounting point, usually the radiator support or a bracket you fabricate if there’s no factory provision. Leave the mounting hardware loose so you can shift the post slightly during fitting.
-
Close the hood and check clearance. With the posts roughly positioned, shut the hood gently and confirm the pin rod path lines up with where you want the hole on the hood skin. Adjust the post before locking anything down.
-
Apply the witness mark. Coat the tip of the pin rod (or a sharpened bolt shaped to match) with grease or toothpaste, then close the hood carefully so it transfers a precise dot onto the underside of the panel. This witness-mark method is what separates a centered hole from a hole that’s fighting the plate’s screw pattern later.
-
Center-punch the mark. Use a spring-loaded punch to dimple the exact center so your pilot bit can’t wander once you start drilling.
-
Mask the area. Lay painter’s tape over the top surface around the mark. It keeps the bit from skating on gel coat or clear coat and reduces chip-out at the entry point.
-
Drill the pilot hole. Start with the 1/8 inch bit. Drill from the underside when the access allows it; it gives you a cleaner entry hole on the visible top surface.
-
Step up gradually. Move through your step bits incrementally rather than jumping straight to full size. Rushing this step is where holes go oval or off-center, especially on curved panels where the bit can walk.
-
Deburr both sides. Once you hit final diameter, clean the burr from the top and underside of the hole so the plate and gasket seat flat.
-
Check for backer clearance. On double-wall hoods, you may need to open up the inner skin slightly so the backing plate has room to sit flush against the structure rather than bridging an air gap.
-
Assemble the sandwich. Install the top plate, rubber gasket, and inner backing plate together, then run the hardware through and torque it down evenly. Don’t crank one bolt fully before the others; work in a cross pattern like you would a wheel.
-
Set the pin rod height. Thread the base and hold the rod steady with a wrench flat (or vise grips wrapped in a rag) while you tighten the base nut. If the rod spins while you torque it, you’ll strip the threads or throw off the height you just dialed in.
-
Install the locking pin and lanyard. Slide the pin through, attach the lanyard to a nearby anchor point, and confirm it doesn’t dangle into anything moving.
On fastener choice, use threadlocker on the base nut and any bolt exposed to engine bay vibration. Save the lock nuts for hardware you might need to service later, like the plate bolts, so you’re not fighting old threadlocker residue during maintenance.
Installing Hood Pins on Carbon Fiber or Fiberglass Hoods
Composite hoods aren’t built like steel. A steel hood is one continuous sheet that shrugs off a clamping load almost anywhere. A carbon or fiberglass hood is a thin outer skin bonded to an inner skeleton of ribs, and that skin will crack or delaminate if you clamp a fastener straight through it without spreading the load first.
That’s why sandwich construction matters so much more here than it does on a factory steel panel:
- Always use a full-size backing plate on the inside, not just a washer, so the clamping force spreads across a wide area of the inner skeleton rather than pinching one small point on the skin.
- Add a rubber gasket or bumper between the top plate and the hood surface to cushion vibration and prevent the plate edge from biting into the clear coat.
- Drill in stages with carbide bits only. A standard twist bit or a uni-bit sized for sheet metal will rip carbon strands instead of shearing them.
- Mask heavily with painter’s tape before you touch the surface. Composite gel coats chip far more easily than automotive paint on steel.
Expect your top-side hole to end up slightly larger than the pin rod diameter itself; that’s normal and gets covered entirely by the top plate, so don’t chase a perfect press fit on the visible hole. If your hood has a factory pin provision already molded in, reuse those holes rather than drilling new ones. And if you’re working around a scoop, vent, or any structural rib you can’t clearly identify from outside the panel, that’s the point to hand the job to a body shop rather than guess. A misjudged hole through a load-bearing rib on a carbon hood is not a mistake you patch, it’s a mistake you replace the whole panel over.
Getting the Alignment and Latch Engagement Right
Alignment is where most “I installed hood pins and now the hood rattles” complaints trace back to. The pin needs to enter its latch mount at close to a straight angle on both sides. Even a small mismatch between left and right, or a rod that’s angled instead of vertical, is enough to keep the locking pin from seating properly, which defeats the entire point of installing it.
A few practices keep both sides consistent:
- Build a cardboard template off the side you finish first, then use it to mark the second side instead of measuring from scratch.
- Use a laser level or a straightedge across the hood to confirm both posts sit at the same height and angle relative to the hood’s centerline.
- Set pin height so the hood closes without upward pressure fighting the latch. If you have to push down on the hood to get the pin through, the height is wrong.
- Test by pulling upward on the hood with progressively more force after the pin is locked. It should hold firm with zero flex at the pin location.
Pro Tip: Do the road test before you call it finished. Drive at highway speed, then pull over and check the pin for any play. A pin that felt solid in the driveway can still shift slightly once wind load and vibration get involved.
Finishing Touches and Keeping Your Hood Pins Reliable
A hood pin installation isn’t done the moment the last bolt is torqued. Clean every hole thoroughly, top and bottom, with a deburring tool and a shop rag; leftover metal shavings sitting against carbon fiber or fresh paint will cause corrosion or surface staining over time. Touch up any exposed edge on a painted hood with clear lacquer to seal it against moisture.
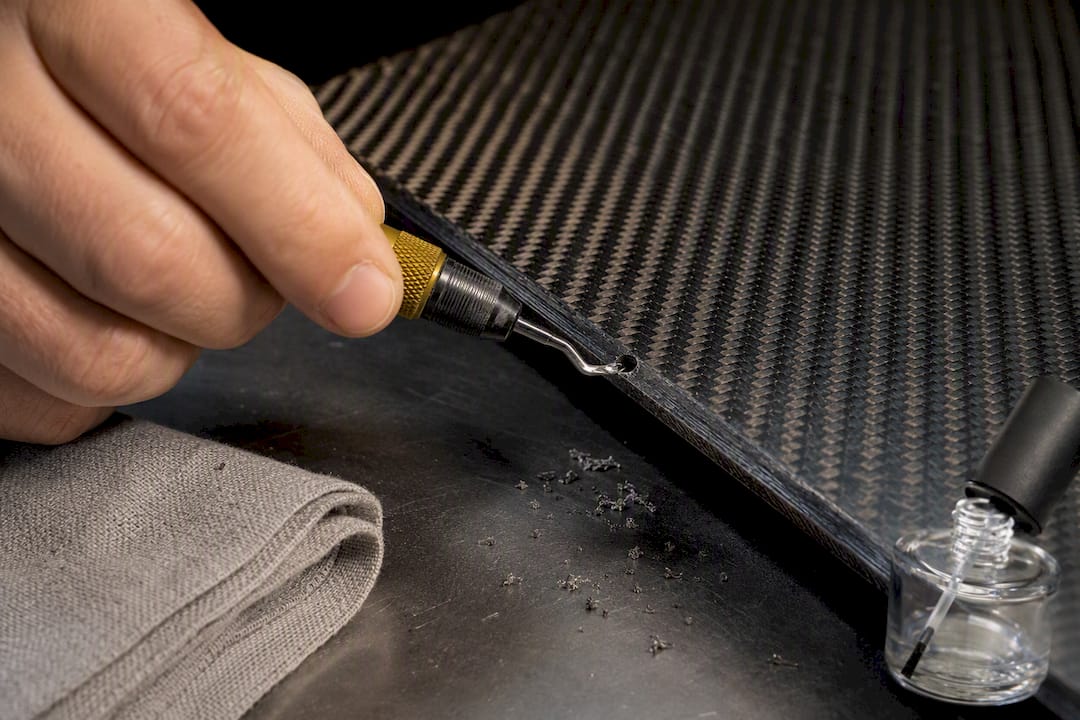
Snap the decorative cover plates and rubber bumpers into place, clip the lanyards to a point that won’t interfere with engine bay components, and store your spare locking clips somewhere you’ll actually remember.
For maintenance:
- Recheck all torque on base nuts and plate hardware after the first 50 miles. New installs settle.
- Inspect composite backing plates every few months for any shift or hairline cracking around the mounting holes.
- If a hole ends up slightly off-center after the fact, don’t redrill; a slightly oversized top hole and a new gasket usually correct minor misalignment without touching the panel again.
- A rattle almost always traces back to a loose base nut or a plate that’s shifted against the gasket, not the pin itself.
An Enthusiast’s Take on Exposed Pins vs. Flush Systems
Exposed billet pins look the part and forgive minor angle error better than flush, hidden-latch systems, which is why they’re the default for most DIY installs. Flush systems clean up the engine bay look but demand tighter tolerances and usually more fabrication.
For a street cruiser, exposed pins with the factory latch as backup is plenty of redundancy. For a track car pulling real aero load, I’d lean toward a second pin per side rather than relying on one. And if your hood has a complex scoop, vented section, or you’re not confident about what’s structurally behind the surface, pay a fabricator. That’s not a DIY compromise, that’s just knowing where the job stops being a drill-and-bolt task.
— Ismael
Where to Go for Composite Hoods and Fitment Parts
If your current hood is already cracked, warped, or just not composite to begin with, hood pins alone won’t fix the bigger fitment picture. Some sellers offer carbon fiber and fiberglass hoods built with real fitment data for popular platforms, along with backing hardware and alignment tools that pair with a hood-pin install rather than fighting against it.

Browse the body kit and hood catalog if you’re replacing a damaged panel rather than drilling into one that’s already compromised. If your pin install is part of a bigger build, the performance parts section covers fitment hardware you’ll likely need alongside it, and painter’s-tape technique for protecting a fresh composite surface is covered in more depth in our carbon fiber hood painting guide. Not sure whether your hood’s inner structure can take a backing plate where you want to drill? Reach out through the Underground Dynamics site before you cut, not after.
Where This Guide’s Information Comes From
The drilling sequence, witness-mark technique, and composite sandwich method in this guide draw from Hot Rod Magazine’s hood pin how-to and its companion step-by-step installation piece, along with YourMechanic’s installation and safety guide. For a simpler factory steel hood install without composite concerns, the Instructables writeup walks through a stripped-down version of the same basic steps.
Sources
- How to easily install hood pins
- How to Install Hood Pins on Your Car | YourMechanic Advice
- How to Install “Automotive Hood Pins” to a Factory Steel Hood
FAQ
How Much Does Hood Pin Installation Cost?
Basic billet-style pin kits start around $99 for the hardware alone, and a DIY install with tools you already own adds no labor cost. Having a shop do it adds regional labor rates on top of the kit price.
Why Do People Install Hood Pins?
Hood pins add a mechanical, visible backup that keeps the hood shut if the factory latch or hood cable ever fails, which matters most at highway speed or on track where a flying hood is a real hazard. They’re also standard on many track builds because tech inspection often requires them.
Do You Need a Hood Latch If You Have Hood Pins?
Yes. Hood pins work best as a secondary restraint, not a replacement for your factory latch. Keeping the OEM latch engaged gives you a backup if a pin is ever installed slightly out of alignment or a lanyard fails.
How Does a Hood Pin Work?
A post-mounted pin rod passes through a hole in the hood and a matching hole in the chassis mount, then a removable locking pin slides through the rod to keep the hood from lifting. The clamping and holding force comes from correct alignment and a properly torqued base, not from the pin’s diameter alone.