FREE SHIPPING ON ORDERS OVER $150

Cart
0

Before your next session, run three checks that matter most: confirm your splitter mounts are solid and the panel has no cracks, verify your rear wing angle hasn’t shifted from the last outing, and look under the car to make sure your undertray or diffuser isn’t dragging or delaminating. Those three steps alone can prevent a dangerous aero failure at speed. As Wikipedia’s overview of downforce mechanics confirms, downforce is generated through a combination of body shaping and airfoil devices, and both categories depend entirely on structural integrity to work as designed.
The full downforce components checklist for track cars starts with the splitter, rear wing, and undertray/diffuser because those three devices carry the highest aerodynamic loads and have the most direct effect on front-to-rear balance. Mounting integrity and aero balance aren’t just lap-time concerns. At speed, a failed splitter mount or a stalled wing can produce sudden handling changes that are genuinely dangerous.
Pro Tip: Before any track day, spend 15 minutes with a flashlight under the car. Most aero failures start as a loose fastener or a hairline crack in a composite panel, and both are easy to catch in the garage.
Key Takeaways
A track car’s aero performance depends on mounting integrity, front-to-rear balance, and incremental testing, not just the number of components fitted.
| Point | Details |
|---|---|
| Prioritize these three first | Splitter, rear wing, and undertray carry the highest aero loads and most directly affect balance. |
| Balance beats total downforce | Target a slightly rear-biased aero map relative to static weight distribution to prevent snap oversteer. |
| One change per run | Changing a single variable per session is the only way to know what’s actually working. |
| Mounting integrity is non-negotiable | Backing plates, grade 5/8 hardware, and safety cables prevent catastrophic failures at speed. |
| Undergrounddynamics for chassis-specific parts | Carbon fiber and fiberglass aero components with real fitment data for BRZ, Miata, Civic, 350Z, and more. |
Table of Contents
- Your Downforce Components Checklist for Track Cars
- What Each Component Does and Where It Mounts
- How Aero Balance Works with Ride Height and Rake
- Materials, Mounting Structure, and Adjustability
- How to Test and Tune Aero on Track
- Installation, Maintenance, and Regulatory Considerations
- Undergrounddynamics Practical Setup and Fitment Checklist
- Undergrounddynamics Has the Parts to Back This Checklist
- Sources
- FAQ
Your Downforce Components Checklist for Track Cars
Use this section as a printable pre-track inspection guide. Work through each component in order, mark pass or fail, and note any urgent items before you load the trailer.
Splitter
- Check all mounting bolts and rods for tightness; look for elongated holes in the panel
- Inspect the leading edge for cracks, chips, or delamination
- Confirm endplates (if fitted) are flush and fastened
- Pass: No cracks, all hardware torqued, rods under slight tension
- Fail: Any crack longer than 2 inches, loose rod, or missing fastener
- Cost range: $150–$600 for a replacement fiberglass or carbon splitter; install time roughly 1–2 hours
Canards / Dive Planes
- Pull each canard laterally to check for flex at the mount bracket
- Inspect the bonding line where the canard meets the bumper or fender
- Pass: No movement at the root, bonding line intact
- Fail: Visible gap at bonding line, bracket cracked or bent
- Cost range: $80–$350 per pair; install time 30–60 minutes
Side Skirts
- Walk the length of each skirt and press inward at the midpoint to check for flex
- Look for ground contact wear or missing clips
- Pass: Firm, no scraping marks on the lower edge, all clips seated
- Fail: Skirt dragging, broken clips, or cracked end cap
- Cost range: $100–$400 per side; install time 1–2 hours
Undertray / Flat Floor
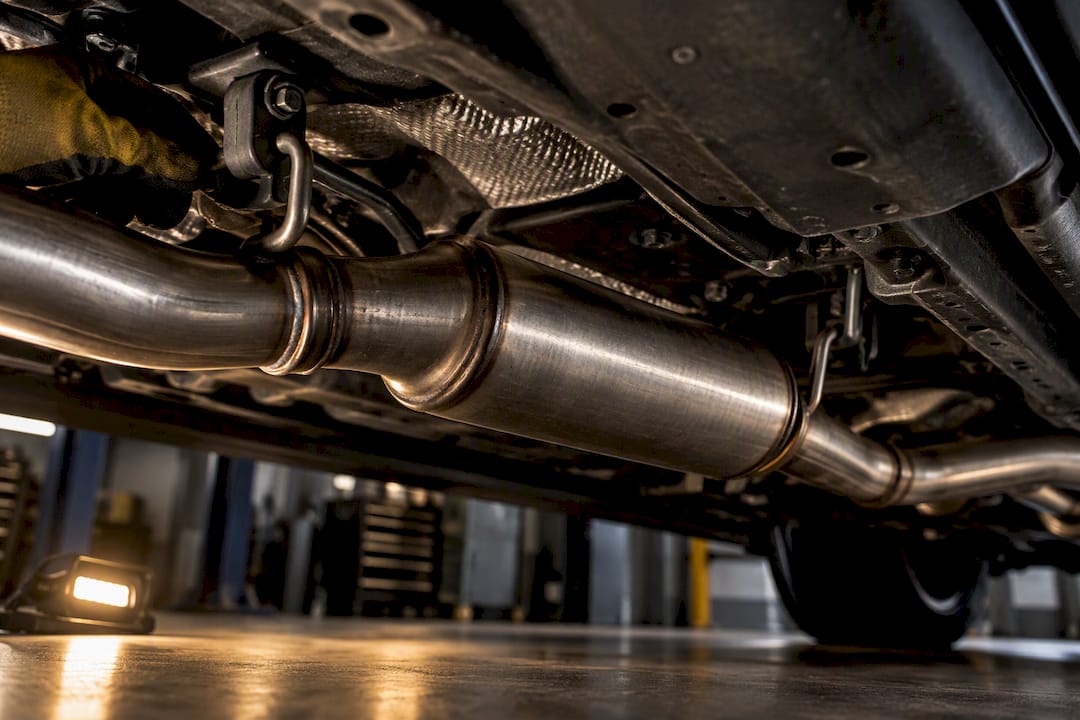
- Slide under the car and check every fastener along the perimeter
- Look for impact damage, warping, or missing sections
- Inspect any sealing foam or tape at the edges for compression or gaps
- Pass: Flat, sealed, all fasteners present
- Fail: Warped panel, missing fasteners, or torn sealing tape
- Cost range: $200–$900; install time 2–4 hours
Rear Diffuser
- Check the upsweep fins for cracks and the mounting tabs for security
- Confirm the diffuser exit is clear of debris
- Pass: All fins intact, no cracks at the tabs, exit unobstructed
- Fail: Cracked fin, loose tab, or debris blocking the exit
- Cost range: $150–$700; install time 1–3 hours
Rear Wing / Spoiler
- Check the wing endplates for cracks and the main element for twist
- Verify the angle-of-attack setting hasn’t shifted (mark your setting with a paint pen)
- Inspect the uprights and their mounting bolts into the trunk or chassis
- Pass: No twist, angle unchanged, all hardware torqued
- Fail: Visible twist in the main element, shifted angle, or loose upright
- Cost range: $250–$1,500; install time 2–4 hours
Endplates
- Check for cracks at the bolt holes and confirm all fasteners are present
- Pass: No cracks, all bolts present and tight
- Fail: Cracked endplate or missing hardware
- Cost range: $50–$200 per pair; install time 30 minutes
Gurney Flap
- Confirm the flap is straight and the rivets or screws are all seated
- Pass: Straight, all fasteners tight
- Fail: Bent, missing fasteners, or delaminating from the wing trailing edge
- Cost range: $20–$80; install time 15–30 minutes
Vortex Generators
- Check adhesive bond on each generator; press firmly to confirm no lift
- Pass: All generators firmly bonded, no lifting edges
- Fail: Any generator with a lifted edge or missing entirely
- Cost range: $30–$120 per set; install time 30–45 minutes
Ducts / Hood Vents
- Confirm duct outlets are clear and the duct body hasn’t cracked or separated from the hood
- Pass: Clear outlet, duct body bonded and intact
- Fail: Blocked outlet, cracked duct, or separated bonding
- Cost range: $60–$300; install time 1–2 hours
Wheel Covers / Aero Discs
- Check all retention clips and confirm no warping from brake heat
- Pass: All clips seated, no warping
- Fail: Missing clips or warped disc
- Cost range: $40–$200 per set; install time 15–30 minutes
Typical pre-track aero inspection: most builders who work through a structured checklist like this complete the full walk-around in under 30 minutes. Skipping it is how a $25 fastener turns into a $600 splitter replacement and a ruined session.
Front splitters, canards, and air dams together manage front-end airflow to reduce understeer and increase front-end grip at higher speeds, making them among the highest-priority items on any pre-track inspection.
What Each Component Does and Where It Mounts
Understanding the function behind each device helps you prioritize repairs and make smarter setup decisions. Here’s a component-by-component breakdown.
Splitter
A front splitter mounts beneath the front bumper, extending forward from the car’s nose. It works by creating a pressure differential: higher pressure builds above the panel while airflow accelerates underneath, generating front downforce. Adding endplates at the outer edges and ramps on the underside prevents pressure from leaking around the sides, which meaningfully improves efficiency. The tradeoff is drag, and a longer splitter overhang produces more of both.

Canards and dive planes
Canards bolt to the front bumper or fender flares, angled to redirect airflow inboard and downward. They add front downforce and help manage the airflow entering the front wheel wells, which reduces lift in that area. Dive planes are a larger, more aggressive version of the same concept. Both are sensitive to ride height changes because they work close to the ground.
Side skirts
Side skirts run along the rocker panels between the front and rear wheels. Their job is to seal the gap between the car’s body and the ground, preventing high-pressure air from the sides from bleeding under the car and disrupting the low-pressure zone that the undertray and diffuser depend on. Without effective side skirts, underfloor downforce drops significantly.
Undertray and flat floor
A flat undertray smooths the airflow under the car, reducing turbulence and allowing the diffuser to work properly. Underfloor devices can account for a large share of downforce in some racing applications, with some designs generating up to roughly 60% of total downforce from underfloor devices depending on rules and design. That makes the undertray one of the highest-leverage components on a budget build, especially when combined with a well-designed diffuser. For a deeper look at fitment specifics, the underbody aero panels guide covers inspection and install details.
Rear diffuser
The diffuser mounts at the rear of the undertray and uses the Venturi effect to accelerate airflow exiting from under the car. As air speeds up through the expanding channel, pressure drops, pulling the car downward. Diffuser efficiency depends on the upsweep angle and the expansion ratio. Too steep an angle causes flow separation and kills the effect. Fins inside the diffuser help organize the flow and prevent cross-channel contamination.
Rear wing
The rear wing is the most visible aero component and the most adjustable. It mounts on uprights above the trunk or rear bodywork, and it generates downforce through the same pressure differential as an aircraft wing, but inverted. A multi-element wing (main plane plus flap) allows angle-of-attack adjustment on both elements independently, giving you a wide range of downforce and drag settings. Endplates at the wing tips contain the pressure field and improve efficiency.

Gurney flap
It increases effective camber and raises the pressure on the high-pressure side of the element, adding downforce with minimal structural complexity. It’s one of the cheapest performance gains available.
Vortex generators
Small ramps or fins bonded to the hood, roof, or body panels generate small vortices that energize the boundary layer, helping airflow stay attached over curved surfaces longer. They’re most effective on cars with complex body shapes where flow tends to separate early.
Ducts and hood vents
S-ducts and hood vents manage pressure buildup in the front bumper cavity. Properly shaped ducts reduce front bumper pressure and improve flow attachment over the hood, which reduces lift at the front of the car. Rectangular ducts with wider outlets and low transition angles perform best in simulation studies.
Tradeoffs at a glance
| Component | Front/rear bias | Drag penalty | Structural demand | Effective speed range |
|---|---|---|---|---|
| Front splitter | Front | Low–medium | Medium | All speeds |
| Canards | Front | Low | Low | Medium–high |
| Side skirts | Neutral (enables underfloor) | Very low | Low | All speeds |
| Flat undertray | Rear-biased | Low | Medium | Medium–high |
| Rear diffuser | Rear | Low | Medium | Medium–high |
| Rear wing (single element) | Rear | Medium | High | Medium–high |
| Rear wing (multi-element) | Rear | High | High | High |
| Gurney flap | Depends on location | Very low | Very low | All speeds |
| Vortex generators | Neutral | Negligible | Very low | Medium–high |
| Hood ducts | Front (reduces lift) | Low | Low | Medium–high |
A simulation-guided study testing 13 aerodynamic modifications found that a combined package of splitters, ducts, and diffusers produced a large increase in downforce at 120 km/h compared to the baseline car, but with a significantly higher drag coefficient (C_D ≈ 0.83).
How Aero Balance Works with Ride Height and Rake
The most common mistake builders make is adding downforce without thinking about where it lands front-to-rear. More total downforce with a front-heavy aero bias can produce snap oversteer at speed, which is harder to manage than understeer and genuinely dangerous on a fast circuit.
Practical racer guidance from Grassroots Motorsports is clear: target an aero balance that roughly tracks or slightly exceeds your static weight distribution toward the rear. If your car sits 60/40 front-to-rear by weight, aim for an aero map that’s 55/45 or 50/50 front-to-rear, not 65/35. That slight rear bias keeps the car planted and predictable under braking and through fast corners.
Here’s a practical sequence for measuring and targeting aero balance:
- Establish a baseline. Run the car on corner scales with all aero fitted but no aero loads (stationary). Record corner weights. This is your static baseline.
- Run a timed session and collect driver feedback. Note where the car feels loose or tight, particularly at the entry and exit of fast corners. Oversteer on entry at speed usually points to insufficient rear downforce or too much front downforce.
- Change one variable. Adjust rear wing angle by one increment (typically 2–3 degrees), or add/remove a gurney flap. Never change two things between runs.
- Re-run and compare. Use GPS lap timing or a data logger to compare sector times. Faster in the fast sectors usually means better aero balance, not just more total downforce.
- Repeat until the driver reports neutral balance in fast corners. That’s your target window.
Pro Tip: Ride height changes affect aero balance significantly. Lowering the front raises front downforce and can shift the balance forward. If you adjust ride height for suspension reasons, re-check your aero balance before assuming the setup is the same.
Rake, the difference in ride height between front and rear, also matters. Most track cars run a small amount of positive rake (rear higher than front) to help the diffuser work efficiently. Too much rake can stall the front splitter. Track suspension setup and aero balance are deeply linked, and changes to one almost always require a revisit of the other.
Materials, Mounting Structure, and Adjustability
Prefer structurally backed mounting points and hardware rated for aerodynamic loads. Material choice balances stiffness, weight, and cost, but none of that matters if the mount fails at 100 mph.
Carbon fiber is the stiffest and lightest option, but it fails brittlely under impact. A carbon splitter that hits a curb hard can shatter rather than flex, and the failure can be sudden. It’s the right choice for components where weight and stiffness are critical and impact risk is low.
Fiberglass is heavier and slightly less stiff than carbon, but it absorbs impact energy better and is far easier to repair in the field. For splitters and body-mounted aero on cars that see regular track use, fiberglass is often the more practical choice. Undergrounddynamics stocks both carbon fiber and fiberglass options across its aero catalog, so you can match the material to your risk tolerance and budget.
ABS and thermoplastic panels are common on OEM-style aero and budget kits. They’re light, cheap, and easy to replace, but they flex under load at high speed, which reduces aerodynamic efficiency. Fine for street use or low-speed events; less ideal for serious time attack.
Aluminum brackets are the standard for wing uprights and mounting hardware. Use grade 5 or grade 8 hardware for any structural fastener. Backing plates are non-negotiable on any through-panel mount: spreading the load across a larger area prevents the fastener from pulling through the composite under aero loads.
Mounting checklist:
- Use backing plates on all through-panel fasteners (minimum 2-inch diameter for composite panels)
- Grade 5 or grade 8 hardware on all structural mounts; replace any fastener showing corrosion or thread damage
- Shear pins or safety cables on splitters and wings to retain the component if the primary mount fails
- Never rely on adhesive alone for a load-bearing mount; adhesive is a supplement, not a primary fastener
- Inspect all mounts for cracks in the surrounding composite after any curb strike or contact
Pro Tip: Mark your wing angle setting with a paint pen or a small scribe line on the upright before your first session. If the wing shifts during a run, you’ll know immediately when you return to the pits.
How to Test and Tune Aero on Track
Use small, incremental changes and objective measurement. A single-variable test loop with a data logger and corner scales will tell you more in one track day than a dozen forum threads.
Here’s the method:
- Set a baseline configuration. Document every aero setting: wing angle, gurney flap height, splitter rod tension, ride height at all four corners. Take photos.
- Run a minimum of three laps per configuration. Discard the first lap (tires and driver warming up) and average the second and third for your comparison number.
- Change one variable only. Adjust wing angle, add or remove a gurney flap, or change splitter height. Never stack changes between runs.
- Log objective data. Use a GPS-based data logger (AiM Solo, Racelogic VBOX, or equivalent) to capture sector times and speed traces. Corner speeds in fast sections are the most sensitive indicator of aero balance changes.
- Record environmental conditions. Air temperature, track temperature, and wind direction all affect aero results. A 10°F swing in air temperature changes air density enough to affect downforce measurably.
- Combine driver feedback with numbers. If the driver reports more confidence in fast corners AND the data shows higher minimum corner speed, the change is working. If only one of those is true, investigate further before committing.
The incremental change methodology with objective measurement is the standard approach used by practical racing teams: baseline runs, single-variable changes, and repeatable driver inputs combined with scales or load data to quantify aero balance.
For builders with limited wind tunnel access, CFD-driven iteration can produce large measured gains in downforce, but scaled verification and conservative expectations are needed when translating simulation results to full-scale performance.
Sample aero test data table:
| Run | Wing angle | Gurney flap | Sector 2 time (fast corner) | Driver feedback |
|---|---|---|---|---|
| Baseline | 8° | None | 18.4 s | Slight understeer mid-corner |
| Run 2 | 8° | 15 mm | 18.2 s | More neutral, slight push on exit |
| Run 3 | 10° | 15 mm | 18.1 s | Neutral entry, slight oversteer exit |
| Run 4 | 10° | 10 mm | 18.0 s | Neutral, driver confident |
Run 4 in this example represents the best balance of objective time and driver confidence. The next step would be to verify the result with a repeat run before locking in the setting.
More downforce also means more cornering load, which increases braking demands. Understanding why track vehicles need different brakes than street cars becomes relevant once your aero package starts generating real load.
Installation, Maintenance, and Regulatory Considerations
Inspect mounts, fasteners, and composite surfaces before every session. Replace any suspect hardware immediately. A fastener that looks borderline in the garage will fail on track.
Installation basics:
- Template splitters and undertray panels on the car before drilling; mark all hole locations with a center punch
- Use a torque wrench on all structural fasteners; finger-tight plus a quarter turn is not a specification
- Apply anti-seize to any fastener threading into aluminum or composite inserts
- Allow any bonded component (canards, vortex generators, duct bodies) to cure fully before track use; 24 hours minimum for most structural adhesives
Maintenance schedule:
Pre-track (every session): Full visual inspection per the checklist above. Check all fasteners. Confirm wing angle hasn’t shifted. Look for new cracks or delamination.
Post-track: Clean all aero surfaces and inspect for impact damage, particularly on the splitter leading edge and diffuser fins. Re-torque any fastener that showed any movement.
Seasonal: Strip all removable aero components and inspect mounts, backing plates, and composite panels for fatigue cracks. Replace any fastener that shows corrosion. Repaint or clear-coat any bare composite to prevent UV degradation.
Pro Tip: Keep a small bag of spare hardware in your track kit: the correct grade bolts, washers, and nyloc nuts for every aero mount on your car. A missing fastener in the paddock is a 30-second fix if you have the part, and a session-ending problem if you don’t.
Regulatory considerations:
Before adding aero, check your series rulebook. Many club racing and time attack series restrict movable aero devices, limit wing dimensions, or mandate minimum ride heights. Some series ban active aero entirely. Common restrictions include:
- Maximum wing width (often tied to body width)
- Prohibited movable elements (DRS-style flaps)
- Minimum ground clearance at rest
- Scrutineer approval required for any aero device that extends beyond the body envelope
When in doubt, email the series technical director with photos of your setup before the event. Getting scrutineered out of a session because of an unapproved wing is avoidable.
Undergrounddynamics Practical Setup and Fitment Checklist
Here’s the shop-floor sequence that produces consistent results across common platforms like the BRZ, Miata, Civic, and 350Z.
Fitment order of operations:
- Start with the undertray and diffuser. These are the highest-leverage components and the hardest to retrofit around other aero. Get them fitted and sealed before anything else.
- Fit the rear wing next. Set the upright height so the wing sits in clean air above the roofline or trunk lid, not in the turbulent wake of the body. Measure upright height from the trunk surface, not from the ground, to account for ride height variation.
- Fit the front splitter last. The splitter height relative to the ground affects both front downforce and the aero balance with the rear wing. Set it after the rear wing is locked in.
- Add canards and gurney flaps as the final tuning layer, not the foundation.
Backing plate sizing: for any through-panel mount on a fiberglass or carbon component, use a backing plate with a minimum footprint of 2 inches × 2 inches. For wing uprights bolting through a trunk or hatch, use a 3-inch × 3-inch plate with a rubber gasket to prevent cracking the panel over time.
Wing mounting height: a common rule of thumb is to position the wing’s main element so its leading edge sits at or above the roofline. Lower than that and the wing operates in disturbed air, losing efficiency. Higher than that increases the moment arm on the uprights, raising structural demand.
Prioritized actions for limited budget or time:
- First: mounting integrity on every existing component. A loose splitter at speed is worse than no splitter.
- Second: front-to-rear aero balance. Adding a rear wing without checking front downforce is a common mistake that creates oversteer.
- Third: adjustability. Once balance is close, add a gurney flap or adjustable wing to fine-tune without major hardware changes.
Pro Tip: On small sports cars like the BRZ or Miata, the undertray and diffuser combination often produces more lap-time gain per dollar than a rear wing. Start there if you’re working with a tight budget. The role of aero on small sports cars covers this in more detail.
What building track aero actually teaches you
The biggest lesson from building and tuning aero on track cars isn’t about parts. It’s about sequence and measurement. Most builders who struggle with aero handling problems made the same mistake: they added components without establishing a baseline, changed multiple things at once, and then couldn’t isolate what was working.
The checklist in this article exists because the alternative is guessing. And guessing at 100 mph with an unbalanced aero setup is how you end up with a car that’s genuinely difficult to drive, even if the individual parts are high quality.
The second lesson is that mounting integrity beats marginal aero gains every time. A perfectly designed wing that’s bolted to a cracked mount is a liability, not an asset. Practical teams prioritize repeatability and structural soundness over chasing the last tenth of downforce coefficient. That’s not conservative thinking; it’s what actually produces consistent lap times.
Balance is the third lesson, and it’s the one most often skipped. Adding rear downforce without matching front downforce, or vice versa, shifts the handling balance in ways that can be hard to diagnose without data. The goal is a car that’s predictable and consistent, not one that’s fast in a straight line and nervous in corners.
Undergrounddynamics Has the Parts to Back This Checklist
If you’ve worked through this checklist and identified gaps in your aero setup, Undergrounddynamics carries chassis-specific carbon fiber and fiberglass aero components with real fitment data, so you’re not guessing on compatibility. The catalog covers the full range of what this checklist addresses.
Browse the body kits and aero components catalog for splitters, wings, undertray panels, and lip kits matched to popular platforms including the BRZ, Miata, Civic, 350Z, Supra, and more. Need to dial in ride height and rake to match your new aero? The suspension parts section covers coilovers, air suspension, and lowering springs with the same fitment specificity. Head to Undergrounddynamics to check fitment for your build and get the right parts the first time.
Sources
The following sources provided factual grounding for this article. Each serves a different purpose depending on what you want to explore next.
- Simulation-Guided Aerodynamic Design and Scaled Verification for High-Performance Sports Cars
- Race car aerodynamics: How to counteract lift with downforce | Articles | Grassroots Motorsports
- Downforce
- Upgrade Motorsport Track Day Checklist: Best Performance Mods for Time Attack Racing
- Aerodynamic Upgrades - Rapid Racer
FAQ
What downforce components should you check first on a track car?
Start with the splitter mounts, rear wing uprights, and undertray fasteners. These three carry the highest aerodynamic loads and are the most likely to cause a handling failure if they’re compromised.
What is downforce and how does it work on a race car?
Downforce is vertical load generated by shaping bodywork and using inverted airfoil devices to create a pressure differential that pushes the car toward the track surface. It increases tire grip as speed rises, allowing higher cornering and braking forces.
How do you maintain aero balance on a track car?
Target an aero balance that roughly matches or slightly rear-biases your static weight distribution. Adding front downforce without matching rear downforce shifts the balance forward and can cause oversteer at speed, as Grassroots Motorsports’ practical guidance confirms.
Which car produces the most downforce?
Formula 1 cars generate the highest downforce of any production racing vehicle, with modern cars capable of producing downforce exceeding their own weight at racing speeds. For road-based track cars, the specific figure depends heavily on the aero package, speed, and configuration.
How often should you inspect aero components on a track car?
Inspect all aero mounts, fasteners, and composite surfaces before every track session. Post-session, check for new impact damage and re-torque any fastener that showed movement. A full seasonal teardown and inspection of backing plates and mount integrity is recommended at least once per year.
Recommended
- Track Suspension Setups: A Guide for Performance Enthusiasts – Underground Dynamics
- Suspension Tuning Checklist for Experienced Builders – Underground Dynamics
- Underbody Aero Panels: What Performance Owners Need to Know – Underground Dynamics
- The Role of Aero on Small Sports Cars: Builder’s Guide – Underground Dynamics