FREE SHIPPING ON ORDERS OVER $150

Cart
0
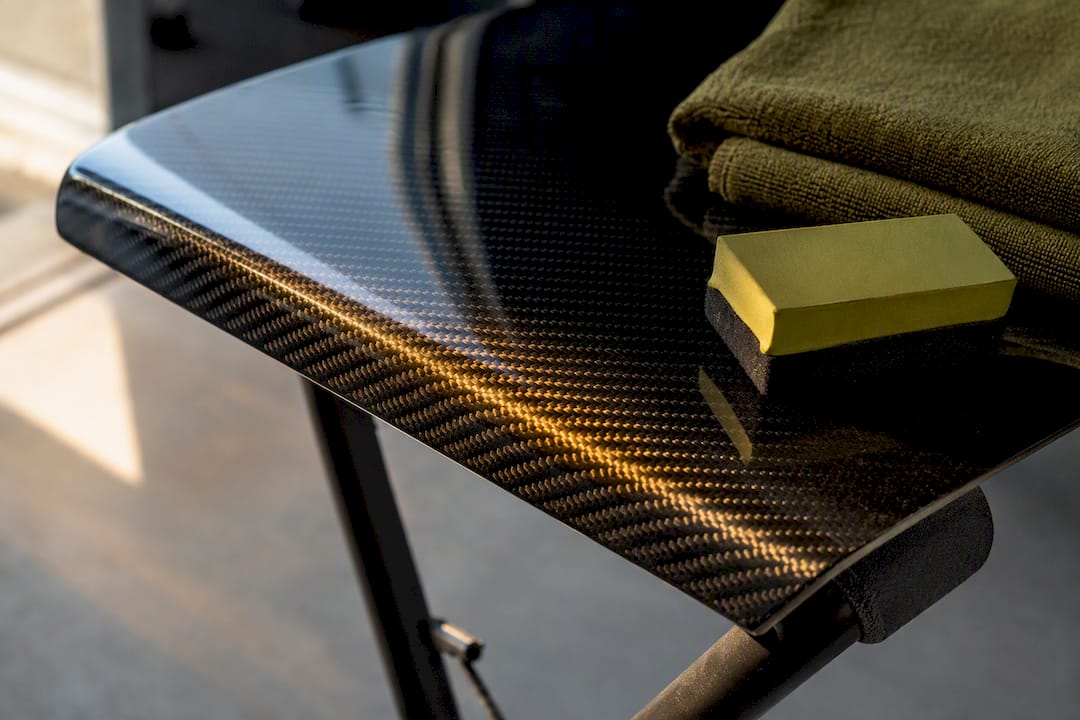
The core routine is simple: wash carbon fiber panels with pH-neutral soap and microfiber using the two-bucket method, skip anything abrasive or high-pressure, and layer on UV protection before the clear coat starts to yellow. Light swirl marks polish out at home. Cracks, delamination, or exposed weave mean the panel goes to a composite specialist, not your driveway.
TL;DR:
- Proper washing with the two-bucket method, pH-neutral shampoo, and microfiber tools prevents most damage caused during cleaning.
- Use gentle, dedicated products for matte or satin finishes to avoid altering the appearance of the carbon fiber surface.
- Regular inspections every month or quarter can detect chips, soft spots, or early yellowing that needs professional repair or reapplication of protective coatings.
- Avoid harsh solvents like acetone and high-pressure water near seams to prevent internal damage and yellowing from moisture infiltration.
- A high-quality UV-resistant clear coat combined with ceramic coating or paint protection film offers the best long-term defense against fading and yellowing.
Table of Contents
- Carbon Fiber Care Starts With How You Wash It
- Getting Bird Droppings, Tar, and Brake Dust Off Safely
- When Polishing Helps and When It Signals Bigger Trouble
- Wax, Sealant, Ceramic, or PPF: Picking the Right Shield
- Storing and Handling Panels Without Warping or Yellowing Them
- How Often to Inspect Carbon Fiber Parts (And What to Check For)
- What Ismael Has Learned Fitting Carbon Parts at Underground Dynamics
- A Builder’s Quick Checklist for Track and Street Cars
- Where to Find Well-Finished Carbon Parts Worth Protecting
- Sources
- FAQ
Carbon Fiber Care Starts With How You Wash It
Most damage to carbon fiber panels does not come from crashes or curbs. It comes from the wash bay. Wheel brushes, dish soap, and dollar-store microfiber towels grind fine grit into a clear coat that is often thinner and more sensitive than the paint on the rest of the car.
The two-bucket method solves most of that. One bucket holds soapy water, the other holds a rinse for your mitt, so you are not dragging dirt back across the panel on every pass. Pair it with a pH-neutral automotive shampoo and a soft microfiber wash mitt, never a sponge that has ever touched a wheel well.
The rest of the wash routine:
- Rinse the whole panel first to knock loose grit off before any mitt touches it.
- Wash in straight-line strokes, not circles. Circular motion is what creates the fine swirl pattern you will later have to polish out.
- Dry with a plush microfiber towel or a blower. A rough towel undoes everything you just did with the two buckets.
- Work in the shade or on a cool panel. Soap drying on a hot hood streaks and can bake residue into the clear coat.
Finish type changes your product choice. Gloss carbon tolerates standard automotive shampoos and sealants. Matte and satin finishes do not: conventional wax and polish will alter the look, turning a flat weave shiny in patches. If your hood or splitter has a matte finish, buy products labeled specifically for matte surfaces. It is a smaller category, but using the wrong bottle here is one of the fastest ways to ruin an otherwise perfect part.
Getting Bird Droppings, Tar, and Brake Dust Off Safely
Contaminants sit on carbon fiber the same way they sit on paint, but the margin for error is smaller because the clear coat is doing double duty: looks and structural protection both.
Start soft. Warm water softens most organic contaminants, bird droppings, tree sap, road film, enough that a gentle wipe lifts them without a fight. For anything that does not budge, reach for a bug and tar remover formulated as safe for clear coats, never a generic degreaser pulled off a shop shelf.
A few rules worth keeping on a sticky note in the garage:
- Isopropyl alcohol works on fresh oil or grease spots, but use it sparingly and never as a routine cleaner. Repeated use dries out the clear coat over time.
- Acetone and lacquer thinner are off the table entirely. They can strip a clear coat in seconds and cannot be undone.
- Test any new product on a hidden edge or the underside of a splitter lip before you use it on a visible panel.
- Keep pressure washers away from seams, fastener edges, and panel joints. Force water into a bonded seam and you are inviting corrosion and yellowing from the inside out, damage you will not see until it is already advanced.
When Polishing Helps and When It Signals Bigger Trouble
Not every mark on a carbon panel needs a repair shop. A fingernail test tells you which category you are in: if your nail catches on the scratch, it has gone through the clear coat and needs more than polish. If your nail glides over it, you are dealing with a surface swirl.

Light swirls and shallow marks respond well to a finishing polish run through a dual-action polisher. Work in small sections, use a light pad, and match your polish aggression to how thin the clear coat is, carbon parts often carry less film buildup than steel body panels, so aggressive correction removes protection faster than you’d expect. Sanding only enters the picture for deeper defects, and it should be a last resort, not a first move.
Pro Tip: Run the dual-action polisher on its lowest speed setting for the first pass on any new panel. You can always increase aggression on the second pass, but you cannot put clear coat back once it’s gone.
Stop immediately if you see exposed weave, a soft or spongy spot under light pressure, or visible separation between layers. Delamination and structural cracks are not cosmetic problems. They are composite failures, and they need a specialist who works with layup and resin repair, not a detail shop.
Wax, Sealant, Ceramic, or PPF: Picking the Right Shield
UV exposure is the real long-term enemy of carbon fiber. It degrades the resin underneath the clear coat and drives the yellowing that makes an otherwise clean panel look old. A factory-grade UV-resistant clear coat, paired with either a ceramic coating or paint protection film, is the most reliable defense against that slow fade.
Each option trades cost against longevity differently:
Ceramic coatings and modern polymer sealants both extend gloss and reduce how often you need to touch the panel, but ceramic demands correct surface prep and costs more up front. PPF earns its price on leading edges, front lips, and anywhere rock chips are a real risk. Ceramic makes more sense across a whole hood or fender where UV and chemical resistance matter more than impact protection. A lot of builders run both: PPF on the nose, ceramic everywhere else.
- Wax needs the most frequent reapplication and offers the least UV protection of the four.
- Sealants split the difference, decent durability without the prep work ceramic demands.
- Ceramic and PPF both reward proper installation and punish rushed prep with early failure.
Storing and Handling Panels Without Warping or Yellowing Them
Uninstalled panels should live somewhere cool, dry, and out of direct sun; heat and UV are what warp resin and start the yellowing process even before a part goes on the car. Stack panels flat with padding between them rather than leaning them against a wall, and never set anything heavy on top.
For installed parts, prolonged sun exposure is the bigger threat. A breathable car cover or simple shade during long-term parking slows UV damage considerably. A few handling habits matter just as much:
- Support panels on padded stands during removal or installation, never on bare edges or fasteners.
- Recheck torque on fasteners after the first few drives once a panel is reinstalled.
- Avoid stacking anything on a stored panel, even briefly.
How Often to Inspect Carbon Fiber Parts (And What to Check For)
A workable inspection rhythm catches problems while they are still cheap to fix:
- Monthly: a quick visual pass for chips, edge lifting, or fastener corrosion around mounting points.
- Quarterly: a full wash and detail pass, checking for soft spots or early yellowing under good light.
- Annually: a complete inspection with reapplication of ceramic coating or sealant as needed, since most coatings age out inside the twelve-month mark.
The decision rule is straightforward. Surface scratches and swirls are polishable, and polishing at home is fine. Anything involving delamination, structural cracking, or a spot that flexes under light pressure needs a professional composite evaluation before you drive on it again. The general maintenance cadence lines up with what most shops recommend for any exterior finish, and the folks at Express Lube’s car care blog cover similar seasonal checklists worth cross-referencing.
What Ismael Has Learned Fitting Carbon Parts at Underground Dynamics
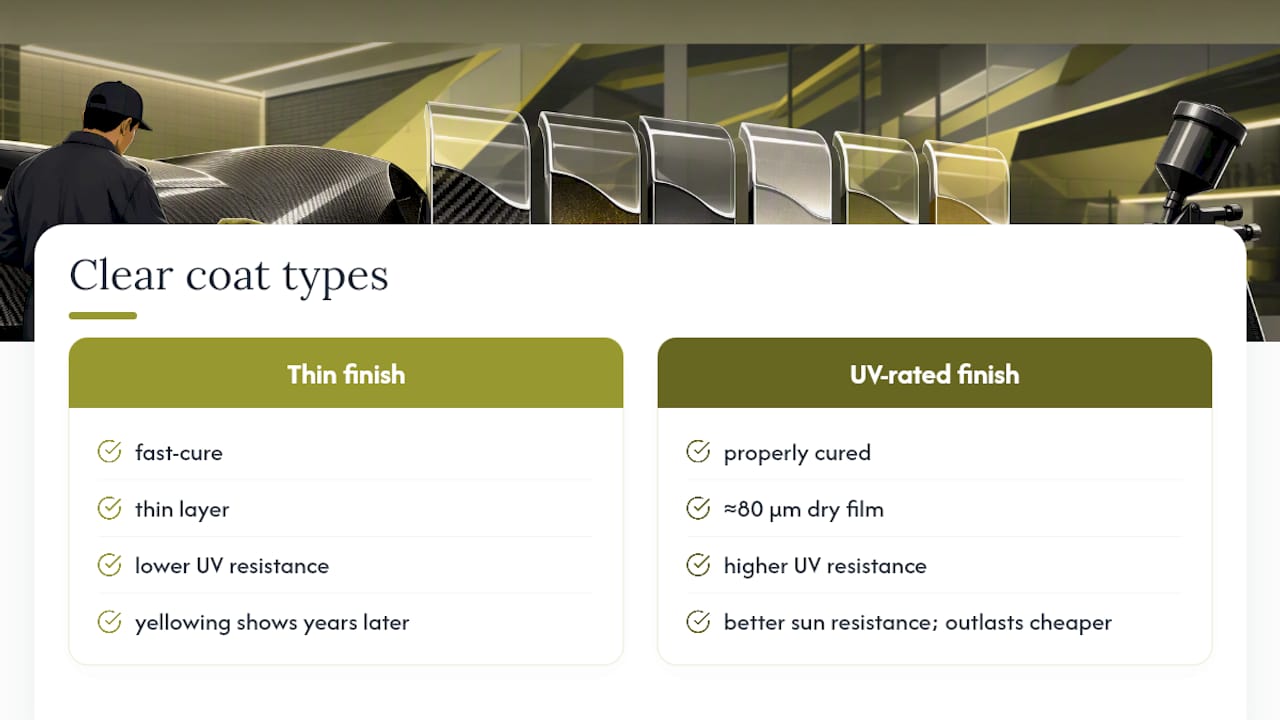
Chassis-specific carbon parts vary more in clear coat quality than most buyers expect. Some hoods and splitters ship with a thin, fast-cure finish; others carry a heavier UV-rated layer closer to the 80 micrometer minimum dry film thickness that better withstands sun exposure. That difference shows up years later, not on day one, which is why fitment and finish quality matter as much as the shape of the part itself. A mustang carbon fiber hood with a properly cured clear coat will outlast a cheaper equivalent even under identical care.
One habit worth repeating: keep pressure washers away from bonded seams and fastener edges. Moisture that sneaks into a seam can cause damage from underneath, invisible until the yellowing or bubbling shows up months later.
A Builder’s Quick Checklist for Track and Street Cars
Track cars and street cars need different priorities. On a track car, I care most about fast turnaround: a quick sealant reapplication and a pre-run inspection before you’re back on grid, because you don’t have weeks to babysit a coating. Street cars live outside constantly, so long-term UV protection matters more than quick touch-ups.
Either way, the checklist is the same six steps: wash, inspect, spot-treat, protect, torque-check, store. Skip one enough times and it catches up with you.
— Ismael
Where to Find Well-Finished Carbon Parts Worth Protecting
All the care in the world will not save a panel that was poorly laid up to begin with. Some suppliers provide finished carbon fiber and fiberglass aero parts with real fitment specs, so you know what clear coat and layup quality you are protecting before you buy, not after the yellowing starts.

If you are shopping for a replacement hood, splitter, or fender and want fitment details up front, the body kits and aero catalog lists chassis-specific options with the specs that actually matter for a long-term install. Got a fitment question or need help identifying the right panel for your chassis? Reach out through Underground Dynamics and get a straight answer before you buy.
Sources
- How to Maintain and Care for Carbon Fiber Products: A Complete Guide
- Carbon Fiber Cleaning Guide: Safe Steps & Tips
- Carbon Fiber UV Protection Guide | Preventing Resin Yellowing
- How to Maintain and Care for Carbon Fiber Products – Advanced Composites
- Caring for Carbon Fiber Parts: Cleaning & Maintenance
FAQ
What ruins carbon fiber the fastest?
UV exposure without protection and high-pressure water near seams cause the most long-term damage, followed by abrasive pads and harsh solvents like acetone during cleaning.
Does spray wax protect carbon fiber from fading?
Spray wax offers light, short-term UV protection, typically a few weeks, but it wears off far faster than a polymer sealant or ceramic coating and won’t stop yellowing on its own over a full season.
How do you make carbon fiber look new again?
A gentle two-bucket wash followed by a finishing polish on a dual-action polisher removes light swirls and restores gloss; deeper scratches or fading need a professional re-clear or coating refresh.
Can you put wax on carbon fiber?
Yes, on gloss finishes wax is safe and adds short-term shine and water beading, but skip it on matte or satin carbon since it will alter the finish.
How often should carbon fiber parts be re-coated or resealed?
Wax requires reapplication every few weeks, polymer sealants every few months, and ceramic coatings generally last multiple years before a refresh is due.