FREE SHIPPING ON ORDERS OVER $150

Cart
0
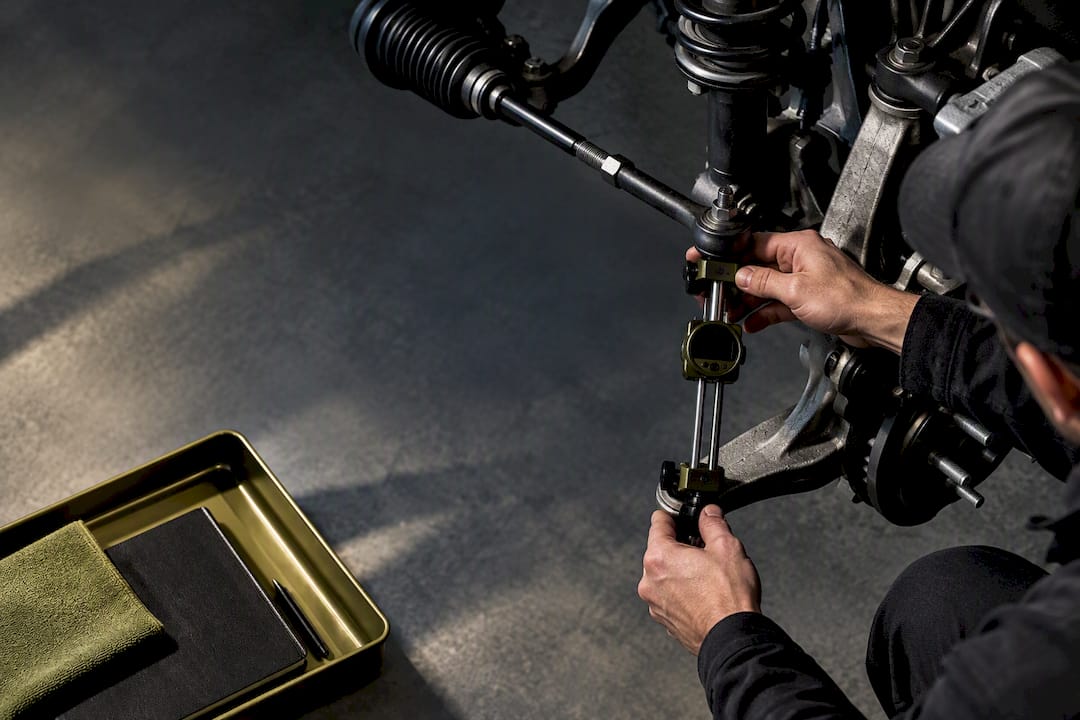
Yes, bump steer is fixable: measure it, correct the tie-rod and steering geometry, then verify with a bump-steer gauge. The process is measure, identify where the arcs mismatch, adjust the geometry, and re-check through the same travel range. Skip the measuring step and you’re just guessing, and guessing at steering geometry is how you end up chasing a squirrel front end for a whole season.
TL;DR:
- Lowering or lifting a car often increases bump steer unless tie-rod pickup points are corrected, especially when changing ride height with coilovers or adjustable arms.
- Accurate measurement of bump steer requires a dial indicator and proper setup, with at least three to five measurements at different suspension travel points to map the arc pattern.
- Most correctable bump-steer issues involve reducing toe-out in compression to a target range of 0.004 to 0.010 inch per inch of travel, focusing on the first inch of suspension movement.
- Replacing worn parts, such as tie-rod ends and bushings, is essential before measuring or adjusting to avoid misdiagnosing geometry issues.
- Repeated cycling and re-measuring after each adjustment are necessary, often taking over an hour per corner, to ensure the bump-steer curve converges within acceptable limits.
Table of Contents
- What bump steer is and why it matters on a lowered or lifted car
- Symptoms, common causes, and quick checks
- Shop checklist before you measure bump steer
- Step-by-step measurement: how to make a bump-steer curve
- Mapping measured patterns to corrective actions
- Verification and tuning: iterate until the curve converges
- Builder perspective: what actually trips people up
- Parts and tools that make correction easier
- Sources
- FAQ
What bump steer is and why it matters on a lowered or lifted car
Bump steer happens when your wheel steers itself as the suspension moves up and down, with zero input from the steering wheel. It’s an arc problem: the control arm and the tie rod sweep through different radiuses as the suspension compresses and extends, and when those arcs don’t match, the tie rod pulls or pushes the steering arm out of line. Bump steer is caused by that mismatch, and adjusting tie-rod pickup height or length changes the curve.

On the road, that mismatch shows up as toe-in or toe-out through travel, bump-in or bump-out in shop terms. Lower your car and you’ve almost certainly moved the tie-rod’s arc relative to the control arm’s arc without meaning to, which is exactly why lowering a car often increases bump steer, even on a car that handled fine stock.
Symptoms, common causes, and quick checks
Bump steer feels like the car darting or tugging over bumps and expansion joints, with the steering wheel twitching under your hands even though you didn’t move it. It’s worse on rough pavement, inconsistent from lap to lap, and it gets worse the more you’ve dropped or raised the ride height.
The usual suspects:
- Lowering or lifting the car without correcting tie-rod pickup points.
- Worn tie-rod ends, ball joints, or bushings that add slop to the arc.
- Tie rods that got shortened or lengthened during an alignment without checking the resulting geometry.
- A relocated steering rack, common on swapped or widened chassis.
Before you touch a wrench, rule out the easy stuff. Check for play in the tie rods and ball joints, confirm your static alignment numbers are sane, and inspect control arms and bushings for wear or damage. A worn part will mimic bump steer symptoms and waste your measuring time if you fix geometry before fixing the part.
Shop checklist before you measure bump steer
You need a few dedicated tools to get numbers you can trust, not guesses you can’t repeat. A Longacre-style bump-steer gauge paired with a dial indicator is the standard setup shops reach for, and it’s affordable enough that it belongs in any serious builder’s toolbox.
- Bump-steer gauge plate and dial indicator, or a string and trammel setup as a budget alternative.
- Floor jack and jack stands rated for the corner weight you’re lifting.
- Digital caliper for double-checking spacer thickness and tie-rod length changes.
- Marker or tape to record the wheel centerline reference point.
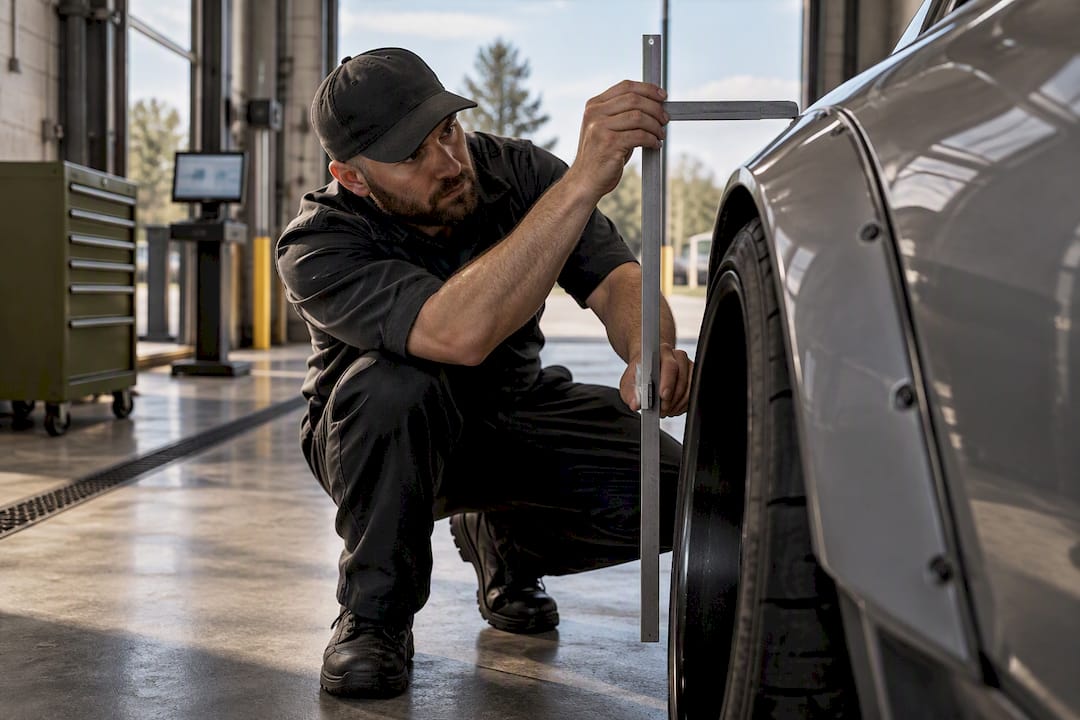
Set the car at the ride height it will actually run, with the correct tire size and pressure mounted, since a different tire diameter changes your travel reference. Lock the steering wheel so it can’t move mid-measurement, and disable or unhook the anti-roll bar if your method calls for isolating one corner at a time. Take your time on the fixture setup: a gauge that shifts on the hub between readings will hand you garbage numbers no matter how careful your math is afterward.
Step-by-step measurement: how to make a bump-steer curve
This is the part that separates a real correction from a guess. The standard measurement workflow uses a bump-steer plate and dial indicator to log toe at ride height, then at set increments through the suspension’s travel.
- Set the car at ride height, lock the steering wheel, and record your static toe as the zero reference.
- Raise or lower the corner in fixed steps, commonly negative 1 inch, ride height, and positive 1 inch, logging the dial or string reading at each stop.
- For a finer curve, take readings every half inch out to plus or minus 2 inches of travel.
- Compare each reading against your zero point: dial movement toward toe-out on compression is bump-out, movement toward toe-in is bump-in.
- Pay closest attention to the first inch of compression, since that’s the range your suspension actually lives in over most street and track surfaces.
Pro Tip: Log every reading in a notebook or spreadsheet as you go. Chasing a bump-steer curve from memory is how you end up remeasuring a corner twice.
Aim for minimal total movement, with a slight bump-out preferred over any bump-in. Worked examples in the field commonly target small toe-out values in the 0.004 to 0.010 inch range per inch of travel, rather than any toe-in at all.
Mapping measured patterns to corrective actions
Once you have a curve, the fix depends on which direction it’s wrong and by how much. Reading toe-out where you wanted neutral, or toe-in anywhere in the curve, points you to a specific correction rather than a random parts swap.
- Toe-out on compression that’s larger than target: shim down the outer tie-rod end or lower the inner tie-rod mounting point to flatten the arc mismatch.
- Toe-in on compression, the pattern you want to eliminate first: add a shim under the inner tie-rod mount or raise it slightly to bias the curve toward bump-out.
- A curve that’s wrong across the whole range rather than just one end: check tie-rod length before touching mounting height, since a length change shifts the whole arc.
Small shims and length adjustments handle most modified cars, especially anything lowered an inch or two on coilovers. When the mismatch is large or a shim stack won’t get you there, it’s time to escalate: relocating the rack, dropping the pitman or idler arm, or moving to a dedicated bump-steer correction kit with relocated tie-rod mounts. Custom spindles or arms are a last resort reserved for extreme lowering or widened track widths.
Pro Tip: If a joint or bushing is worn out, replace it before you measure anything. A sloppy ball joint will make a properly corrected geometry read just as bad as an uncorrected one.
Respect the mechanical limit here: keep spacer stacks under the tie-rod end to about a quarter inch. Stack more than that and you’re loading the tie-rod end and steering arm with leverage they weren’t designed for, which is a fastener failure waiting to happen, not a fix.

Verification and tuning: iterate until the curve converges
Bump-steer correction is not a one-shot job. Plan on cycling the suspension, re-measuring, and adjusting again, sometimes several times per corner before the curve settles where you want it.
- Make one adjustment at a time, cycle the corner through its travel, and re-measure the full curve rather than spot-checking a single point.
- Repeat until the readings sit inside your target range at every measured increment, not just at ride height.
- Torque every fastener to spec once you’re satisfied, then get a full alignment done at ride height.
- Test drive over the roughest roads you have access to and confirm the darting or wheel tug is gone.
Budget real shop time for this, convergence per corner commonly takes over an hour once you count the remeasuring. If you’re still fighting the curve after a reasonable number of passes, or the fix would require custom arms or a relocated rack, that’s the point to bring in a chassis fabricator rather than keep guessing with shims.
Builder perspective: what actually trips people up
A bump-steer kit in the box does nothing until you measure before and after installing it. The mistake we see most is builders assuming the kit alone fixes the geometry, then never checking the curve to confirm it.
Bias toward slight bump-out over bump-in every time, and remember that stiffer bushings quiet down the symptom without fixing the underlying arc mismatch. Fine-thickness spacers are your best friend for homing in on the exact pivot height, and writing down every change keeps you from repeating a bad adjustment twice.
— Ismael
Parts and tools that make correction easier
Once you know what your car needs, having the right hardware on hand speeds up every pass. We carry parts commonly used in bump-steer corrections, and pairing the right part with a real measurement beats guessing every time.
- Coilovers and lowering springs for builders adjusting ride height as part of the correction.
- Adjustable control arms that let you shift pickup points instead of relying on shim stacks alone.
- Vehicle-specific alignment tools, like the ACT 2000 Honda S2000 alignment tool, built for the measurement and verification stage.
Whatever hardware you land on, measure before you buy and measure again after you install. Browse the coilovers, air ride, and lowering springs lineup at Underground Dynamics if your correction starts with a ride-height change, and pair any purchase with a proper alignment once the geometry is dialed in.
Sources
The Lincoln Tech bump-steer guide covers the core measurement workflow, the MotoIQ suspension guide explains why lowered cars are prone to it, and the Wikipedia bump steer entry breaks down the arc theory behind every fix in this article.
- Eliminate bump steer — Lincoln Tech Tip
- Bump steer — Wikipedia
- The Ultimate Guide to Suspension and Handling — MotoIQ
- Communication Theory — How to recognize, measure and fix bump steer — NASA Speed News
- Bump Steer — Longacre Racing (product/support page)
FAQ
What is the ideal bump steer setting?
Most builders target a small amount of toe-out through compression rather than zero change or any toe-in. Worked examples commonly aim for 0.004 to 0.010 inch of toe-out per inch of travel, with the tightest range held through the first inch.
What does a bump steer correction kit do?
A correction kit relocates the tie-rod’s inner or outer mounting point so its arc matches the control arm’s arc more closely through travel. It does not fix anything on its own until you measure the resulting curve with a gauge and confirm the change actually worked.
What is the main cause of bump steer?
The main cause is a mismatch between the control arm’s arc and the tie rod’s arc as the suspension moves. Ride height changes from lowering or lifting are the most common trigger on modified cars, since they shift the tie-rod’s geometry relative to the control arm without anyone correcting for it.
What is an acceptable bump steer?
An acceptable result is minimal total toe change through the measured range, biased slightly toward bump-out rather than bump-in. Builders generally treat readings in the low thousandths of an inch per inch of travel as acceptable, while any noticeable toe-in through the first inch of compression is worth correcting.