FREE SHIPPING ON ORDERS OVER $150

Cart
0
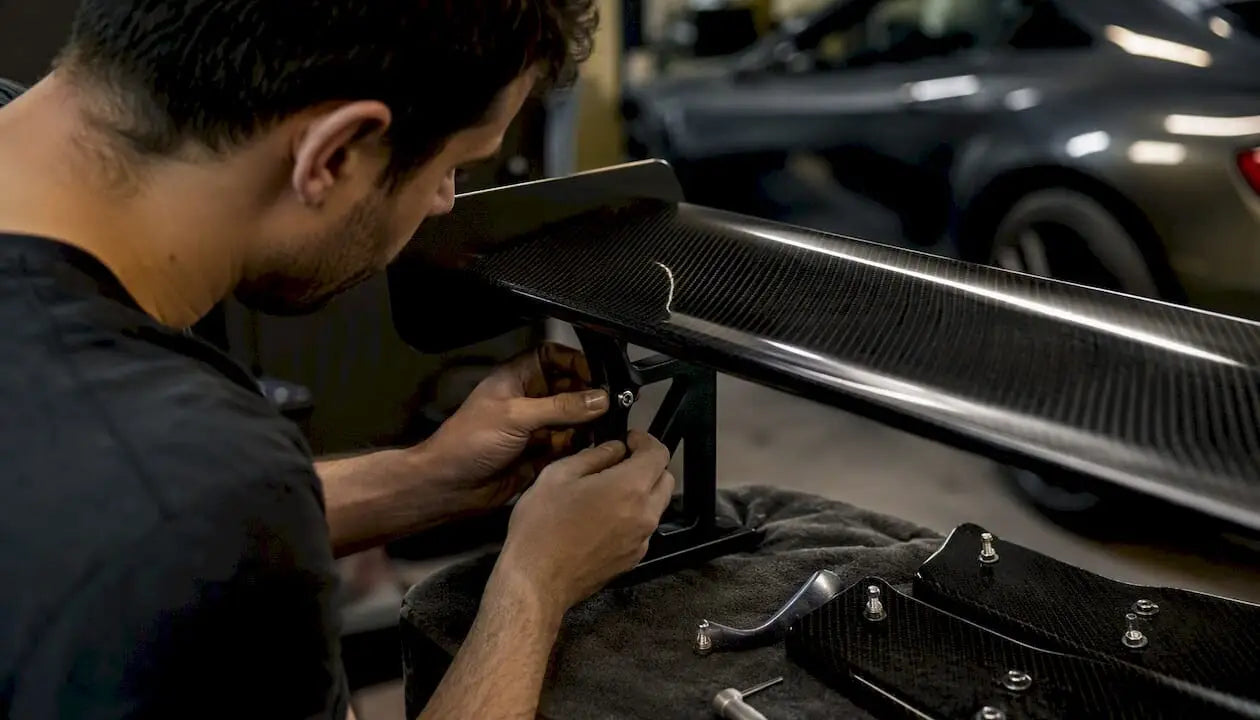
Advanced automotive aero components are purpose-designed splitters, wings, diffusers, canards, ducts, side skirts, and wide-body fenders that reshape pressure and airflow around your car to generate downforce, reduce lift, or cut drag. The result is more grip, better high-speed stability, and predictable handling at the limit.
| Point | Details |
|---|---|
| Speed threshold | Aerodynamic forces grow with the square of speed; meaningful downforce typically starts above 60–70 mph |
| Primary trade-off | More downforce requires more angle of attack, which increases drag and can hurt top speed |
| Supporting mods | Effective aero requires controlled ride height and, for diffusers, a sealed or flat undertray |
Aero is worth the investment when you spend real time above 60 mph on track or on a highway course. For a purely cosmetic street build, most of these parts add weight without measurable grip gains.
Key Takeaways
Advanced aero components only deliver measurable downforce when matched as a system, mounted correctly, and used at speeds where aerodynamic forces are significant.
| Point | Details |
|---|---|
| Speed threshold | Meaningful downforce starts above 60–70 mph; below that, most aero adds drag without grip return |
| Stall angle | Most airfoils stall near 22°; tune wing angle in very small increments to stay in the productive range |
| Diffuser requirement | A diffuser needs a sealed or flat undertray to generate downforce; open underfloors make it cosmetic |
| Fitment first | Confirm mounting points, ride height range, and clearances before ordering any structural part |
| Undergrounddynamics | Stocks chassis-specific carbon and fiberglass aero with fitment specs for popular enthusiast platforms |
Table of Contents
- Every advanced aero component type explained
- How downforce, drag, and stall angle actually work
- Carbon fiber vs. fiberglass: which material fits your build
- How to tune wing angle and balance front/rear downforce
- Fitment checks you must do before ordering any aero part
- NACA ducts and brake ducts: placement and routing that actually works
- Common mistakes, maintenance, and US street-legal considerations
- Your buyer checklist for choosing the right aero components
- How Undergrounddynamics maps to your aero build
- How aero affects safety and tire wear
- Aero effectiveness at different speeds and driving conditions
- Popular aftermarket aero kits and their typical use cases
- What a typical aero installation looks like, step by step
- What most builders get wrong about aero
- Undergrounddynamics has the parts to back this up
- Sources
- FAQ
Every advanced aero component type explained
Considering a few aero add-ons for your car confirms that most aftermarket parts are cosmetic unless paired with a sealed underfloor or a matched kit. Here is what each part actually does.
Front splitter / lip kit. Mounts under the front bumper. It extends the low-pressure zone under the car and creates a high-pressure stagnation point on top, pushing the nose down. A functional splitter needs a flat or sealed undertray behind it to sustain that pressure differential.
Front air dam. A vertical panel that blocks airflow from going under the car entirely. Effective on low-ride-height builds; less useful if your car sits high enough to let air spill around the sides.
Canards. Small dive planes on the front bumper corners. They redirect airflow outward, reduce front-end lift, and can add a small amount of downforce. Purely cosmetic canards have no angle or chord depth to generate meaningful force.
Side skirts. Seal the gap between the body and road to prevent high-pressure air from rushing under the car and disrupting underbody flow. Without skirts, a splitter and diffuser lose a significant portion of their effectiveness.
Underbody panels / flat floor. A flat undertray accelerates airflow under the car by reducing cross-sectional area. This is the foundation for any ground-effect setup. Without it, a diffuser is largely decorative.
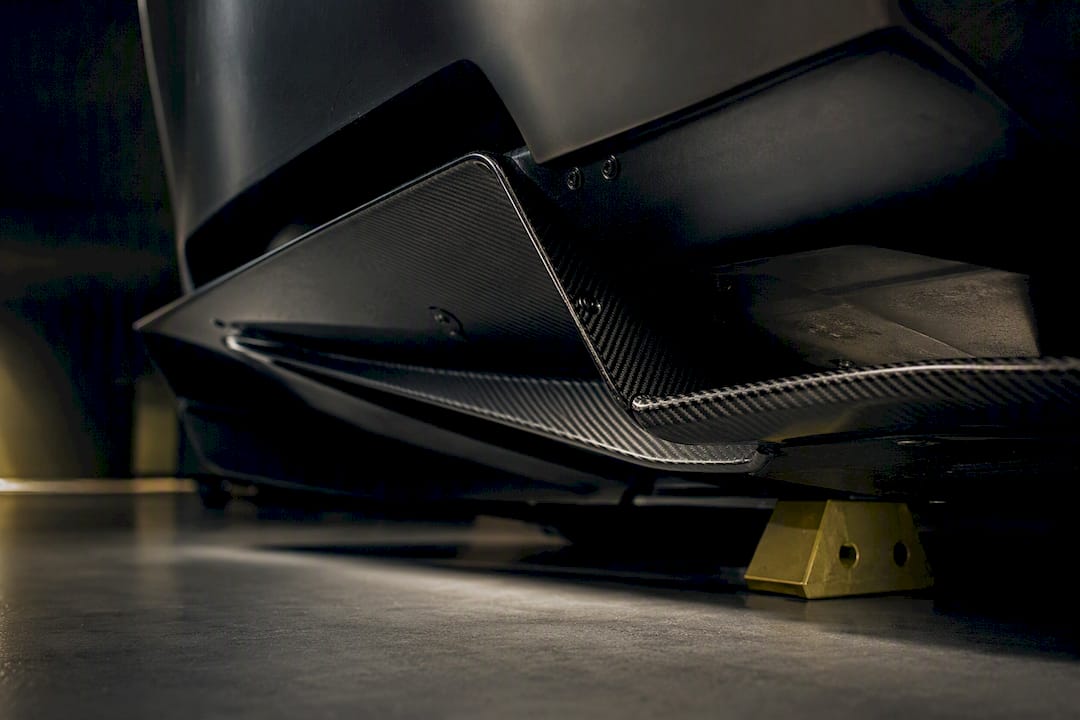
Rear diffuser. Mounts at the rear of the undertray and expands the airflow channel, slowing air and raising pressure at the exit. A diffuser requires a sealed or mostly flat underfloor and correct exit geometry to generate meaningful downforce. Open underfloors negate the effect almost entirely.
Rear spoiler vs. multi-element wing. A spoiler disrupts airflow off the trunk to reduce lift. A wing generates active downforce through an airfoil profile. Multi-element wings (two or three planes) allow higher angles of attack without stalling by re-energizing the boundary layer between elements.
Endplates. Vertical plates at the wing tips that prevent high-pressure air from rolling around the ends of the wing. They improve wing efficiency and are a simple, low-cost upgrade to an existing single-element setup.
Gurney flap / wicker bill. A small right-angle strip on the trailing edge of a wing. It increases downforce but also increases drag. Best used when you need more rear grip and are already close to your drag budget.
Wide-body fenders. Beyond accommodating wider wheels and tires, properly designed wide-body fenders vent wheel-well turbulence outward, reducing lift over the front axle. Fenders that simply bolt on without venting are cosmetic.
NACA ducts. Flush-mounted intake scoops that feed air to brakes, intercoolers, or cabin cooling with minimal drag penalty. They only work when placed in a confirmed high-pressure zone.
Brake ducts. Hoses or channels that route ambient air directly to the brake rotors and calipers. Critical for track use where repeated hard stops overheat brakes and cause fade.
How downforce, drag, and stall angle actually work
Pressure differentials drive everything. Air moving faster over a curved surface drops in pressure; the resulting pressure difference between the top and bottom of a wing or splitter creates a vertical load. On a car, you want that load pushing down.
Angle of attack (AoA) controls how aggressively a wing generates that load. Increase the angle and downforce rises — until it does not. Most airfoils stall at around 22°, at which point the boundary layer separates, downforce collapses, and drag spikes. That is why tuning in 1–2° increments matters: you are working in a narrow, productive band.
Interference drag is the other trap. Poorly shaped mounting struts, exposed hardware, and abrupt body transitions create turbulent wakes that cost speed. Front/rear balance matters too: adding rear downforce without matching front downforce shifts the pitching moment rearward, lightening the front tires and making the car push in corners. Ground-effect and underbody shaping can generate large downforce gains when ride height and sealing are controlled, but the system is sensitive to suspension compliance and geometry changes.
Carbon fiber vs. fiberglass: which material fits your build
Material choice comes down to one question: is the part structural or cosmetic?
Carbon fiber offers a substantially better stiffness-to-weight ratio than fiberglass, with a typical composite density of carbon fiber is substantially lower than that of E-glass. Finished carbon parts generally cost more than their fiberglass equivalents and are harder to repair after impact.
- Carbon fiber: Best for wings, splitters, and structural panels where stiffness under load matters. Prepreg/autoclave construction gives the tightest tolerances and best surface finish. Expect to pay a premium.
- Fiberglass: Hand-layup fiberglass is cheaper, easier to cut and repair, and perfectly adequate for side skirts, wide-body fenders, and cosmetic panels. RTM (resin transfer molding) fiberglass improves consistency over hand layup.
- Aluminum: Low cost for brackets and simple flat panels. Not suitable for complex aerodynamic shapes but excellent for brake duct mounting hardware and undertray supports.
Mounting hardware is where builders cut corners and pay for it later. Bumper-skin mounts flex under load and cause rattles or outright failure at speed. Through-chassis anchors with reinforcement plates distribute load properly. Any structural aero part — a wing, a splitter under braking load — needs hardware rated for the forces involved, not just the weight of the part.
How to tune wing angle and balance front/rear downforce
Start conservative. Small changes produce real results, and large changes risk stall.
- Establish a baseline. Record current ride height, tire pressures, fuel load, and ambient temperature before any change.
- Change one variable. Adjust wing angle by 1–2° only. Log the new setting.
- Run a test session. Note handling balance (push vs. oversteer), tire temperature distribution, and lap time or driver feedback.
- Evaluate and repeat. If the change improved balance, try another 1–2°. If not, return to baseline before trying a different variable.
- Add a gurney flap last. A gurney flap adds rear downforce quickly but also adds drag. Use it only after you have exhausted angle adjustments.
| Angle change | Expected effect | Best use case |
|---|---|---|
| +1–2° AoA | Modest downforce gain, small drag increase | Track days, balanced builds |
| +3–5° AoA | Noticeable downforce, meaningful drag rise | Dedicated track, low-speed corners |
| Near 22° AoA | Approaching stall, sharp drag spike risk | Avoid unless testing in controlled conditions |
| Gurney flap added | Downforce boost at rear, drag cost | Tight technical tracks needing rear grip |
Pro Tip: Log tire temperature across the inner, middle, and outer tread after each session. Uneven temperatures tell you more about aero balance than lap times alone.

Fitment checks you must do before ordering any aero part
Measure first, order second. Confirm mounting point locations, current ride height range, wheel and tire clearance, and undertray geometry before you add anything to your cart.
| Spec to confirm | Why it matters |
|---|---|
| Mounting point locations (bolt pattern, bracket positions) | Determines whether the part bolts on or requires fabrication |
| Current and target ride height | Splitters and diffusers have minimum clearance requirements |
| Wheel/tire outer diameter and width | Wide-body fenders and canards must clear full steering lock |
| Undertray condition and sealing | Diffuser effectiveness depends on a flat, sealed floor |
| Required reinforcement areas | Structural parts need backing plates; bumper skin alone is not enough |
Before purchasing, photograph your front and rear bumper mounting points, measure from the ground to the lowest body panel, and confirm your suspension allows the ride height the part requires. Ask the seller for exact bracket positions and recommended ride height range. If that data is not available, treat the part as cosmetic until proven otherwise.
NACA ducts and brake ducts: placement and routing that actually works
Ducts only deliver airflow when placed in a confirmed high-pressure or suction zone. A duct in a neutral-pressure area moves almost no air regardless of how well it is built.
- Validate placement first. Tape yarn tufts near the proposed duct location and run at speed. Tufts pointing toward the opening confirm positive pressure; tufts streaming away indicate suction. Either can be useful depending on the duct’s purpose.
- Use smooth internal surfaces. Corrugated or flexible “scat” tubing collapses slightly at speed, reducing effective diameter and cutting volumetric flow. Rigid aluminum or smooth-bore silicone hose maintains diameter under pressure.
- Keep bends gentle. Each sharp bend in a brake duct run reduces flow. Route with sweeping curves, not right angles.
- Size for the application. Brake ducts for a Miata on a 20-minute track session need less volume than those on a Mustang running 45-minute endurance stints.
Pro Tip: Before cutting any bodywork for a NACA duct, use a piece of cardboard taped over the proposed location for one session. Tufts on the cardboard confirm whether the location sees the pressure differential you need.
Common mistakes, maintenance, and US street-legal considerations
The most common mistake is buying cosmetic parts marketed as functional. An open underfloor with decorative diffuser blades generates no meaningful downforce. Improper mounting is the second most frequent problem, and ignoring front/rear balance is the third.
- Verify function before buying. Ask whether the part requires a sealed undertray. If the seller cannot answer, assume it is cosmetic.
- Inspect fasteners every 500 miles or after every track day. Vibration loosens hardware faster than most builders expect.
- Check paint and gel coat for delamination. Fiberglass parts that flex under load can crack the surface layer; carbon parts can delaminate at mounting points under repeated stress.
- Monitor tire wear patterns. Excessive downforce on one axle accelerates wear on that end. Uneven cross-tread wear often points to an aero balance problem, not just an alignment issue.
- Confirm US street legality locally. Ride height changes, wide-body fenders, and large wings may affect state vehicle inspection requirements, visibility standards, or local ordinances. Check your state’s DMV regulations and consult a local shop before driving on public roads.
Your buyer checklist for choosing the right aero components
Track-focused builds should prioritize splitter, diffuser, and wing as a balanced system. Street-first builds often need only a front lip and a small spoiler to reduce lift without adding significant drag.
- Define your use case. Track only, street/track, or street only determines how much drag penalty you can accept.
- Set a speed profile. If you rarely exceed 70 mph, high-downforce wings add drag without meaningful grip return.
- Choose materials by role. Structural parts in carbon; cosmetic or high-contact panels in fiberglass.
- Confirm fitment specs. Bolt pattern, bracket positions, required ride height, and reinforcement needs before ordering.
- Budget realistically. Front lips start around $100–$200 in fiberglass; full carbon multi-element wings run $800–$2,500 or more depending on construction.
- Ask the seller: exact mounting points, recommended ride height, any available test data, and the return or fitment policy.
- Buy matched when possible. A complete aero package engineered as a system outperforms a mix of single parts from different manufacturers.
| Point | Details |
|---|---|
| Track builds | Start with splitter + diffuser + wing as a balanced trio |
| Street builds | Front lip and small spoiler reduce lift with minimal drag penalty |
| Material choice | Carbon for structural parts; fiberglass for cosmetic or high-contact panels |
| Matched kits | Components engineered together interact positively; mixed parts often do not |
How Undergrounddynamics maps to your aero build
Undergrounddynamics stocks chassis-specific body kits, splitters, wide-body fenders, and diffusers in both carbon fiber and fiberglass, with fitment specs listed per vehicle so you can verify clearances before ordering. The catalog covers popular enthusiast platforms including the Civic, BRZ, Supra, 350Z, Miata, Mustang, and G35, among others.
For a front-biased street build, the lip kit and wide-body fender sections are the logical starting points. For a balanced track build, the full body kit pages include splitter and diffuser combinations with mounting notes. Check the vehicle-specific pages and request reinforcement guidance for any structural install — the fitment data is there to help you avoid surprises on installation day.
How aero affects safety and tire wear
Downforce increases tire contact patch load, which improves grip but also accelerates wear if the load is unbalanced front to rear. A rear-heavy aero setup lightens the front tires, causing understeer and faster front tire wear. A front-heavy setup does the opposite.
At high speed, improperly mounted aero parts become safety hazards. A splitter that detaches at 100 mph can go under the car or into traffic. Wings that flex under load can shift the car’s balance mid-corner without warning. Proper mounting hardware and regular fastener checks are not optional on any car that sees track use.
Aero also affects braking stability. Rear downforce keeps the rear planted under hard braking; without it, the rear can step out as weight transfers forward. Brake ducts directly affect safety by preventing brake fade during repeated hard stops.
Aero effectiveness at different speeds and driving conditions
Aerodynamic force scales with the square of speed. At 30 mph, most aero parts produce negligible force. At 60 mph, a well-designed splitter and wing combination begins generating measurable downforce. At 100 mph and above, the forces become significant enough to change lap times and handling balance noticeably.
On a tight autocross course where speeds rarely exceed 50 mph, a large wing adds drag without meaningful grip return. On a high-speed track like Road America or Watkins Glen, that same wing can be the difference between a stable car and a nervous one through fast sweepers. Street driving rarely reaches speeds where advanced aero components produce meaningful downforce, which is why aero on small sports cars requires honest assessment of actual use before spending.
Popular aftermarket aero kits and their typical use cases
Full body kits (splitter + skirts + diffuser + wing): Designed for track-day and time-attack builds on platforms like the BRZ/GR86, Civic Type R, and Supra. These matched systems are engineered to work together and are the safest bet for builders who want functional downforce without custom fabrication.
Lip kits: The most common entry point. A front lip on a Miata or 350Z reduces front-end lift at highway speeds and looks purposeful without requiring suspension changes. Fiberglass options keep cost low; carbon fiber versions save weight on cars where every pound matters.
Wide-body fender kits: Popular on drift builds and time-attack cars running wide wheels. Functional wide-body kits vent wheel-well pressure; purely cosmetic kits do not. Platforms like the S-chassis Nissan, Civic, and Mustang have strong aftermarket support for wide-body options.
Diffuser-only upgrades: Work best on cars with a relatively flat undertray from the factory, such as the BRZ or late-model Civic. On cars with heavily contoured underfloors, a diffuser alone without undertray work produces limited results.
What a typical aero installation looks like, step by step
A front lip on a Civic or BRZ takes two to four hours for an experienced builder with basic hand tools. A full body kit with wide-body fenders and a wing can take a weekend or more, especially if bodywork or panel trimming is required.
Typical installation sequence:
- Dry-fit everything before drilling or cutting. Confirm all mounting points align and clearances are correct.
- Mark and reinforce any mounting locations that will carry structural load. Add backing plates behind bumper skin mounts.
- Install front components first (splitter, lip, canards) and confirm ride height clearance before moving to the rear.
- Install side skirts and confirm they seal against the body without gaps that would let high-pressure air under the car.
- Mount the diffuser and rear wing last, then check all fasteners and confirm wing angle before driving.
- Test at low speed in a parking lot before heading to the track. Listen for rattles, check for rubbing at full steering lock, and confirm nothing contacts the ground over speed bumps.
Budget one to two additional hours for any bodywork, trimming, or reinforcement that was not anticipated during the dry-fit. Wide-body fender installs often require cutting factory fender lips, which adds time and may require a body shop if you want a clean finish.
What most builders get wrong about aero
Most builders treat aero as a visual upgrade first and a performance tool second. That order of operations leads to expensive parts that do nothing measurable on track.
The part that surprises people most is the diffuser. It looks functional. It has fins, it has an exit, it looks like it belongs on a race car. But without a sealed undertray feeding it, it is generating turbulence, not downforce. The physics are unforgiving on this point, and no amount of carbon fiber weave changes that.
The second thing builders underestimate is balance. Adding a big wing without a matching front splitter does not make a car faster. It makes the front end light and the car nervous. The best aero setups are boring to look at on paper: matched front and rear loads, controlled ride height, sealed underfloor. The drama comes on track, not in the spec sheet.
If you are just starting out, spend your first aero budget on a front lip, a modest rear spoiler, and coilovers to control ride height. That combination will teach you more about how your car responds to aero changes than any single high-downforce wing ever will.
Undergrounddynamics has the parts to back this up
Carbon fiber and fiberglass aero that actually fits your car, with the specs to prove it. Undergrounddynamics carries chassis-specific body kits, lip kits, wide-body fenders, and diffusers for the platforms builders actually drive — Civic, BRZ, Supra, 350Z, Miata, Mustang, Camaro, G35, and more. Every listing includes fitment data so you are not guessing about clearances or mounting points.
For suspension to match your new ride height requirements, the suspension catalog covers coilovers, air suspension, and lowering springs by vehicle. For performance components like brake pads and rotors that pair with brake ducting work, the performance parts section has you covered. Start with your vehicle on the body kits page and pull the fitment specs before you buy.
Sources
- Aerodynamics in Race Cars Explained - Circle Track Magazine
- Considering a few aero add‑ons for your car
- Aerodynamic Body Kit 2026: What It Really Does and How to Choose
- Carbon Fiber vs Fiberglass: Cost, Weight & Performance
- Race Car Aerodynamics: How Air Improves Lap Times
FAQ
What speed do aero components start working on a street car?
Meaningful aerodynamic forces typically begin above 60–70 mph, where the square-law relationship between speed and force produces loads large enough to affect handling. Below that threshold, most parts add drag without a measurable grip benefit.
What is the stall angle for a typical aftermarket wing?
Most airfoils used on performance cars stall at around 22° angle of attack. Beyond that point, downforce drops and drag spikes sharply, which is why tuning in 1–2° increments is the standard practice.
Does a rear diffuser work on a stock underfloor?
Only partially. A diffuser requires a sealed or mostly flat undertray to manage underbody airflow velocity and pressure. On a stock car with a heavily contoured or open underfloor, a bolt-on diffuser produces limited downforce and is largely cosmetic.
Carbon fiber or fiberglass for a track-day build?
Use carbon for structural, load-bearing parts like wings and splitters where stiffness matters. Fiberglass is a practical choice for side skirts, wide-body fenders, and cosmetic panels where cost and repairability outweigh the weight savings.
Where can I find chassis-specific aero parts with fitment data?
Undergrounddynamics carries carbon fiber and fiberglass aero components for popular enthusiast platforms with fitment specs listed per vehicle, so you can verify clearances and mounting points before ordering.