FREE SHIPPING ON ORDERS OVER $150

Cart
0

Yes, new pads and rotors need a controlled bedding process before you drive them hard. Warm them through a series of stops, then cool them without stopping to lock in an even transfer layer. Skip it, and you’re rolling the dice on pedal feel and pad life for the life of that friction surface.
TL;DR:
- Proper bedding involves a series of controlled stops and cooldowns to create an even transfer layer of pad material on the rotor surface, essential for consistent braking.
- Failing to properly bed in new pads or rotors can cause uneven transfer layers, leading to judder, glazing, hot spots, and reduced pad life.
- The typical street bedding procedure includes several moderate stops from around 30-40 mph, followed by a cooldown period, while track brakes require higher speed stops and longer cooldowns.
- Inconsistent bedding or skipping the process can result in a soft or pulsating pedal, variable stopping distances, and visual signs of glazing or uneven rotor coloration.
- Ensuring proper fitment and matching pad and rotor materials before installation reduces bedding failures and avoids troubleshooting issues caused by parts mismatch.
Table of Contents
- What Is Brake Pad Bedding and Why Does It Matter?
- When Do You Actually Need to Bed New Brakes?
- How Do You Bed In New Brake Pads Step by Step?
- How Do You Know Bedding Worked?
- What Mistakes Ruin a Brake Bedding Job?
- How Do You Maintain Brakes After Bedding?
- Underground Dynamics’ Take on Getting Bedding Right the First Time
- Get Pads and Rotors That Bed In Right the First Time
- Technical Whitepapers and Guides Referenced
- Sources
- FAQ
What Is Brake Pad Bedding and Why Does It Matter?
Bedding is how you transfer a thin film of pad material onto the rotor face. That film, not the raw rotor iron, becomes your actual friction surface for the life of the pad. Get it even, and you get consistent bite. Get it patchy, and you get pulsation every time you touch the brakes.
Two friction mechanisms are at play here. Adherent friction happens when pad material transfers cleanly to the rotor in a uniform layer, and it’s what you want. Abrasive friction is the pad essentially grinding against bare rotor, which happens when the bedding process fails or the pad hasn’t matured yet. Each pad compound has its own working temperature window for making that switch, ranging roughly from 100 to 600 degrees Fahrenheit for street compounds and considerably higher for race pads.
An uneven transfer layer is the leading mechanical cause of brake judder. Even small thickness variations across the rotor face translate directly into a pulsing pedal.
Skip bedding or botch it, and you invite glazing, hot spots, and disc thickness variation that no amount of pad swapping will fix without correcting the rotor surface.
When Do You Actually Need to Bed New Brakes?
Any time you install new pads, new rotors, or switch to a different pad compound, run an active bedding procedure. Don’t skip it and hope the drive home takes care of it.
Passive bedding, meaning just driving normally and letting the pads gradually seat themselves, does eventually build a transfer layer. But it’s a slow, unreliable path. Passive bedding can take 100 to 300 miles, and during that entire stretch your braking performance is inconsistent, which is a bad way to find out your pads are underperforming in a panic stop.
Before you start any bedding run, check a few things:
- Rotor surface is free of deep scoring, rust ridges, or existing glaze
- Calipers slide and release properly, with no stuck pins or sticking pistons
- Brake fluid is at the correct level and not overdue for a flush
- Pads are seated correctly in the caliper with anti-rattle hardware installed
Skipping these checks and bedding anyway just bakes existing problems into your new friction surface.
How Do You Bed In New Brake Pads Step by Step?
The right brake pad break-in process depends on what you’re driving and how you drive it. A daily-driven street car and a track car on race compound need different heat cycles, and treating them the same is how you either underheat street pads or overheat track pads before they’ve matured.
Street method (works for most OE and street-performance pads):
- Find a stretch of road with no traffic behind you.
- Accelerate to 30 to 40 mph, then apply firm, steady pressure to slow to about 10 mph. Do not come to a complete stop.
- Repeat this partial stop 6 to 10 times, spacing them out slightly so the brakes get progressively warmer without overheating.
- Immediately after your last stop, drive at a steady cruising speed for 5 to 10 minutes with no braking, letting the rotors cool gradually.
- If pedal feel still seems soft or inconsistent, run a second set.
StopTech’s own bedding procedure for stock-sized brake systems backs this up almost exactly, and notes that two sets are normally enough for street-performance pads. If you’re still getting a spongy or grabby pedal after two sets, something else is wrong. Check your pad seating or caliper function before assuming you just need a third round.
Performance and track method (for race compounds and track-day pads):
- On a closed course or empty stretch, accelerate to 60 to 70+ mph.
- Brake hard and progressively, feeling for the pad to “come in,” meaning bite that builds rather than fades.
- Run 4 to 10 stops per set, then take a longer cooldown of 15 to 20 minutes or more, driving gently with minimal brake use.
- Repeat sets as needed, watching for consistent bite and no fade.
Race-oriented bed-in guidance is explicit about the danger of dragging brakes during this process. Progressive, deliberate stops beat constant light pressure every time. High-performance pads need real heat to mature, and that’s not something you can safely generate on a public road with traffic around you. Save the aggressive runs for a track or a closed lot.
A few safety notes apply to both methods. If your car has ABS, use firm, steady pressure rather than pumping the pedal. Letting ABS engage briefly during a hard stop is normal, but don’t fight it. Never bed brakes in traffic, since the repeated partial stops and inconsistent speeds are a hazard to anyone behind you. And never, ever apply the parking brake while rotors are still hot from bedding. That’s one of the fastest ways to bake an uneven deposit right into the surface.
Pro Tip: A mild resin smell during your first couple of stops is normal and means the pad material is transferring. Acrid smoke or a burning smell that doesn’t fade after cooldown means something’s dragging, like a stuck caliper pin, and you should stop and inspect before continuing.
How Do You Know Bedding Worked?
A properly bedded brake setup feels boring, in the best way. The pedal should feel firm and consistent from stop to stop, with no sponginess and no sudden grab.
Here’s what to check:
- Pedal feel: firm and progressive, not soft or spongy
- Stopping distance: consistent across repeated stops, no fade
- Vibration: no new pulsation through the pedal or steering wheel
- Rotor surface: an even blue-gray or straw-colored transfer film across the whole friction ring, not patchy dark spots
- Pad edges: even wear line with no chunking or cracking
If you see localized dark or shiny patches on the rotor, that’s glazing, and it means the bedding process didn’t take evenly in that spot. Disc thickness variation as small as a few thousandths of an inch is enough to cause noticeable brake judder, so don’t dismiss a slight pulsation as “just settling in.” If it’s still there after 100 miles, it’s worth measuring rotor thickness and deciding between resurfacing and a full re-bed.
What Mistakes Ruin a Brake Bedding Job?
Most failed bedding jobs come down to the same handful of errors, repeated across garages and forums for years.
- Coming to a complete stop during the hot phase, especially with pressure held, deposits an uneven ring of material right where the pad sat.
- Using the parking brake on hot rotors locks a small contact patch against the disc while it’s still expanding from heat, baking in a hot spot almost instantly.
- Riding the brakes during cooldown, even lightly, undoes the gradual cooling that lets the transfer layer set evenly.
- Skipping cooldowns entirely and stacking sets back to back overheats pads before they’ve matured, which can cause fade or glazing rather than a clean bed.
If glazing does show up, a light resurfacing of the rotor combined with a proper re-bed often fixes it. Severe glazing or visible cracking means it’s time to replace the pads, the rotors, or both. Persistent pulsation after a re-bed, visible rotor warping, or a burning smell that doesn’t clear are all reasons to get a professional to look at the calipers and hydraulic system rather than chasing the problem yourself.
How Do You Maintain Brakes After Bedding?
The bedding process isn’t a one-time event you can forget about once it’s done. The transfer layer you just built needs some protecting.
- Do a visual check around the 50 to 200 mile mark, looking for even coloration and no new glazing.
- Avoid repeated hard stops on cold brakes right after a long parked stretch. Give them a chance to warm gradually on your first few stops of the day.
- Keep an eye on rotor thickness over time and resurface or replace once it drops near the manufacturer’s minimum spec.
- Flush brake fluid on a normal service interval and keep calipers lubricated and free to move, since a dragging caliper undoes bedding faster than almost anything else.
Good habits here protect the work you just did and stretch pad life meaningfully compared to brakes that get hammered cold every morning.
Underground Dynamics’ Take on Getting Bedding Right the First Time
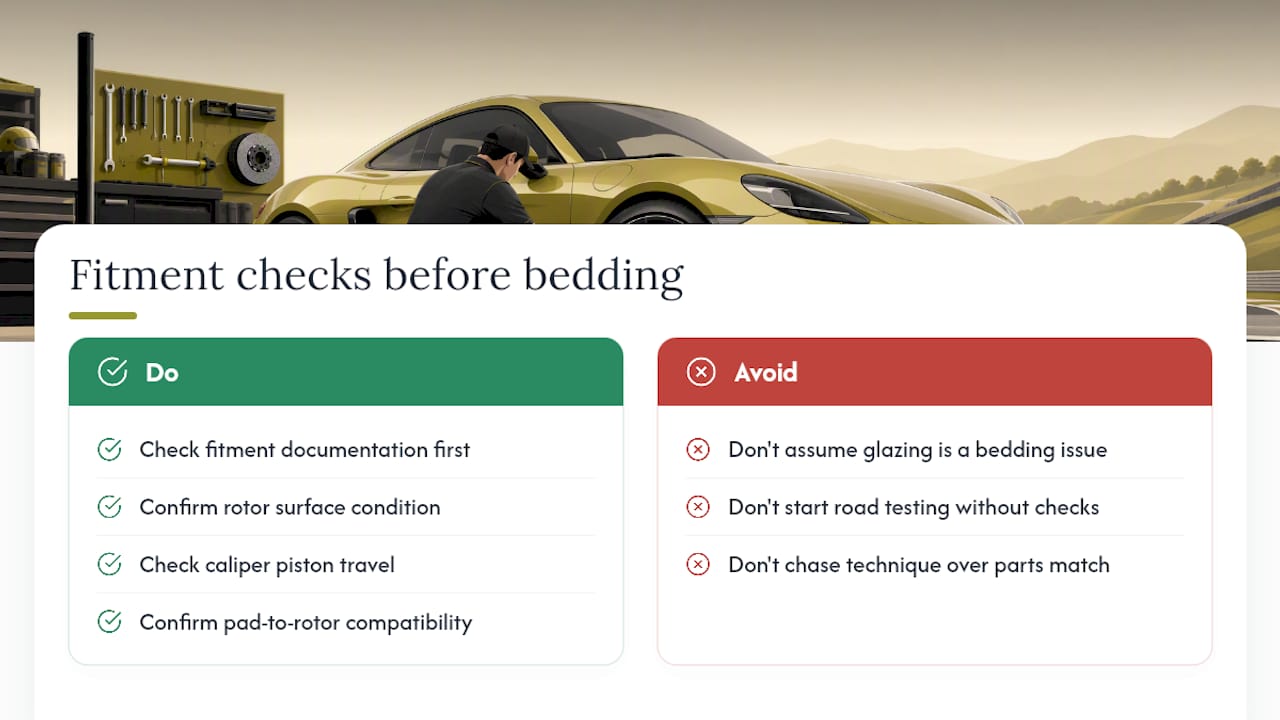
Most bedding failures we see traced back to something wrong on the fitment side, not the procedure itself. A rotor that’s slightly out of spec for the caliper, or a pad that’s not quite matched to the rotor’s hardness and finish, will fight you no matter how carefully you run the heat cycles.
That’s the case for checking fitment documentation before you even start your first stop. A pad rated for one rotor finish behaving differently on another isn’t a bedding problem, it’s a parts-matching problem that shows up as a bedding problem. Confirming rotor surface condition, caliper piston travel, and pad-to-rotor compatibility before you touch the road saves you from chasing a glazing issue that was never really about your bedding technique.
— Ismael
Get Pads and Rotors That Bed In Right the First Time
Underground Dynamics stocks rotors and pads with the fitment detail you actually need before you start a bedding run, not vague size ranges you have to guess your way through. That matters because a mismatched rotor finish or the wrong pad compound for your application is the number one reason bedding goes sideways, no matter how carefully you follow the procedure.

Every listing includes the compatibility and spec data that lets you confirm fitment before checkout, so you’re not troubleshooting a parts mismatch three stops into your first bedding session. If you’re rounding out a brake refresh with other functional upgrades, browse the performance parts lineup for rotors, hardware, and related components sized for your specific chassis. Start at the Underground Dynamics storefront to find the right pads and rotors for your build, or check the suspension category if you’re tackling handling upgrades in the same session.
Technical Whitepapers and Guides Referenced
- Centric Parts technical bulletin on transfer layers and DTV
- StopTech’s bedding procedure for stock-sized brake systems
- Jalopnik’s practitioner guide to bedding brakes
- AutoZone’s DIY street bedding steps
- BrakeTech’s race pad bed-in procedure
- PowerStop’s break-in procedure reference
- Express Lube’s local guide to breaking in new brake pads
Sources
- TECH_BULLETIN_C22-01.pdf (Centric Parts technical bulletin)
- StopTech’s Recommended Procedure for Bedding-in Stock-Sized Brake Systems (technical whitepaper)
- How To Properly Bed Brakes (Jalopnik)
- BRAKE PAD & ROTOR BED-IN PROCEDURES (BrakeTech)
FAQ
Is Brake Pad Bedding Necessary?
Yes. Active bedding creates an even transfer layer between pad and rotor, which is what actually delivers consistent braking, and skipping it risks glazing and uneven wear.
How Do You Know if Your Brakes Are Bedded?
A bedded brake system gives you a firm, consistent pedal, stable stopping distance across repeated stops, and no new pulsation. The rotor surface should also show an even coloration across the whole friction ring.
Do Pads Need to Be Bedded Again After Changing Rotors?
Yes. New rotors have a bare surface with no transfer layer, so any time you install new rotors, whether the pads are new or reused, you need to run a full bedding procedure again.
What Is Bedding in New Brake Pads?
Bedding in new brake pads means running a controlled series of stops and cooldowns that transfers a thin, even layer of pad material onto the rotor face, which becomes the actual surface your brakes grip going forward.