FREE SHIPPING ON ORDERS OVER $150

Cart
0
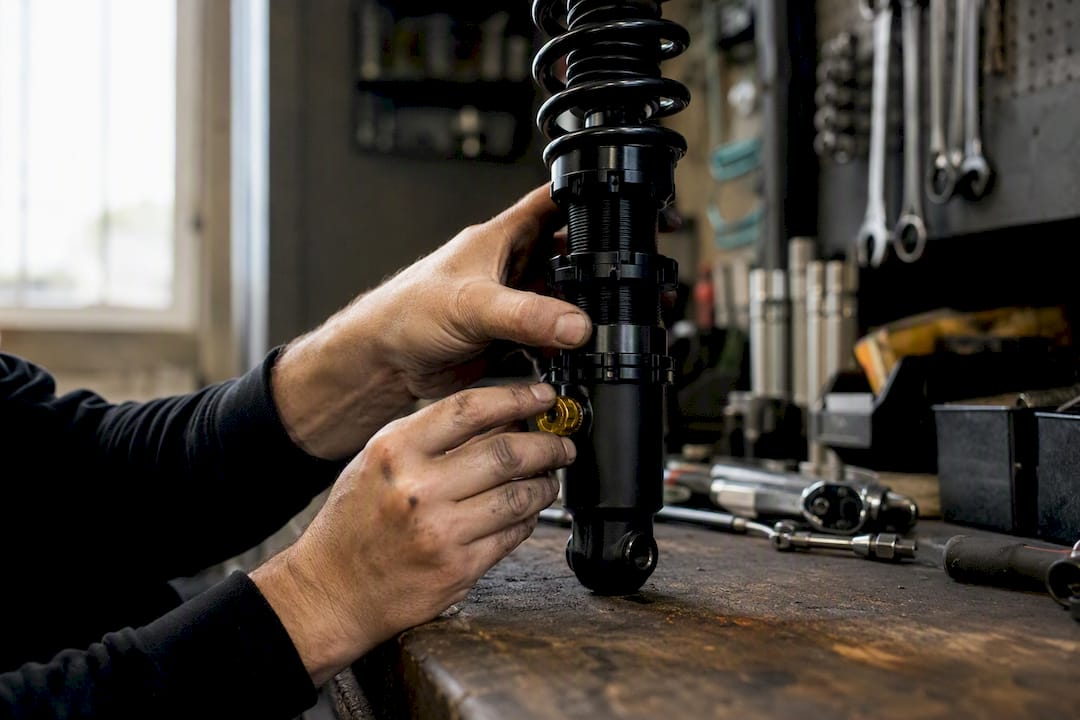
Compression damping controls how quickly your suspension compresses by resisting oil flow through the damper as the shock or fork shaft moves inward. It’s a speed control, not a strength control. Turning a compression clicker doesn’t make your spring stiffer or softer; it changes how fast the wheel is allowed to react.
Two quick examples make this click:
- Small bump at speed: low-speed compression (LSC) resists the slow, steady squish from cornering load or braking dive, keeping the chassis settled instead of diving into the stroke.
- Hard landing or square-edge hit: high-speed compression (HSC) resists the sudden, fast shaft speed from a big impact, preventing a harsh bottom-out without turning the whole ride stiff.
Key Takeaways
Compression damping controls the speed of suspension compression through oil resistance, and tuning it correctly requires the right sag and spring rate first.
| Point | Details |
|---|---|
| Damping controls speed, not stiffness | Oil flow through ports and shims slows compression; it never replaces the correct spring rate. |
| LSC handles slow inputs | Braking dive, cornering roll, and weight transfer respond to low-speed compression adjustments. |
| HSC handles sharp impacts | Square-edge hits and hard landings need high-speed compression, adjusted in coarser increments. |
| Fix symptoms in the right order | Check sag and rebound before touching compression to avoid masking a spring-rate problem. |
| Underground Dynamics stocks tuning-ready parts | Coilovers and springs with detailed fitment specs help correct spring-rate issues compression alone can’t fix. |
Table of Contents
- What Does Compression Damping Do Inside a Fork or Shock?
- Low-Speed vs High-Speed Compression: What Each One Controls
- How Compression Damping Shapes Traction, Support, and Plushness
- Signs Your Compression Damping Is Off (and How to Tell It’s Not the Spring)
- How to Tune Compression Damping Step by Step
- Common Mistakes Beginners Make With Compression Settings
- A Real-Driver Take on Testing Compression Settings
- Where to Go Once You’ve Dialed In Your Damping
- Sources
- FAQ
What Does Compression Damping Do Inside a Fork or Shock?
Inside every hydraulic damper, oil gets forced through small ports and over shim stacks every time the suspension compresses. That restriction is the whole trick. As the shaft moves inward, oil has to squeeze through a controlled passage, and the resistance it meets converts kinetic energy into heat. That heat dissipates through the damper body, and the suspension slows down without the spring itself changing at all.
This is the part beginners mix up most: the spring holds the vehicle up and determines how much force it takes to compress the suspension a given distance. The damper controls how fast that compression happens. A hydraulic damper regulates the speed of compression and rebound independently of spring rate, which is why cranking your compression knob will never fix a spring that’s too soft for your weight or your driving style.
Compression adjusters work by opening or closing these oil circuits:
- Closing the circuit narrows the path oil can travel, increasing resistance and slowing compression.
- Opening the circuit widens the path, letting oil flow more freely and speeding up compression.
- Some dampers split this into separate LSC and HSC circuits, each with its own valving and clicker.
Quick fact: damping force isn’t linear. Doubling shaft speed can more than double the resistance a damper generates, which is exactly why HSC and LSC need separate controls. A setting that feels right for slow weight transfer can behave completely differently under a hard impact.
Low-Speed vs High-Speed Compression: What Each One Controls
Shaft speed, not vehicle speed, is what these terms actually describe. You can be crawling through a parking lot and still generate high shaft speed if you clip a pothole. Splitting compression into two adjustable ranges lets a damper handle both without compromise.
- Low-speed compression (LSC) governs slow, gradual shaft movement: braking dive, cornering roll, weight transfer under acceleration, and body motion over rolling terrain. This is your fine-tuning knob for support and control.
- High-speed compression (HSC) governs fast, abrupt shaft movement: square-edge hits, curb strikes, hard landings, and anything that tries to slam the suspension through its travel in a hurry. LSC handles weight transfer and slow inputs while HSC manages sharp impacts, and the two adjust independently on most quality dampers.
Because HSC only engages during violent, fast events, it behaves like a coarser control. You’re not shaping every corner with it. You’re setting a ceiling for how harsh the worst hits feel. LSC, on the other hand, is active almost constantly, so small changes produce noticeable shifts in how the vehicle feels through everyday driving or riding.
Pro Tip: If you’re chasing a specific handling complaint, ask yourself whether it happens slowly (body roll, dive) or suddenly (a hit, a drop). That answer tells you whether to touch LSC or HSC before you turn a single click.
How Compression Damping Shapes Traction, Support, and Plushness
Every compression setting is a trade among three things: traction, support, and plushness. Push one up, and at least one of the other two gives ground.
More compression damping increases support. The chassis stays higher in its travel, resists dive under braking, and feels more locked down through hard cornering. Moderate compression damping keeps tires planted and improves predictability, which is exactly why a track-focused setup usually runs firmer compression than a comfort-focused one.
But that support comes at a cost. Crank the compression too far and the wheel can’t react fast enough to small, high-frequency bumps. Instead of absorbing them, the suspension starts skipping across them, and small-bump traction drops off. Too much compression increases harshness and can reduce traction because the wheel can’t move out of the way quickly enough.
- Comfort-focused driving or riding: favor lower compression for a plush, absorbent feel over broken pavement or chattery trail.
- Track or autocross use: favor firmer LSC for chassis support through transitions, keeping HSC just stiff enough to survive curb strikes and bumpy apexes.
- Loaded or adventure setups: favor firmer LSC to fight wallow under the extra weight, paired with a softer HSC so sharp trail impacts still get absorbed. Riders carrying luggage often prefer firmer LSC and softer HSC, adjusting to their specific load and terrain for exactly this reason.
There’s no universal correct setting here. The right balance depends entirely on what you’re asking the suspension to do.
Signs Your Compression Damping Is Off (and How to Tell It’s Not the Spring)
Too little compression damping shows up as bottoming out, a wallowy, seasick feeling through corners, and the wheel unweighting or lifting over bumps because nothing is controlling the rebound of energy back through the chassis.
Too much compression damping shows up differently:
- A harsh, jarring ride even over small, unremarkable bumps.
- Wheels skipping or “skittering” across chattery surfaces instead of tracking them.
- A noticeable loss of small-bump traction, especially in corners or under light braking.
- The chassis feeling like it’s fighting the road instead of working with it.
Here’s the diagnostic trap: a lot of these symptoms overlap with having the wrong spring rate, and beginners often try to fix incorrect spring rate by adding compression damping, which just piles bad damping on top of a bad spring.
Separate the two with a static sag check first. Measure how much the suspension compresses under the vehicle’s own weight at rest. If sag is way off target, that’s a spring problem, not a damping problem, and no amount of clicker adjustment will fix it. Follow that with a bounce test: push down on the corner and let it rebound. If it bounces back and overshoots repeatedly, that’s a rebound issue. If it feels dead and slow to return, that’s compression or rebound damping running too firm. Only once sag checks out should you start adjusting compression to chase the symptoms above.
How to Tune Compression Damping Step by Step
Compression damping is the last knob you touch, not the first. Manufacturers and suspension specialists recommend nailing sag and rebound before adjusting compression, because compression can’t compensate for the wrong spring rate or a rebound setting that’s fighting your inputs.
- Set sag first. Measure static sag with the vehicle or rider in normal riding position. Most setups target a sag within a moderate range of total travel, depending on the application. If sag is far outside that range, adjust preload or swap springs before touching anything else. Our checklist for tuning stepwise walks through this in more detail.
- Establish a rebound baseline. With sag correct, set rebound so the suspension returns to full extension in one smooth motion, without a second bounce and without feeling sluggish. This baseline has to be right before compression changes mean anything, since a wrong rebound setting will mask or distort how compression feels.
- Tune LSC in small increments. Adjust one or two clicks at a time. Test against specific weight-transfer scenarios: hard braking into a corner, a loaded highway on ramp, a rolling dirt climb. Write down what changed and how it felt before making the next adjustment.
- Tune HSC in coarser steps. Since HSC only engages during sharp, fast events, treat it as a coarse control rather than a fine-tuning knob and test it against real hits: a pothole, a curb, a hard landing. Fewer clicks per adjustment here go a long way.
- Run an A/B test. Change exactly one click on one adjuster, then drive or ride a defined loop you know well. Note the specific difference; not “it felt different” but “less dive braking into turn three.” Revert if it’s worse, keep it if it’s better, then move to the next adjuster.
Pro Tip: Keep a written log of every click change and the loop you tested it on. Suspension memory is unreliable after three or four variables, and a log turns guesswork into a repeatable system. Readers running coilovers on a street build might also find our Honda Civic coilover setup guide useful for translating this sequence to a specific platform.
Common Mistakes Beginners Make With Compression Settings
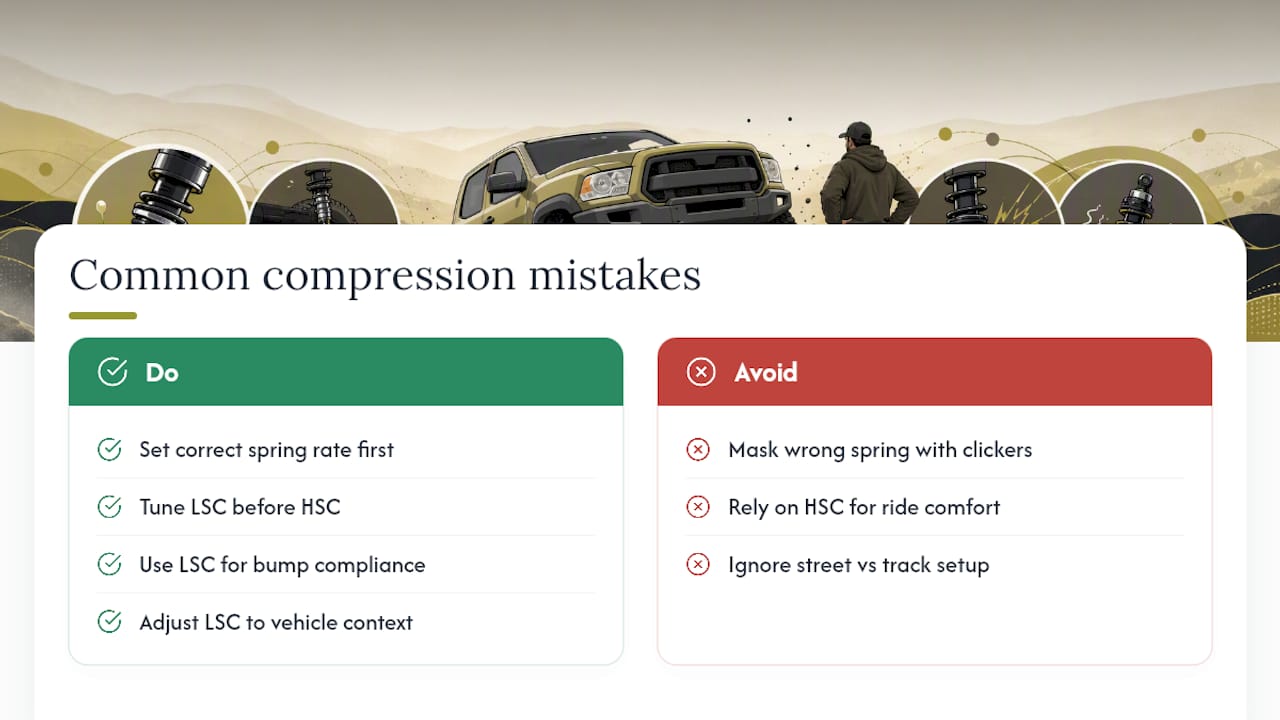
The single most common mistake is using compression clickers to mask a spring rate that’s wrong for the vehicle’s weight or the rider’s inputs. It feels like progress because the ride does firm up, but you’re papering over the real problem instead of fixing it, and you’ll usually end up with harsh, skittish handling that still bottoms out under a big enough hit.
Vehicle context matters too. A street car on coilovers typically wants a gentler LSC curve for daily comfort, with HSC dialed in just enough to survive potholes and speed bumps without bottoming. A dedicated track setup can run noticeably firmer LSC since ride comfort isn’t the goal; support through transitions is. The same logic shows up on two wheels: motorcycle and mountain bike suspension use the exact same LSC/HSC split, just scaled to different spring rates and travel amounts.
Treat LSC as your primary tool for bump compliance and chassis support, and treat HSC as your emergency valve for sharp impacts. Get LSC close to right first, then let HSC handle the worst-case hits.
A Real-Driver Take on Testing Compression Settings
Guesswork is the enemy here. Change one click, drive a loop you know, write down exactly what shifted. If sag still feels off after a full round of compression testing, that’s your signal to look at a spring change, not another click.
Try a simple two-ride A/B test before you touch anything else. Log the results honestly.
— Ismael
Where to Go Once You’ve Dialed In Your Damping
Once you’ve worked through sag, rebound, and compression and you’re still fighting the setup, the issue usually isn’t the clickers anymore. It’s the hardware. Undergrounddynamics carries coilovers, air suspension, and lowering springs built with the kind of fitment detail that lets you match spring rate to your actual build instead of settling for a generic kit.
Every listing includes real fitment specs, so you’re not guessing whether a given coilover set actually suits your chassis before you buy. If your compression testing kept pointing back to a spring problem rather than a damping one, that’s the fix worth making. Browse the suspension category to compare spring rates and adjustability ranges, or check the full catalog if you’re also eyeing aero or chassis upgrades for the same build.
Sources
- Compression Damping Explained: High-Speed vs Low-Speed · Suspend
- Suspension theory guide — RockShox / SRAM
- Full Travel, Part III — Cane Creek
FAQ
Is higher or lower compression damping better?
Neither is universally better. Higher compression favors support and control for aggressive driving or track use, while lower compression favors plushness and small-bump traction for comfort.
What happens with too much rebound damping?
Excessive rebound damping causes the suspension to pack down over repeated bumps because it can’t return to full extension fast enough between hits, which reduces available travel and traction.
What’s the difference between compression damping and rebound damping?
Compression damping controls how fast the suspension compresses under load, while rebound damping controls how fast it returns to full extension afterward; they work as a pair but adjust independently.
Does more damping mean softer suspension?
No. Damping changes reaction speed, not stiffness; spring rate determines how soft or firm the suspension feels under static load, while damping shapes how it behaves in motion.
Should I adjust compression before rebound?
No, set sag and establish a rebound baseline first, since compression is the final adjustment layer and can’t correct an incorrect spring rate or rebound setting.